Table of Contents
Case Study: Oil in Water Engine Problem in Mercedes-Benz E-Class
Finding oil in the coolant system is one of the most alarming issues a Mercedes-Benz owner can face. This problem, often referred to as the “oil in water engine issue”, not only compromises the efficiency of the cooling system but also raises concerns about the long-term health of the engine.
In this case study, we’ll look at a real incident involving a Mercedes E-Class, where the customer reported that their coolant appeared contaminated with oil. We’ll cover the symptoms, diagnosis, repair process, cleaning procedure, and preventive measures, so you’ll have a complete understanding of how to handle this serious fault.
Customer Complaint: Oil Mixing With Coolant
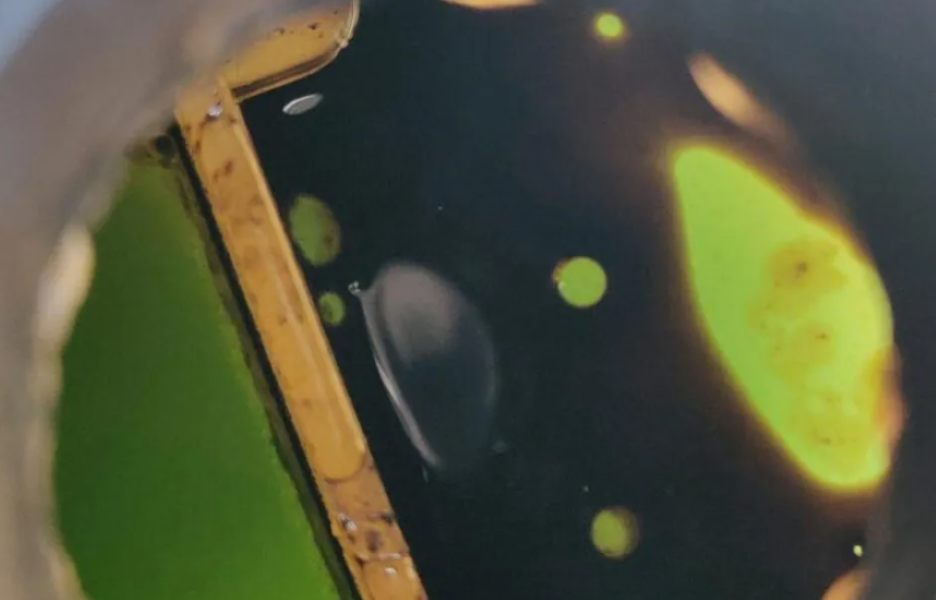
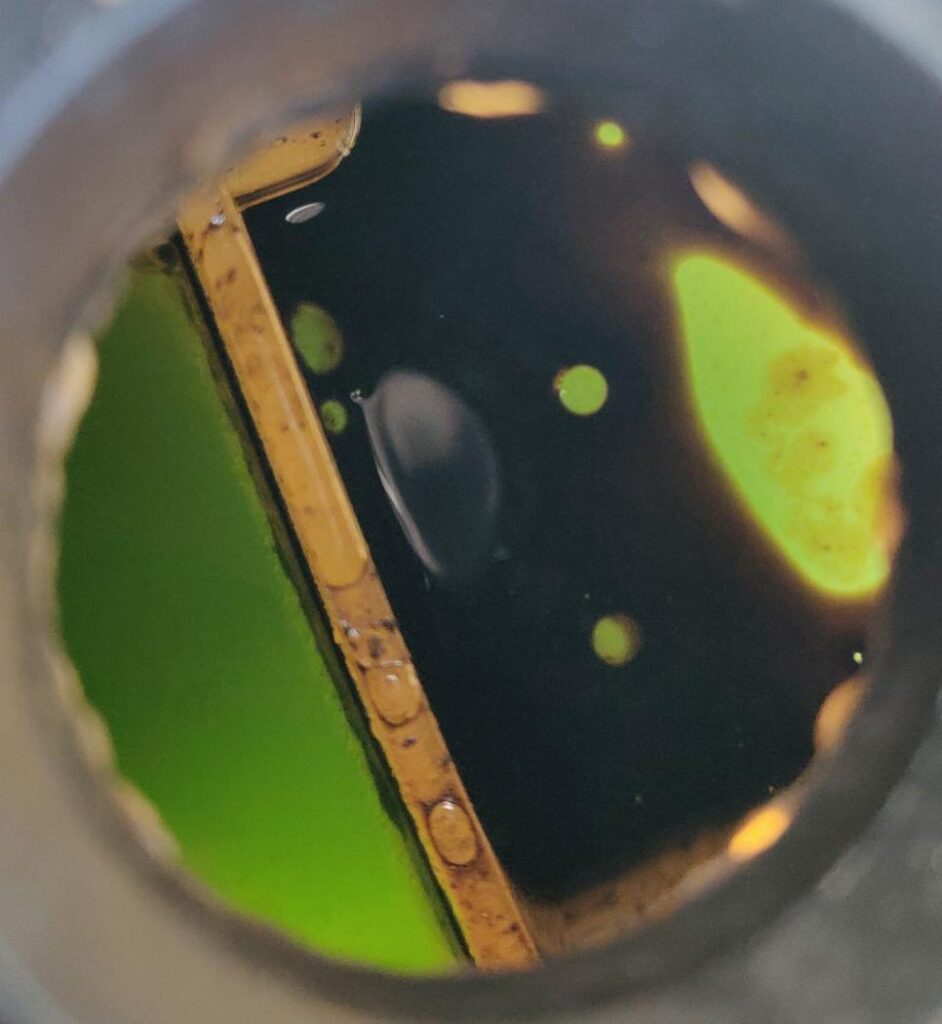
The customer arrived at the Mercedes workshop after noticing that their coolant reservoir showed a brownish discoloration. This is often a telltale sign of oil contamination. Along with the discolored coolant, the owner reported a growing concern about the vehicle’s safety, performance, and reliability.
The key complaints were:
- – Visible oily residue inside the coolant reservoir.
- – Worries about overheating or further engine damage.
- – Reduced trust in the vehicle’s reliability.
Such symptoms are a clear red flag, prompting immediate professional inspection.
Diagnostic Process: How Technicians Identified the Fault
The vehicle was handed over to a certified Mercedes-Benz technician. Following standard Mercedes-Benz diagnostic procedures, the following steps were carried out:
1. Checking Fluid Levels and Condition
The technician first inspected all fluid levels, including coolant and engine oil, confirming that the coolant indeed showed signs of contamination.
2. Head Gasket Test
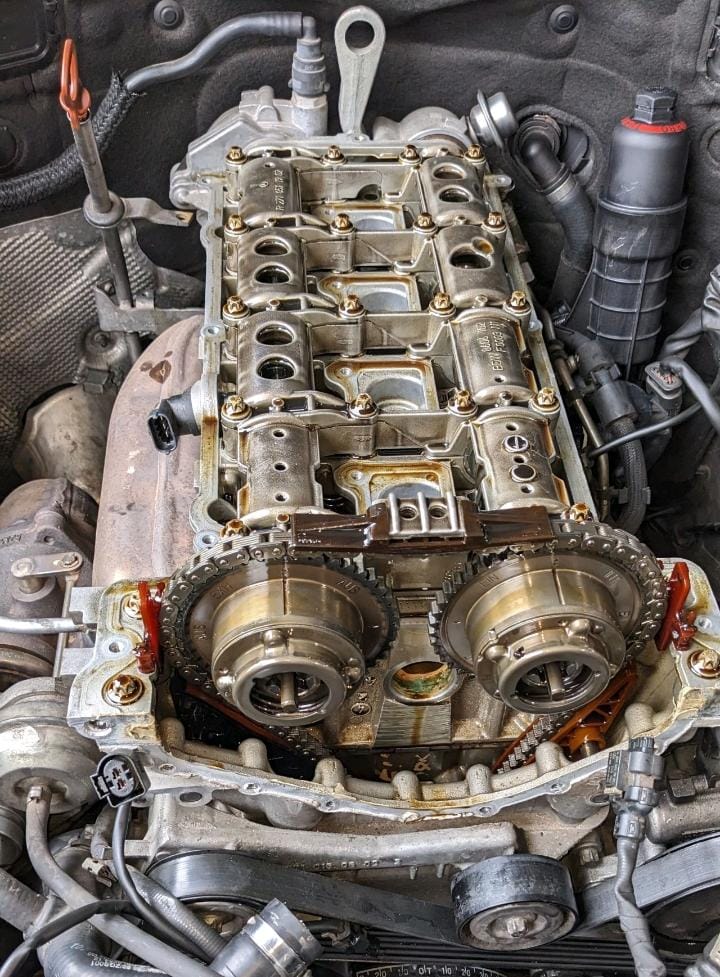
Since the head gasket is a common source of cross-contamination between oil and coolant, a test was performed to check for leaks or pressure inconsistencies.
3. Visual Inspection
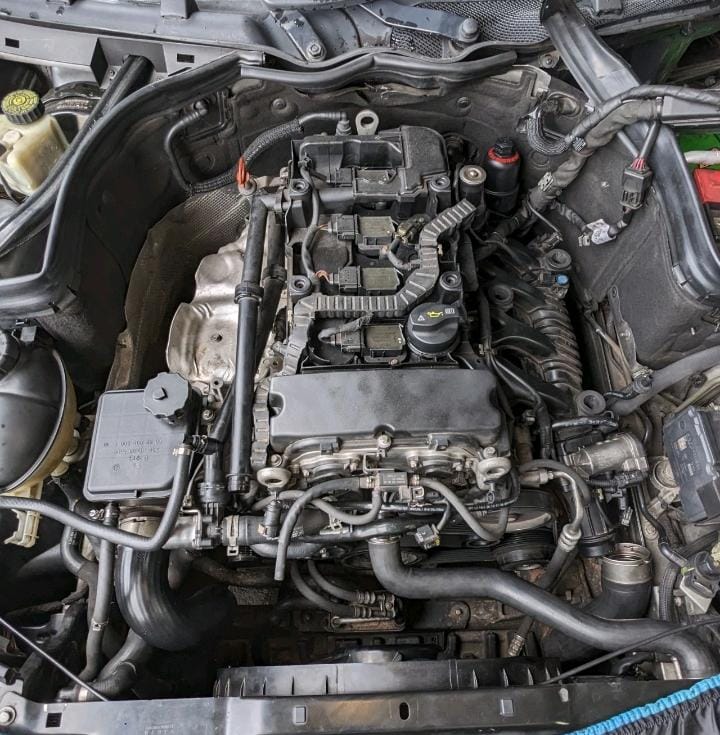
A detailed engine bay inspection was performed to detect external leaks or cracks in the cooling passages.
4. Fluid Analysis
The contaminated coolant was sampled. Laboratory analysis confirmed the presence of engine oil mixed with coolant.
The Diagnosis: Blown Head Gasket
After these checks, the technician concluded that the head gasket was damaged, allowing oil to seep into the coolant passages.
Repair Process: Fixing Oil in Water Engine Issue
The following corrective measures were applied:
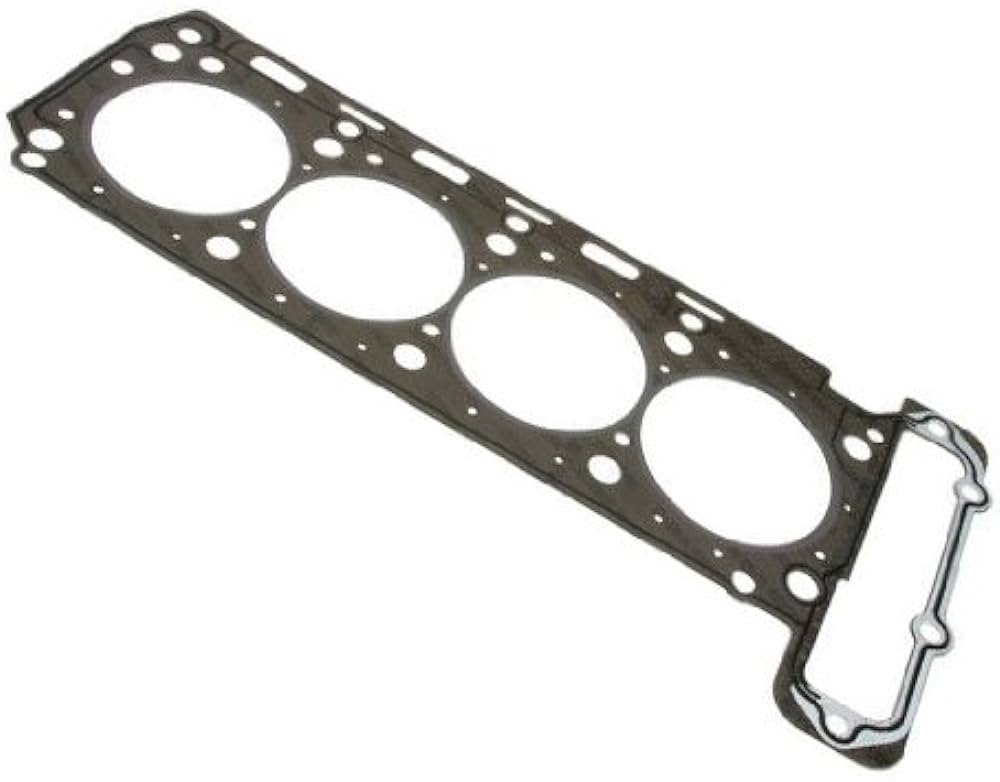
1. Head Gasket Replacement The faulty gasket was replaced with a genuine Mercedes-Benz part to restore sealing integrity.

2. Cooling System Cleaning The contaminated system was thoroughly flushed and cleaned (explained in detail below).
3. One-Day Road Test After repairs, the vehicle was test-driven under various conditions to ensure the issue was fully resolved.
The repair was successful, and the Mercedes E-Class was returned to the customer in optimal condition.
Table: Common Causes of Oil in Water in Mercedes Engines
| Cause | Description | Impact on Engine | Repair Solution |
|---|---|---|---|
| Blown Head Gasket | Seal between engine block and cylinder head fails, allowing fluids to mix. | Overheating, loss of compression, contamination | Replace head gasket, flush cooling system. |
| Cracked Cylinder Head/Block | Structural cracks allow oil and coolant to cross-contaminate. | Severe overheating, possible engine failure | Repair or replace cylinder head/block. |
| Faulty Oil Cooler | Oil cooler develops internal leaks. | Oil leaks into coolant or vice versa. | Replace oil cooler, flush system. |
| Improper Maintenance | Using poor-quality parts or neglecting servicing increases risk of failures. | Accelerated wear, hidden leaks. | Use OEM parts, follow maintenance schedule. |
More Mercedes Cooling System Resources
Want to explore more causes, symptoms, and repair tips for coolant leaks, overheating, and contamination?
Learn more about Mercedes cooling system faults in our full Cooling System Guide.
How to Clean a Cooling System Full of Oil ?
Cleaning a cooling system full of oil is an important task that requires following precise steps to ensure the system is completely free of contamination. Here’s how to proceed:
Steps to Clean a Cooling System Full of Oil ;
Step 1: Preparation
- 1. Ensure the engine is cold before starting.
- 2. Place the vehicle on a flat surface and raise the front with jacks if necessary for better access.
Step 2: Drain the Contaminated Coolant
- 1. Place a large container under the radiator to collect the contaminated coolant.
- 2. Open the radiator drain plug (usually located at the bottom of the radiator) and let the coolant drain completely.
- 3. Also, open the coolant reservoir cap to facilitate drainage.
Step 3: Initial Cleaning
- 1. Fill the cooling system with clean water.
- 2. Run the engine for about 10 to 15 minutes to allow the water to circulate through the system and pick up oil residues.
- 3. Turn off the engine, let it cool, then drain the water again.
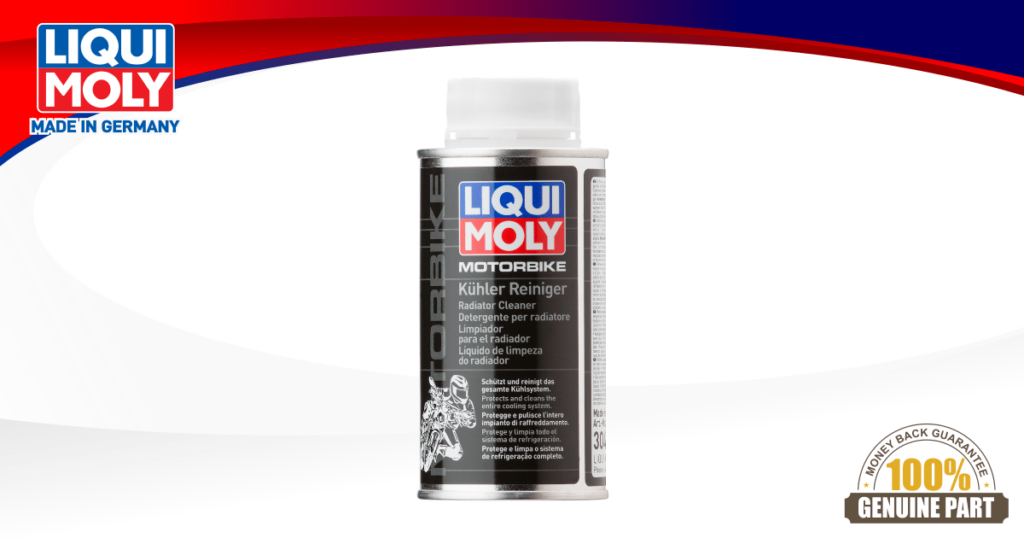
Step 4: Use a Cooling System Cleaner
- 1. Fill the cooling system with clean water and add a specific cleaning product for cooling systems. These products are designed to break down and remove oil and other contaminants.
- 2. Follow the manufacturer’s instructions for the correct dosage and circulation time.
- 3. Run the engine for the recommended duration (usually between 20 and 30 minutes) as per the cleaning product instructions.
- 4. Turn off the engine and let it cool, then completely drain the cooling system.
Step 5: Final Rinse
- 1. Refill the system with clean water and run the engine again for about 10 to 15 minutes.
- 2. Turn off the engine, let it cool, and drain the water.
- 3. Repeat this rinsing process several times until the water runs clear.
Step 6: Refill the Cooling System
- 1. After the final rinse, fill the cooling system with a fresh mixture of coolant and distilled water.
Step 7: Final Check
- 1. Check the coolant levels after running the engine and adjust if necessary.
- 2. Visually inspect for potential leak points and ensure everything is tight and in place.
Following these steps ensures the cooling system is thoroughly cleaned and free from oil contamination, restoring proper vehicle function.
Preventive Measures Against Oil in Water Engine Problems
- 1. Regular Maintenance Early detection prevents costly repairs.
- 2. Monitor Engine Temperature Overheating is a warning sign.
- 3. Use Quality Parts Genuine head gaskets and oil coolers reduce failure risks.
- 4. Fix Coolant Leaks Quickly Even small leaks can trigger major issues.
Why Oil in Water Is Dangerous
Ignoring this issue can lead to:
- – Reduced Cooling Efficiency Oil restricts coolant flow.
- – Overheating May damage engine internals.
- – Corrosion & Sludge Long-term contamination damages system.
- – Expensive Repairs Potential full engine rebuild.
Conclusion
The case study of the Mercedes-Benz E-Class with oil in water engine issue highlights the need for immediate action when coolant contamination is detected. Here, the head gasket was replaced, and the cooling system was fully flushed, restoring performance.
By following preventive steps and regular servicing, drivers can minimize the risk of facing this costly and stressful problem.
Key Reminder: If you ever notice oil in your coolant reservoir, act fast ignoring it could mean thousands in repair bills.
FAQ – Oil in Water Engine
1. What causes oil to mix with coolant in a Mercedes engine?
Oil and coolant usually mix because of a blown head gasket, cracked cylinder head, or faulty oil cooler. These failures create passages between the oil and coolant systems, allowing fluids to contaminate each other.
2. Can I drive my Mercedes if there is oil in the coolant?
No. Driving with oil in the coolant can lead to engine overheating, corrosion, and severe internal damage. It’s best to stop driving and have the car inspected immediately by a qualified technician.
3. How do I know if my coolant is contaminated with oil?
You may notice brown or milky discoloration in the coolant reservoir, an oily film on the coolant, or overheating issues. Sometimes a sweet smell or thick sludge around the cap is also visible.
4. How much does it cost to fix oil in water engine issues in a Mercedes?
Costs vary depending on the root cause. A head gasket replacement can range from $1,200–$2,500, while replacing an oil cooler is usually cheaper. Severe cases like a cracked cylinder head may require extensive repairs.
5. How can I prevent oil from mixing with coolant in my Mercedes?
Regular maintenance, monitoring engine temperature, using OEM-quality gaskets, and fixing coolant leaks early are the best preventive measures.
Author
Written by: Mercedes Expert
Automotive Technical Trainer & Mercedes-Benz Diagnostic Specialist
With years of hands-on experience repairing and diagnosing Mercedes-Benz vehicles, specializes in case-study-based troubleshooting guides that blend workshop accuracy with educational clarity.
Last Updated: August 2025
— Salim, Mercedes Expert
Independent specialist in Mercedes-Benz diagnostics, CAN Bus analysis, troubleshooting case studies, and EV systems.