Table of Contents
Car Shaking Under Braking in a Mercedes E-Class: A Real Case Study
When your Mercedes shakes under braking, it’s a clear sign that something is wrong within the braking or suspension system. Such vibrations can reduce control, lengthen stopping distances, and indicate deeper mechanical issues that shouldn’t be ignored.
In this real-world case study, we look at a Mercedes-Benz E-Class brought to a dealership with a noticeable shake during braking. A certified technician performed a detailed diagnostic inspection, identifying warped brake rotors as the root cause and restoring smooth, safe braking performance.
For an overview of related systems including ABS, ESP, and Brake Assist visit our complete hub: Mercedes Brake System Problems: ABS, ESP & Brake Assist Guide
Customer Complaint
The owner of a Mercedes E-Class reported that the vehicle vibrated severely when braking, particularly at higher speeds or during downhill stops.
The shaking was felt through both the steering wheel and brake pedal, raising concerns about safety and component wear.
Initial Inspection
The technician began by conducting a test drive to confirm the complaint.
The vibration occurred only when braking, suggesting that the issue was brake-related, not from the engine or drivetrain.
Common suspects included:
- – Warped or uneven brake rotors
- – Worn or contaminated brake pads
- – Loose or damaged suspension components
- – Tire imbalance or uneven wear
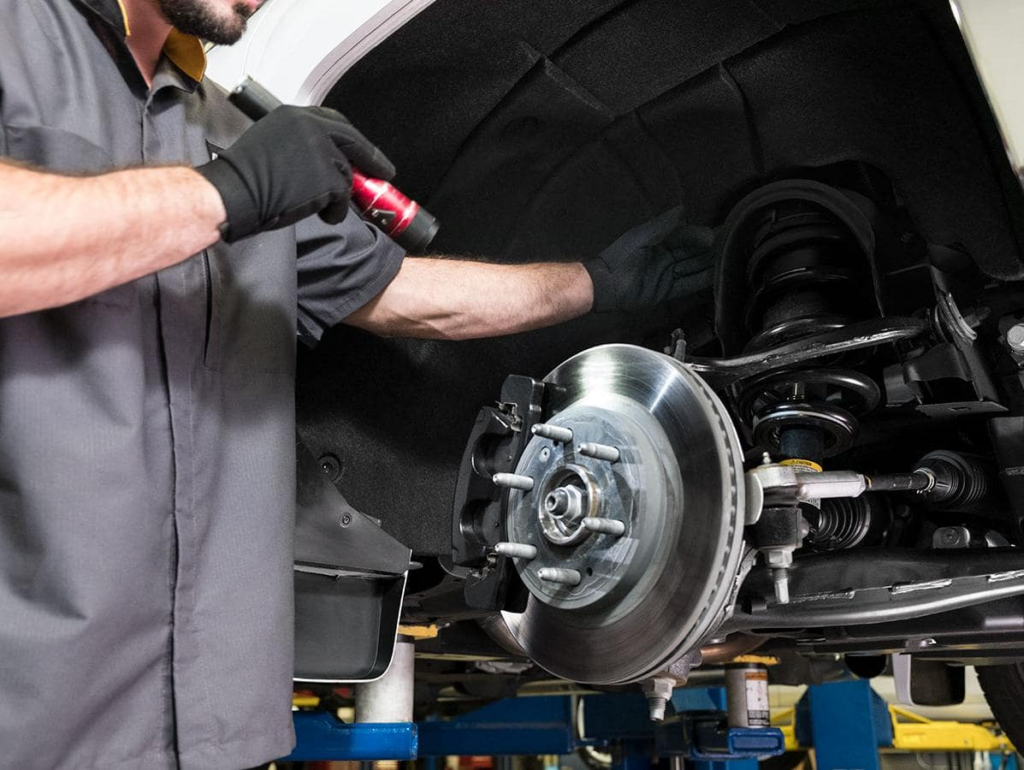
Step 1: Visual Inspection and Basic Tests
A visual inspection of the braking system was carried out first:
- – Brake pads: Showed uneven wear and heat marks.
- – Brake rotors: Visibly discolored and slightly warped.
- – Suspension: No play or looseness detected.
- – Tires: Even tread wear and proper pressure confirmed.
This early inspection pointed toward brake rotor deformation.
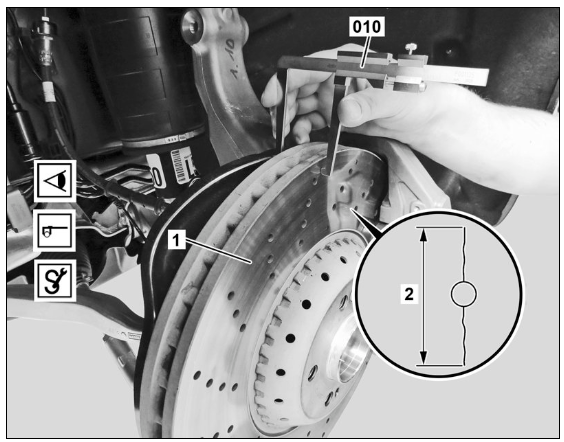
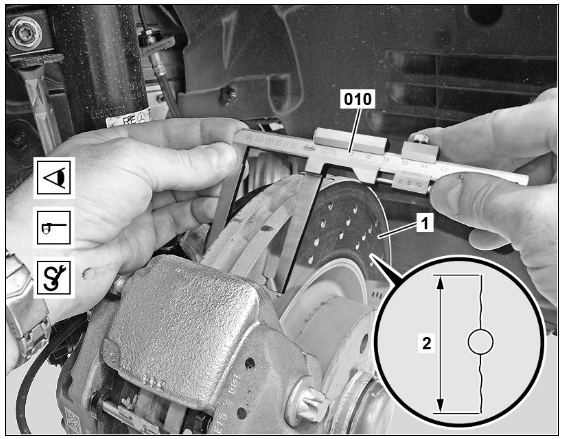
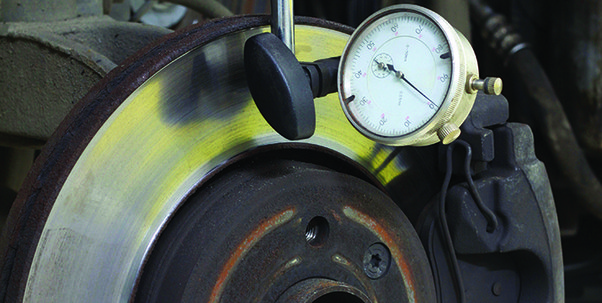
Step 2: Measuring Rotor Run-Out
Using a dial indicator gauge, the technician measured rotor run-out the amount of lateral wobble when the rotor spins.
The readings showed deviation beyond the manufacturer’s tolerance, confirming rotor warping.
What causes warped rotors?
- – Excessive heat buildup from prolonged braking.
- – Sudden cooling (e.g., washing a hot car immediately after driving).
- – Over-torqued or unevenly tightened wheel bolts.
Step 3: Repair Process
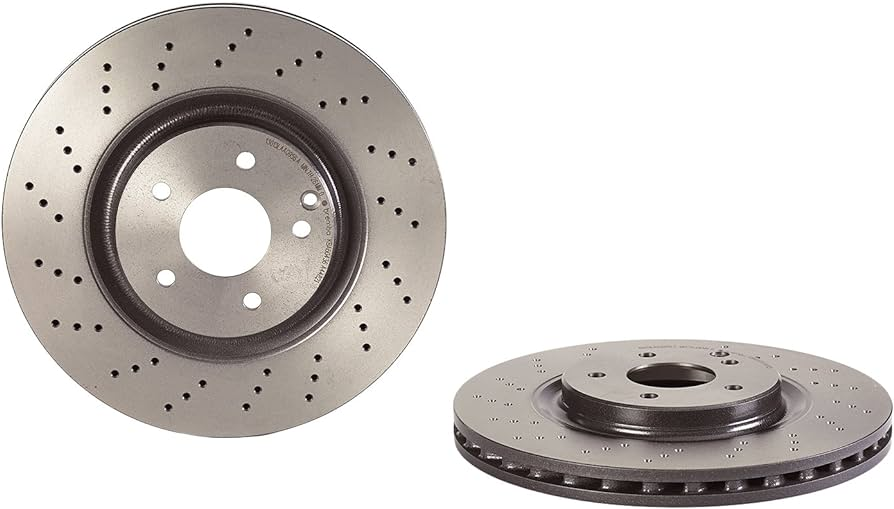
Rotor Replacement
- – Replaced both front rotors with OEM Mercedes-Benz components
- – Cleaned the hub surface to ensure perfect alignment
Brake Pad Replacement
- – Installed new pads to match the new rotors
- – Ensured even wear and silent operation
System Check & Brake Bleeding
- – Verified brake fluid level
- – Bled air from the hydraulic system for consistent pressure
Step 4: Test Drive & Verification
A controlled road test confirmed:
- – No shaking or vibration during braking
- – Steady pedal pressure and excellent stopping performance
Diagnosis confirmed: warped brake rotors caused the vibration and were successfully replaced.
Technical Explanation: Why Cars Shake Under Braking
| Cause | Description |
|---|---|
| Warped rotors | Uneven contact between pad and disc, creating vibration. |
| Worn pads | Uneven friction surfaces cause pulsing. |
| Suspension wear | Loose ball joints or bushings transfer vibration. |
| Tire imbalance | Exacerbates vibration at speed or under load. |
Root Cause in This Case
The customer mentioned the problem began after visiting a car wash. The technician concluded that hot rotors were rapidly cooled by cold water, leading to uneven contraction and rotor warping a textbook example of thermal stress failure.
Can you replace brake rotors yourself?
Replacing brake rotors is a crucial aspect of vehicle maintenance that can significantly impact your car’s safety and performance. While many car owners rely on professional mechanics for this task, it’s entirely possible to replace brake rotors yourself with the right tools and knowledge.
This guide will walk you through the process, offering insights into the necessary steps, tools, and safety precautions, empowering you to handle this essential repair confidently and efficiently.
Brake rotor replace steps
For brake rotor replace, follow the next steps looking at the attached image;
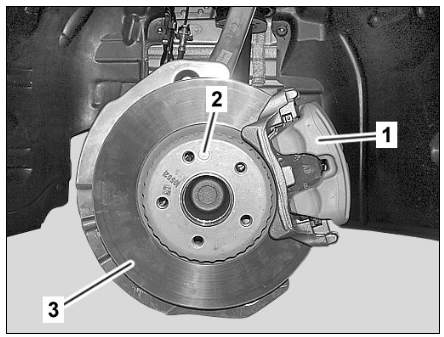
Step 1 : Remove, install
- 1. Remove the brake caliper (1) with the brake pads from the front axle and secure it to the vehicle without straining the connected cables.
- 2. Remove the brake caliper (1) with the brake caliper bracket from the front axle and secure it to the vehicle without straining the connected cables.
- 3. Remove the brake caliper (1) with the brake caliper bracket from the rear axle and secure it to the vehicle without straining the connected lines.
- 4. Remove the brake pads from the rear axle.
- 5. Unscrew the locking screw (2) and remove the brake disc (3).
Step 2 : Clean
- – Clean the contact surface and the mounting seat of the brake disc (3).
- – Lightly grease the mounting seat of the brake disc (3).
Always replace rotors in pairs and follow Mercedes torque specifications.
Prevention Tips
- – Allow brakes to cool before washing the car.
- – Replace pads and rotors together for even performance.
- – Inspect brakes every 10,000 miles.
- – Use OEM-grade parts for best results.
- – Replace brake fluid every 2 years (DOT 4+).
FAQs: Car Shaking Under Braking Mercedes
Q1: Why does my Mercedes shake when I brake?
The most common cause is warped brake rotors, which cause uneven contact between the pads and discs, creating vibration through the steering wheel and pedal.
Q2: How can I tell if my brake rotors are warped?
If you feel pulsing in the brake pedal or vibration in the steering wheel while braking, especially from high speeds, your rotors are likely warped.
Q3: Can worn brake pads cause shaking when braking?
Yes. Unevenly worn or contaminated brake pads can cause brake pulsation or squealing noises. Always inspect pads along with rotors.
Q4: Is it safe to drive when the car shakes during braking?
No. Shaking indicates uneven braking force, which increases stopping distance and can reduce control. Have it inspected immediately.
Q5: How do I prevent my Mercedes brake rotors from warping?
Avoid sudden cooling (e.g., car wash right after a drive), use quality OEM rotors, and torque wheels evenly after service.
Q6: Can suspension issues cause brake vibration?
Yes. Worn suspension bushings, control arms, or tie rods can amplify vibration felt while braking, even if the brakes themselves are fine.
Conclusion
This Mercedes E-Class case study proves that a methodical diagnostic process is essential when dealing with brake vibration.
The technician identified warped rotors as the root cause, replaced them along with new pads, and restored safe braking performance.
Always address brake shaking early neglecting it can lead to uneven wear, damaged components, and reduced braking safety.
To explore more brake-related diagnostics, check our main hub:
Mercedes Brake System Problems: ABS, ESP & Brake Assist Guide
— Salim, Mercedes Expert
Independent specialist in Mercedes-Benz diagnostics, CAN Bus analysis, troubleshooting case studies, and EV systems.