Table of Contents
Case Study: Why Is My Mercedes Ambient Lighting Not Working? (W213 E-Class)
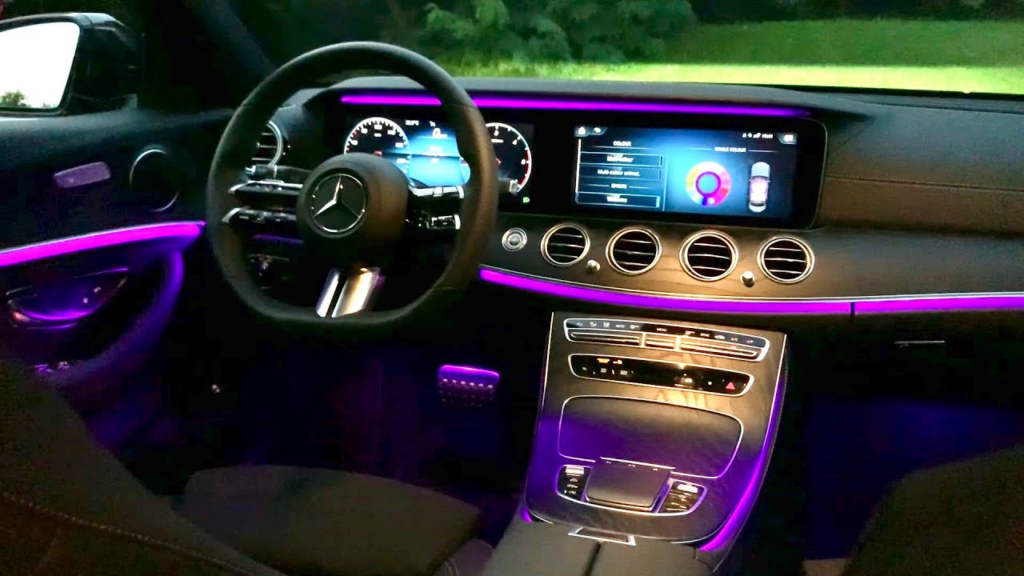
If your Mercedes ambient lighting is not working, dim, flickering, or completely off, the issue can range from incorrect settings to a deeper electrical or LIN communication fault. In modern Mercedes models especially the W213 E-Class ambient lighting is controlled through a network of LIN-based LED modules, door control units, and SAM modules.
To understand how to diagnose and fix these issues correctly, this real workshop case study walks through the exact steps taken to resolve an ambient light failure in the rear right door of a Mercedes E-Class W213.
For more advanced fault-tracing techniques using LIN, CAN, and SAM modules, explore our full hub: Mercedes Electrical Problems: Fix SAM, ECU & CAN Bus Faults
Customer Complaint
A Mercedes-Benz E-Class W213 owner reported:
“The ambient lighting in the rear right door is completely off. All other doors are normal.”
Because the W213 has individually controlled LED modules for each door, a single failed module can bring down the entire LIN circuit. This required a structured, electrical-first diagnostic approach.
Vehicle Information
- – Model: Mercedes-Benz E-Class W213
- – Issue: Rear right door ambient lighting not working
- – Systems involved: Door control unit (DCU), LIN-controlled ambient LED modules, SAM circuit supply
Step-by-Step Diagnostic Process
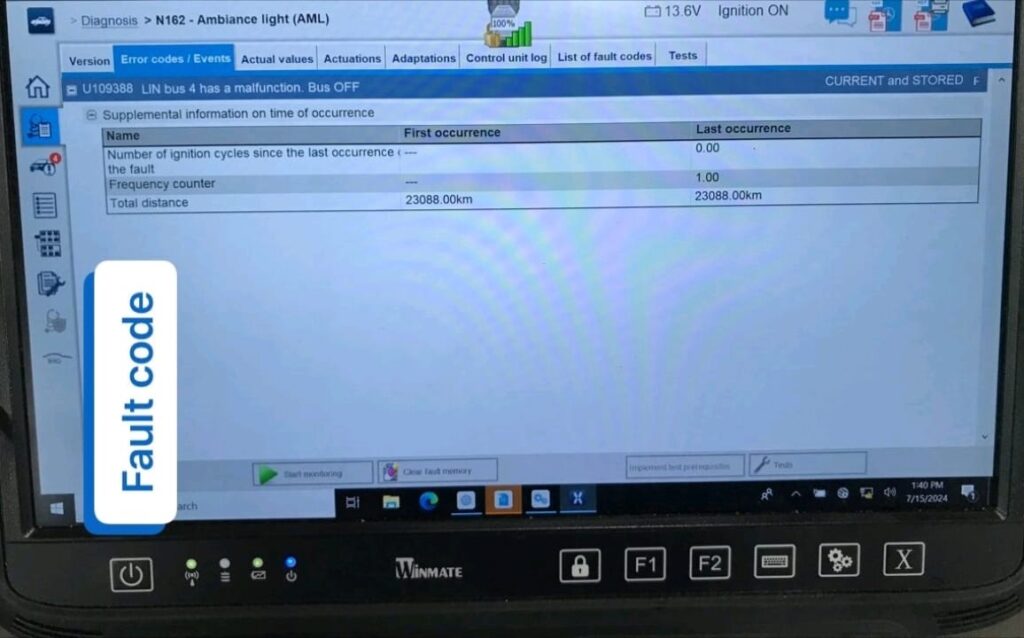
1. System Scan : Fault Code Retrieval (XENTRY)
A quick test revealed the following stored code in the ambient light control unit (N162):
- U109388 : “LIN bus 4 has a malfunction. Bus Off.”
Interpretation:
This means that at least one LED module or wiring branch on the LIN bus is pulling the entire circuit down, causing all lights in that door to stop responding.
2. Studying the Wiring Diagram (LIN Network in the Door)
The W213 uses:
- => 1 main LIN line from the door control unit
- => Multiple LIN branches feeding each individual ambient LED:
- – Door strip
- – Handle light
- – Bottle holder light
- – Upper trim light
Any shorted module along this chain will drop LIN voltage to zero.
3. Door Trim Removal & Visual Inspection
The door panel was removed to inspect:
- – Harness integrity
- – Moisture traces
- – Connector tension
- – Any exposed wiring
No visible damage was found suggesting the fault was internal to the LIN circuit.
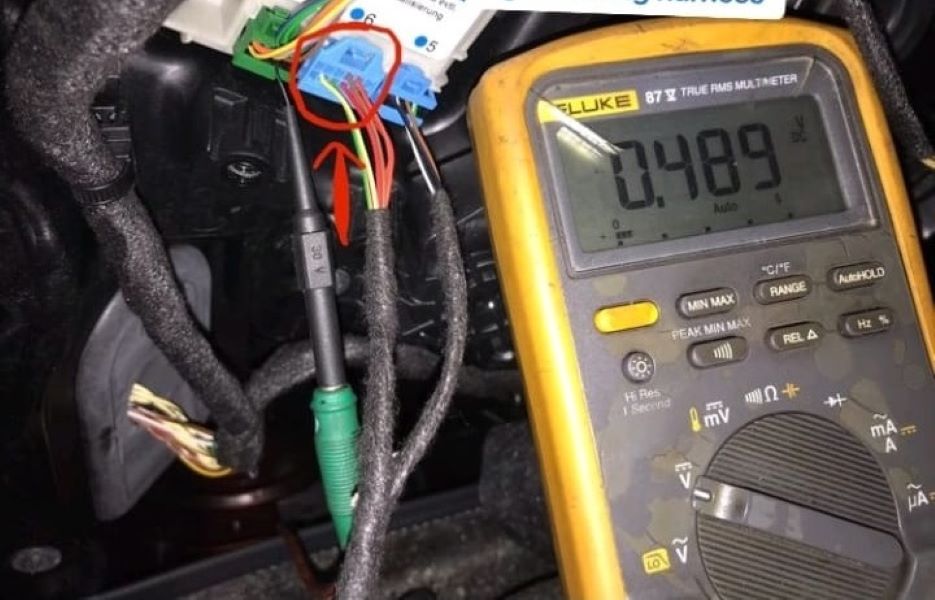
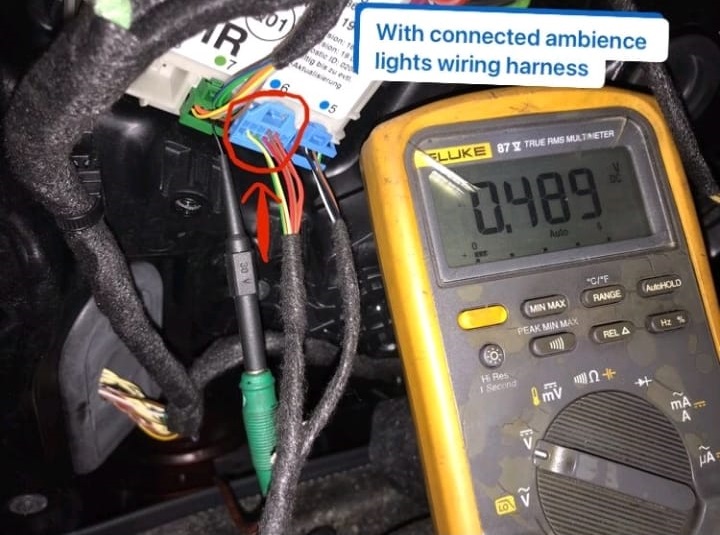
4. LIN Voltage Check : Key Turning Point
The technician measured LIN voltage at the door control unit:
- – Measured LIN voltage (connected): 0V → faulty component pulling circuit down
- – Measured LIN voltage (ambient socket disconnected): 9V → LIN circuit is healthy
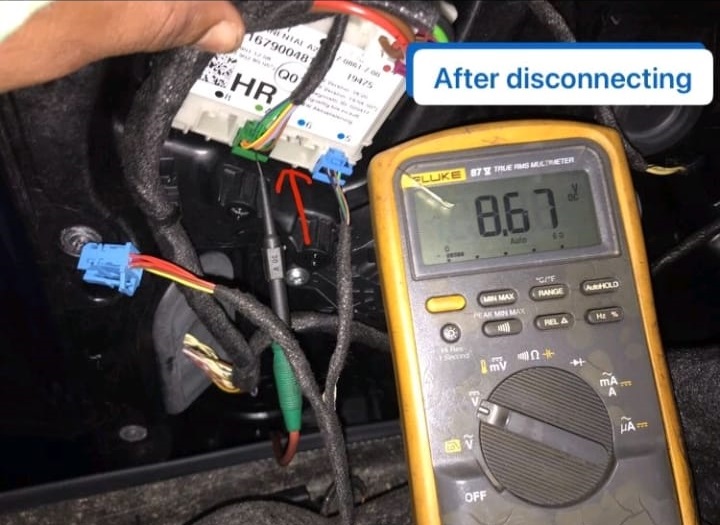
Conclusion:
A downstream LED module or the harness between them is shorting the LIN bus.
Fault Isolation Process (Highly Effective Method)
5. Continuity Tests
All wiring from the control unit to each LED module was checked and was within normal range.
This confirmed no open circuits or high resistance.
6. Sequential Line Isolation
To pinpoint the exact shorted module, the technician used a step-by-step cut-and-monitor method:
Method Used:
- – Cut each LIN branch wire one by one
- – Monitor voltage rise using a multimeter
- – Reconnect the branch after testing to confirm findings
Results:
- – After cutting two suspect wires, voltage returned to 9V
- – Reattaching wire #1 → voltage remained stable
- – Reattaching wire #2 → voltage dropped back to 0V
Final Diagnosis:
The bottle holder ambient LED module was internally shorted, causing the entire LIN bus to shut down.
This is a common failure point, as this LED is positioned low in the door where moisture exposure is more likely.
Corrective Actions
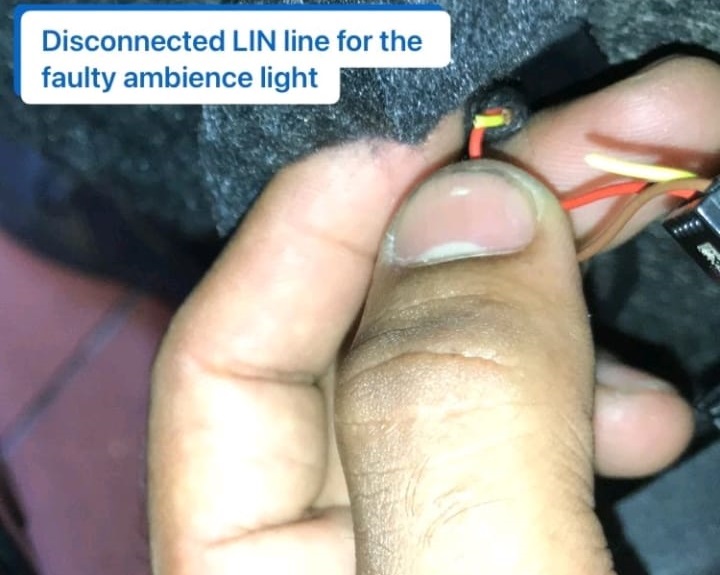
7. Temporary Restoration
- – The faulty ambient light module was disconnected
- – The remaining ambient lights were restored and worked normally
- – This prevented complete door ambient light failure until parts arrived
8. Part Ordered
- – Rear Right Door Ambient Light Wiring Harness – Part No. A2135400571
9. Reassembly & Verification
All door functions were checked, including:
- – Ambient light brightness control
- – Color changes
- – Door control unit communication
- – No new LIN errors on XENTRY
Case Study Conclusion
This Mercedes W213 case confirms a common electrical pattern:
A single shorted LED module can bring down an entire LIN bus, leading to complete ambient light failure in one door.
Key takeaways:
=> LIN voltage testing is essential
A 0V reading almost always indicates a shorted module.
=> LED modules can fail even with no visible damage
Especially those exposed to moisture (e.g., bottle holder light).
=> Systematic isolation prevents unnecessary part replacement
Replacing LED modules or DCUs blindly wastes money and time.
=> Third-party modifications should always be checked
Ambient light failures are frequently caused by aftermarket accessories tapping into door wiring.
For more electrical troubleshooting guides, visit:
Mercedes Electrical Problems: Fix SAM, ECU & CAN Bus Faults
FAQs: Mercedes Ambient Lighting Not Working
What is ambient lighting in a Mercedes-Benz?
Ambient lighting is a customizable LED interior illumination system allowing drivers to adjust color, brightness, and mood lighting throughout the cabin.
How do I change the ambient lighting in my Mercedes?
- 1. Open the infotainment system
- 2. Go to Vehicle → Comfort → Ambient Lighting
- 3. Choose your color and brightness level
- 4. Save the settings
How do I check if my Mercedes has ambient lighting?
- – Look for the Ambient Lighting menu in settings
- – Inspect door trims and footwells for LED strips
- – Check your VIN build sheet
- – Ask your dealership
— Salim, Mercedes Expert
Independent specialist in Mercedes-Benz diagnostics, CAN Bus analysis, troubleshooting case studies, and EV systems.