
Table of Contents
Resolving Check Engine Light Issues on Your Mercedes
Few warnings cause as much anxiety for Mercedes-Benz owners as the check engine light (CEL). When it illuminates on the dashboard, it can be anything from a minor issue like a loose gas cap to a critical failure in the ignition or emissions system. Understanding what the light means, and how to respond, is essential for keeping your vehicle safe, efficient, and reliable.
In this guide, we’ll explore the meaning of the check engine light, walk through a real-world case study on a Mercedes C300 with a faulty oxygen sensor, and provide practical troubleshooting steps, repair processes, and preventive measures.
This article is part of our Mercedes Check Engine Light – Complete Troubleshooting Hub, which includes diagnostic guides, repair tips, and case studies.
Why the Check Engine Light Matters in Mercedes Vehicles
The CEL is a direct link between your car’s OBD-II system and the driver. Modern Mercedes-Benz models continuously monitor:
- – Engine performance
- – Transmission function
- – Emissions and air/fuel ratio
- – Electrical and sensor data
When any system falls outside of expected parameters, the ECU logs a diagnostic trouble code (DTC) and triggers the CEL. This early-warning system is designed to catch small problems before they escalate into expensive failures.
Common Causes of the Check Engine Light
| Cause | Typical Symptoms | Quick Fix |
|---|---|---|
| Loose gas cap | CEL on after refueling, no drivability issues | Tighten or replace cap |
| Faulty O₂ sensor | Poor fuel economy, emissions faults | Replace oxygen sensor |
| Mass Air Flow (MAF) sensor failure | Rough idle, stalling, misfires | Clean or replace MAF |
| Ignition coil/spark plug failure | Misfires, blinking CEL, rough running | Replace plugs/coils |
| Catalytic converter damage | Loss of power, failed emissions | Replace catalytic converter |
| MAP or IAT sensor faults | Incorrect air/fuel readings | Replace faulty sensor |
| EGR valve issues | Rough idle, increased NOx emissions | Clean or replace EGR valve |
Case Study: Resolving a Check Engine Light Oxygen Sensor Issue on a Mercedes C300
Customer Complaint
The owner of a Mercedes-Benz C300 equipped with OM651 Engine noticed the check engine light illuminated on the dashboard. Concerned about potential engine damage, they brought the car to a Mercedes-Benz dealership for professional diagnosis.
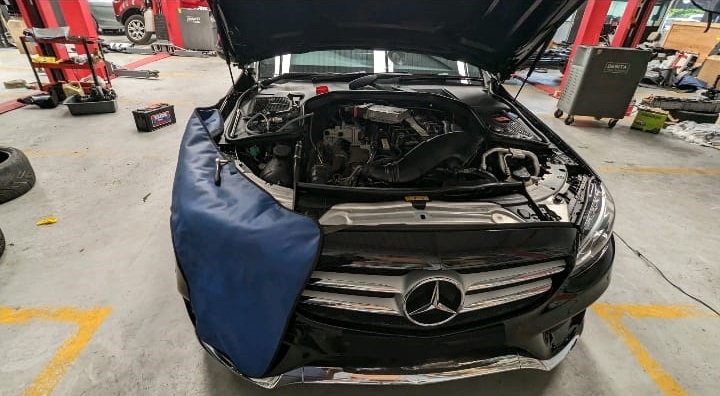
Step 1: Initial Inspection
- – Technician checked for obvious issues like a loose gas cap, disconnected hoses, or visible wiring damage.
- – No external problems were found → moved on to advanced diagnostics.
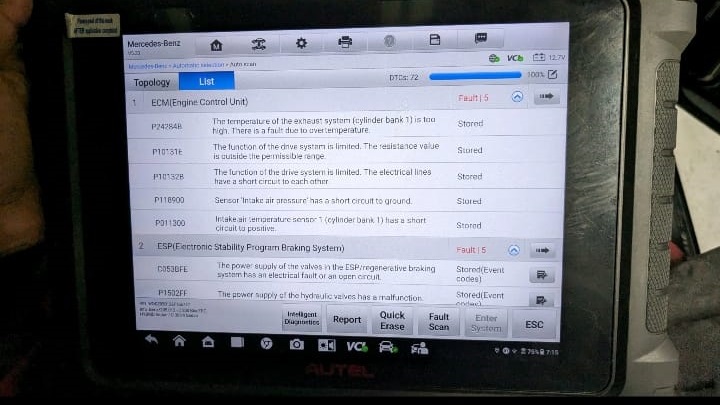
Step 2: Autel Diagnostic Scan
Using Autel Diagnostic Scan, the technician scanned the ECU and retrieved several fault codes:
- – P24284B : Exhaust Gas Recirculation (EGR) valve position sensor fault
- – P10131E / P10132B : Intake manifold pressure sensor range faults
- – P118900 : Oxygen sensor heater circuit, Bank 1 Sensor 2
- – P011300 : Intake air temperature sensor range fault
While multiple codes appeared, the key fault was P118900, indicating a failing oxygen sensor.
Step 3: Expert Analysis
Mercedes systems often show multiple secondary codes when one component fails. In this case, the faulty Bank 1 Sensor 2 oxygen sensor caused incorrect air/fuel readings, which triggered additional sensor-related codes.
Step 4: Repair Process , Replacing the Oxygen Sensor
Repair Procedure:
- 1. Disconnect battery to prevent electrical risks.
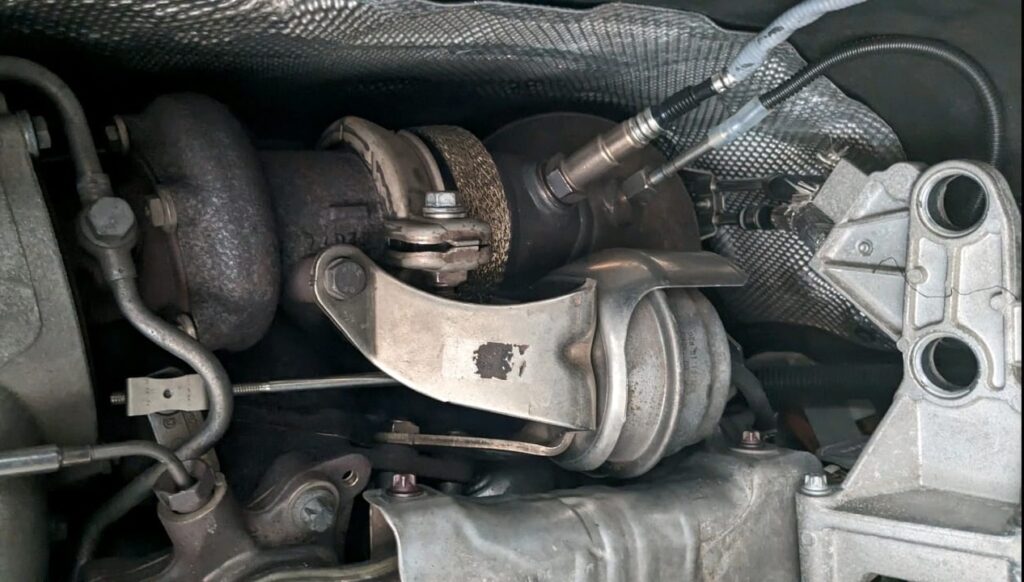
- 2. Locate faulty oxygen sensor (Bank 1 Sensor 2 in exhaust system).
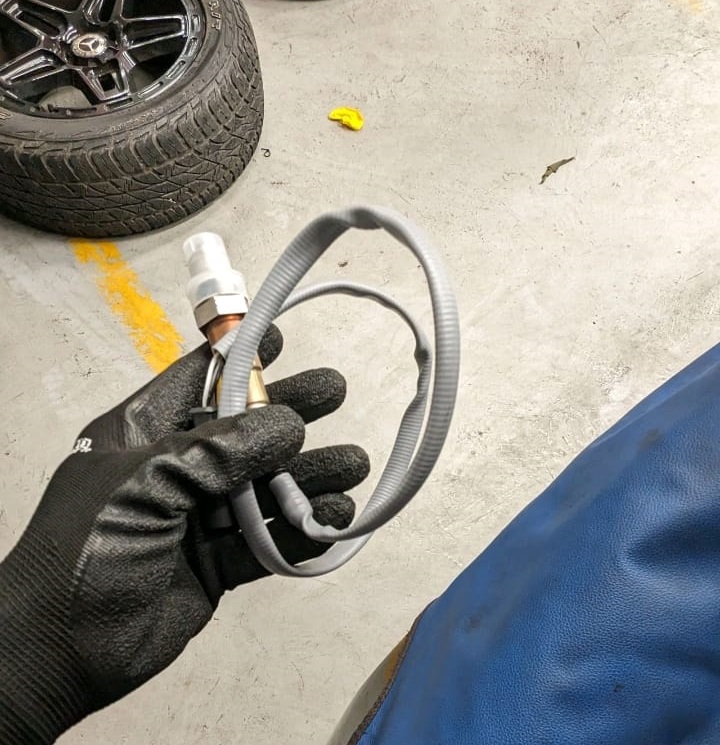
- 3. Remove sensor using the correct socket tool.
- 4. Install new OEM oxygen sensor, ensuring proper torque and connector fitment.
- 5. Reconnect battery and perform system checks.

Step 5: Post-Repair Verification
- – Cleared DTCs using Autel.
- – Conducted test drive under varied loads.
- – CEL did not return → confirming the repair was successful.
Result: Vehicle performance restored, fuel efficiency improved, and customer reassured.
Symptom – Cause – Fix Table
| Symptom | Cause | Recommended Fix |
|---|---|---|
| CEL after refueling | Loose gas cap | Tighten or replace cap |
| Poor fuel economy, emissions codes | Faulty O₂ sensor | Replace oxygen sensor |
| Misfire, blinking CEL | Worn spark plugs or coils | Replace plugs and coils |
| Rough idle, stalling | Dirty MAF sensor | Clean/replace MAF |
| Loss of power, high emissions | Catalytic converter fault | Replace converter |
How to Turn Off the Mercedes Check Engine Light
Steps to Reset
- 1. Fix the underlying issue (gas cap, sensor, coil, etc.).
- 2. Use an OBD-II or XENTRY scanner to clear codes.
- 3. Alternatively, after repairs, the CEL may clear automatically after ~20–40 km of driving.
Cost Breakdown
- – Minor fixes: Gas cap or sensor replacement $20–$200.
- – Moderate repairs: Plugs, coils, MAF sensor $200–$500.
- – Major repairs: Catalytic converter or transmission faults $800–$2,500+.
Preventive Measures
- – Stick to service intervals : Oil, filters, and spark plugs.
- – Use OEM parts : Mercedes electronics and sensors are sensitive to aftermarket parts.
- – Inspect wiring regularly : Especially for rodents or corrosion damage.
- – Drive smoothly : Avoid harsh acceleration that strains ignition and emissions systems.
- – Scan codes early : Even a steady CEL should be checked before issues escalate.
FAQs
Q: Can I drive with the Mercedes check engine light on?
- If steady: Yes, but schedule service soon.
- If flashing: No. Stop immediately to avoid catalytic converter damage.
Q: How much does it cost to replace an oxygen sensor on a Mercedes?
Between $200–$400, depending on labor and OEM part cost.
Q: Does the CEL come on for an oil change?
No. That’s a maintenance reminder light. However, oil-related faults (low pressure, clogged solenoids) may trigger the CEL.
Q: What’s the best scanner for Mercedes check engine light?
- Professional: STAR/XENTRY (dealer-level).
- DIY: High-quality OBD-II scanners that read Mercedes-specific codes.
Conclusion
The Mercedes check engine light should never be ignored. While sometimes triggered by simple issues like a loose gas cap, it can also indicate deeper problems such as a failing oxygen sensor, as seen in this C300 case study.
By combining initial checks, diagnostic scanning, and professional repairs, Mercedes owners can resolve CEL issues efficiently and avoid costly breakdowns.
For more real-world case studies and troubleshooting guides, visit our Mercedes Check Engine Light – Complete Troubleshooting Hub.
— Salim, Mercedes Expert
Independent specialist in Mercedes-Benz diagnostics, CAN Bus analysis, troubleshooting case studies, and EV systems.