Table of Contents
Mercedes No Power When Accelerate: A Case Study
Experiencing a lack of power when accelerating can be a frustrating issue for any car owner, particularly for those driving a luxury vehicle like a Mercedes C Class. In this case study, we delve into a real-life scenario where a Mercedes C Class owner faced this issue and sought help from a qualified technician at a Mercedes dealership. We’ll explore the diagnostic process, the identification of potential causes, and the steps taken to resolve the problem.
Case Study Overview
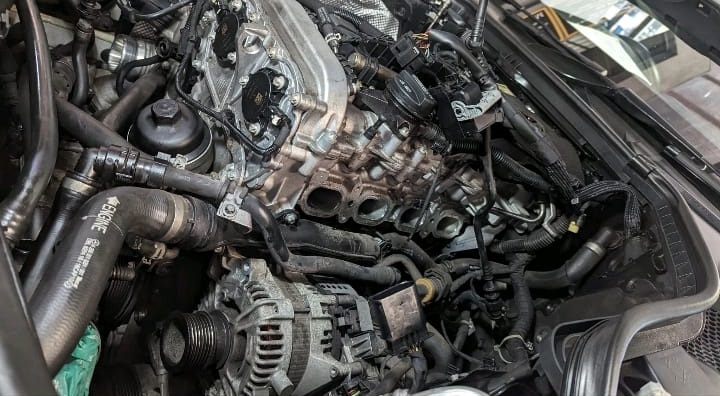
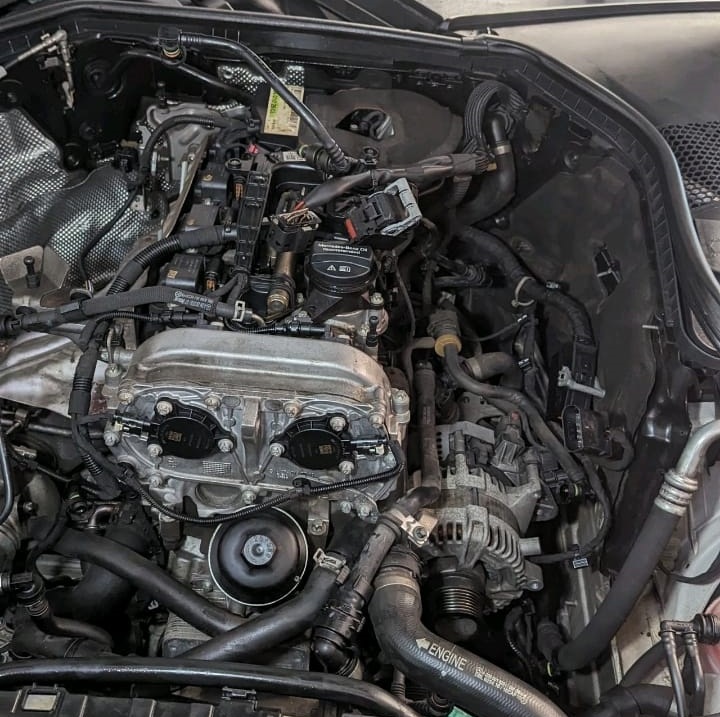
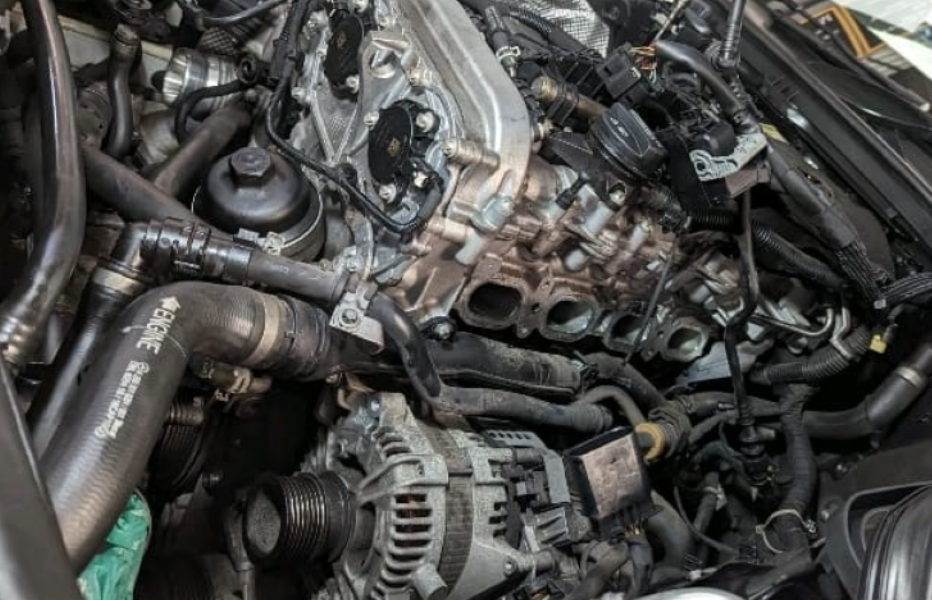
A Mercedes C Class W205 owner brought his vehicle equipped with M264 Engine to a Mercedes dealership, complaining of a lack of power during acceleration. The qualified technician utilized the “Xentry STAR” diagnostic tool to identify the root cause of the problem.
Diagnostic Process
1. Initial Inspection and Diagnostic Scan:
- The technician performed an initial inspection and connected the vehicle to the Xentry STAR diagnostic tool.
- The diagnostic scan revealed fault codes indicating low boost pressure.
2. Identifying Potential Causes:
- Based on the technician’s expertise, several potential causes for low boost pressure were identified:
- Air leak
- Malfunctioning wastegate
- Vacuum circuit leak
- Turbocharger damage
Detailed Component Checks
1. Air Leak:
- The technician thoroughly inspected the intake system for any signs of air leaks, ensuring all hoses and connections were secure, OK.
2. Wastegate:
- The wastegate was checked to ensure it was functioning correctly and regulating the boost pressure as expected, OK.

3. Vacuum Circuit:
- The technician inspected the vacuum circuit for any leaks or blockages that could affect the boost pressure, OK.
4. Turbocharger:
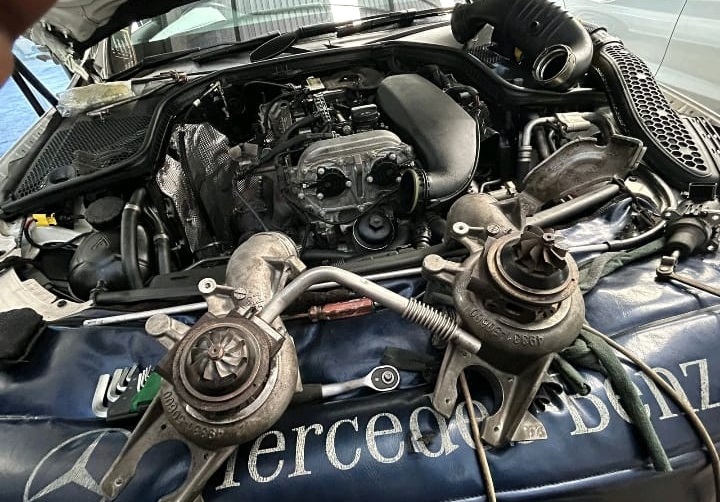
- Finally, the turbocharger was examined. The technician found that the turbocharger was blocked, preventing it from generating the necessary boost pressure.
Solution and Repair
- Turbo Replacement:
- The technician decided to replace the blocked turbocharger. After the replacement, the vehicle was tested to ensure the issue was resolved.
- The test drive confirmed that the Mercedes C Class now accelerated properly, and the problem of low power during acceleration was successfully resolved.
Conclusion
In this case study, we observed the systematic approach taken by a qualified technician to diagnose and resolve the issue of low power during acceleration in a Mercedes C Class. The use of advanced diagnostic tools, combined with the technician’s expertise, ensured a precise identification of the problem and an effective solution. This case highlights the importance of thorough diagnostics and expert intervention in maintaining the performance and reliability of luxury vehicles like Mercedes.
How does a turbo works ?
A turbocharger, often referred to as a turbo, is a device that increases the efficiency and power output of an internal combustion engine by forcing extra air into the combustion chamber. Here’s a breakdown of how a turbo works:
Components of a Turbocharger
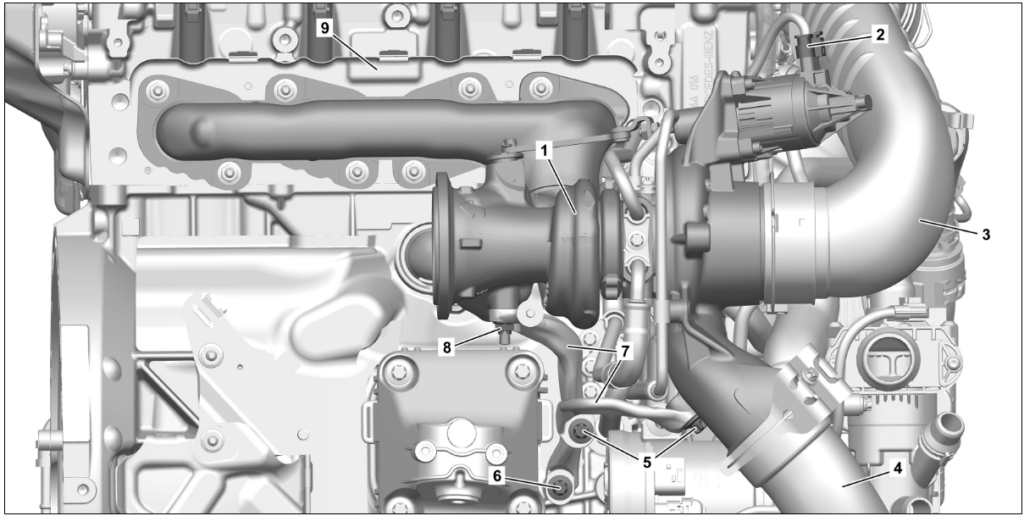
- Compressor: Draws in and compresses the air.
- Turbine: Driven by exhaust gases from the engine.
- Shaft: Connects the compressor and turbine.
- Intercooler: Cools the compressed air before it enters the engine.
- Wastegate: Controls the amount of exhaust gases entering the turbine.
How It Works ?
1. Exhaust Gas Intake:
- The process begins with the exhaust gases from the engine. As the engine runs, it produces exhaust gases that are expelled from the combustion chambers.
2. Turbine Rotation:
- These exhaust gases are directed towards the turbine side of the turbocharger. The high-energy exhaust gases spin the turbine blades.
3. Compressor Rotation:
- The turbine is connected to the compressor through a shaft. As the turbine spins, it also spins the compressor.
4. Air Compression:
- The spinning compressor draws in ambient air and compresses it. Compressed air is denser, meaning it has more oxygen molecules per unit volume.
5. Intercooler:
- The compressed air is usually quite hot, so it passes through an intercooler to cool down before entering the engine. Cooler air is denser and helps improve combustion efficiency.
6. Air Intake into Engine:
- The cooled, compressed air is then directed into the engine’s combustion chamber. More air in the chamber means more fuel can be added, leading to a more powerful explosion during combustion.
7. Increased Power Output:
- The increased air and fuel mixture results in a more powerful combustion process, thereby increasing the engine’s power output.
8. Wastegate Regulation:
- The wastegate regulates the pressure of the exhaust gases entering the turbine. It ensures the turbocharger operates within its designed limits and prevents over-boosting, which could damage the engine.
Benefits of a Turbocharger
- Increased Power: More air and fuel result in a more powerful combustion, increasing the engine’s power output.
- Improved Efficiency: Better combustion leads to more efficient fuel usage.
- Reduced Emissions: More efficient combustion can reduce the amount of harmful emissions produced by the engine.
Turbo replacement
How to replace Turbocharger?
Replacing a turbocharger is a complex task that requires mechanical skill and knowledge of the engine system. Here is a general step-by-step guide to replace a turbocharger:
Steps to Replace a Turbocharger
- Preparation
- Safety First: Ensure the engine is cool and the vehicle is on a flat, stable surface. Disconnect the battery to prevent any electrical issues.
- Gather Tools: Have all necessary tools and materials ready.
- Remove the Old Turbocharger
- Drain Fluids: Drain the engine oil and coolant to avoid spills and contamination.
- Remove Intake and Exhaust Components: Disconnect the air intake hose, intercooler pipes, and exhaust manifold connected to the turbo.
- Disconnect Oil and Coolant Lines: Carefully disconnect the oil supply and return lines, as well as any coolant lines, from the turbocharger.
- Remove Turbocharger: Unbolt the turbocharger from the exhaust manifold and engine block. Remove it from the engine bay.
- Inspect and Prepare for Installation
- Clean Mounting Surfaces: Clean the exhaust manifold and intake mounting surfaces to ensure a proper seal with the new turbocharger.
- Inspect Components: Check the oil and coolant lines for any signs of wear or damage. Replace if necessary.
- Install the New Turbocharger
- Position the Turbocharger: Place the new turbocharger in position, aligning it with the exhaust manifold and intake.
- Attach Turbocharger: Bolt the turbocharger to the exhaust manifold and engine block, using new gaskets and ensuring all bolts are torqued to the manufacturer’s specifications.
- Reconnect Oil and Coolant Lines: Attach the oil supply and return lines, and any coolant lines, ensuring all connections are secure and leak-free.
- Reassemble Intake and Exhaust Components
- Reattach Intake and Exhaust: Reconnect the air intake hose, intercooler pipes, and exhaust manifold to the turbocharger.
- Check Connections: Ensure all clamps and bolts are tight and all connections are secure.
- Refill Fluids
- Add Oil and Coolant: Refill the engine with the appropriate amount of oil and coolant.
- Final Checks and Start-Up
- Reconnect Battery: Reconnect the vehicle’s battery.
- Check for Leaks: Start the engine and let it idle. Check for any oil or coolant leaks around the turbocharger.
- Monitor Performance: Allow the engine to reach operating temperature and monitor the turbocharger’s performance. Listen for any unusual noises and check the boost pressure.
- Test Drive
- Test the Vehicle: Take the vehicle for a test drive to ensure the turbocharger is functioning properly. Monitor the engine performance and check for any issues.
— Salim, Mercedes Expert
Independent specialist in Mercedes-Benz diagnostics, CAN Bus analysis, troubleshooting case studies, and EV systems.