

Table of Contents
Car Shuts Off While Driving: Causes, Fixes & Mercedes Case Study
Few things are more alarming than when your car shuts off while driving especially in a luxury vehicle like a Mercedes-Benz. This problem can feel unpredictable and unsafe, often pointing to faults in the engine’s control, fuel, or crankshaft sensor systems.
In this article, we’ll analyze a real-world case study involving a Mercedes-Benz C-Class equipped with the M272 Engine, where the vehicle would randomly shut off while driving. You’ll see how step-by-step diagnostics helped uncover a faulty ECU, even though the initial clues pointed to a sensor problem.
Customer Complaint
A Mercedes-Benz C-Class owner reported:
“My car suddenly shuts off while driving or idles fine, then stops without warning.”
This intermittent stalling raised serious safety concerns and required a comprehensive diagnostic process to isolate the fault.
Initial Diagnosis
1. Fault Code Retrieval
Using the Mercedes XENTRY diagnostic tool, the technician retrieved the following fault:
| Fault Code | Description | Status |
|---|---|---|
| P0335 | Crankshaft position sensor inaccurate or implausible signal | Stored, then became current |
Initially, the fault appeared intermittent, but after repeated checks, it reappeared as an active code, suggesting a recurring issue in the crankshaft signal chain.
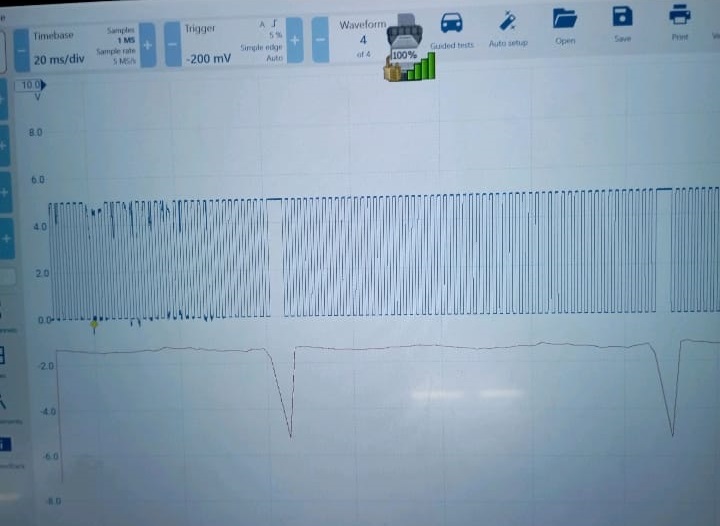
2. Waveform & Voltage Testing
XENTRY Wave Pattern
A live data review showed a correct waveform pattern however, the fault reappeared after clearing.
This inconsistency indicated that the problem was intermittent, not a permanent open circuit.
Sensor Socket Voltage Check
A multimeter confirmed proper voltage supply at the crankshaft sensor socket, ruling out a wiring power fault.
3. Continuity and Fuel Tests
- – Continuity Check: The connection from the crankshaft sensor to the ECU pins tested OK no open or short circuits found.
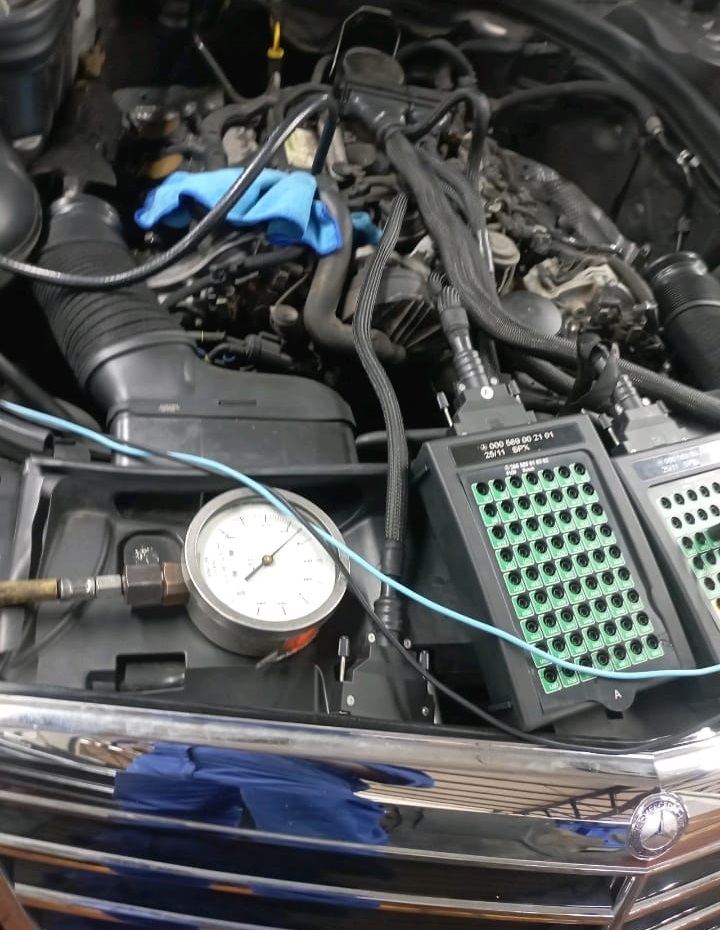
- – Fuel Pressure Test: Normal fuel pressure observed, confirming the fuel system was healthy and unrelated to the shutdowns.
Preliminary conclusion: Wiring and fuel system were not the cause.
Advanced Diagnosis
1. PicoScope Signal Analysis
The PicoScope was connected to monitor real-time crankshaft signal output.
A signal dropout was captured once, suggesting a possible sensor or ECU processing error, but not enough to confirm the sensor as defective.
2. ECU Integrity Check
Inspection of the ECU revealed it was non-original (aftermarket).
Given the random shutdowns and inconsistent fault logging, suspicion shifted toward an unstable ECU communication fault.
Solution & Repair Process
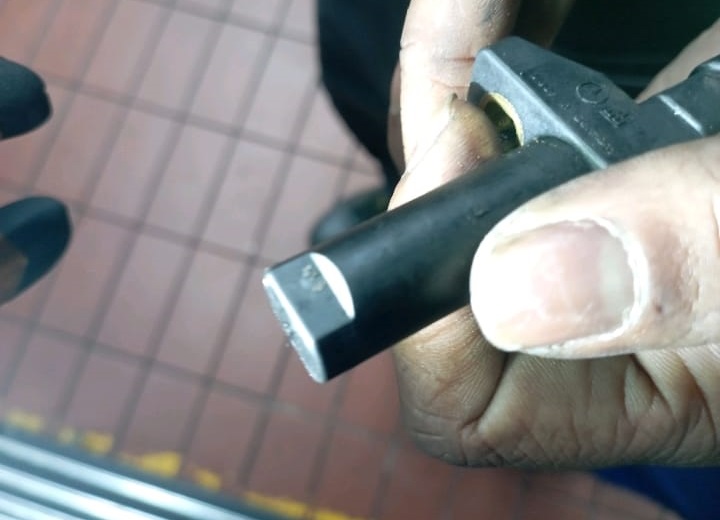
Step 1 : Crankshaft Sensor Replacement
The crankshaft sensor was replaced with a new OEM component of the same part number.
Result: Fault persisted the engine still shut off intermittently.
This ruled out the sensor as the primary cause.
Step 2 : ECU Replacement
A genuine Mercedes-Benz engine control unit (ME Control Module) was installed and coded to factory specification using XENTRY / STAR Diagnosis.
After installation:
- – The fault code P0335 no longer appeared.
- – The engine operated smoothly without unexpected shutdowns.
Root cause confirmed: Defective aftermarket ECU.
Diagnostic Summary
| Test Step | Tool / Method | Finding | Conclusion |
|---|---|---|---|
| Fault code scan | XENTRY | P0335 stored/current | Crankshaft signal error |
| Wiring continuity | Multimeter | OK | Wiring intact |
| Fuel pressure test | Fuel gauge | Normal | Fuel system OK |
| Waveform analysis | PicoScope | Intermittent signal loss | Possible ECU or sensor fault |
| ECU inspection | Visual | Non-OEM ECU installed | Root cause confirmed |
Crankshaft Position Sensor ; Location & Replacement (M272 Engine)
| Component | Location | Access Tip |
|---|---|---|
| Crankshaft Sensor (B70) | Rear of engine block near transmission bell housing | Best accessed from underneath the vehicle |
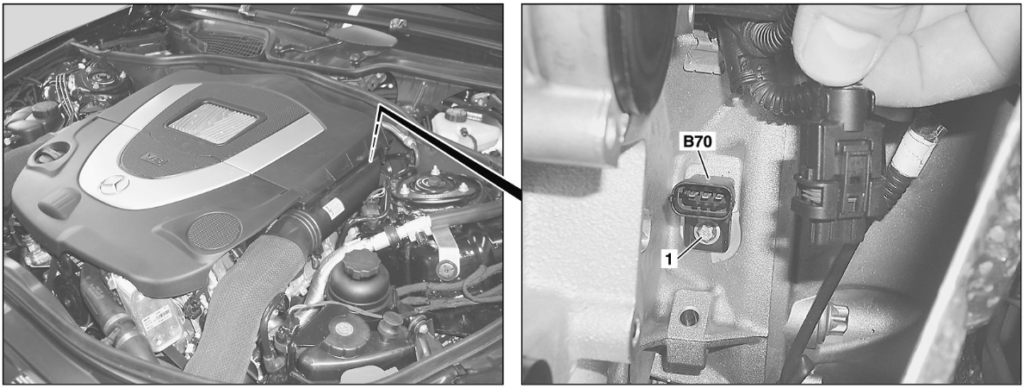
Replacement Steps
- 1. Remove air filter housing and vacuum lines.
- 2. Detach the hot-film MAF sensor and air guide housing.
- 3. Remove the vacuum pump (if equipped).
- 4. Unlock the electrical connector on sensor B70.
- 5. Unscrew the retaining bolt and remove sensor.
- 6. Install new sensor and reconnect.
- 7. Perform ECU adaptation and calibration with STAR Diagnosis.
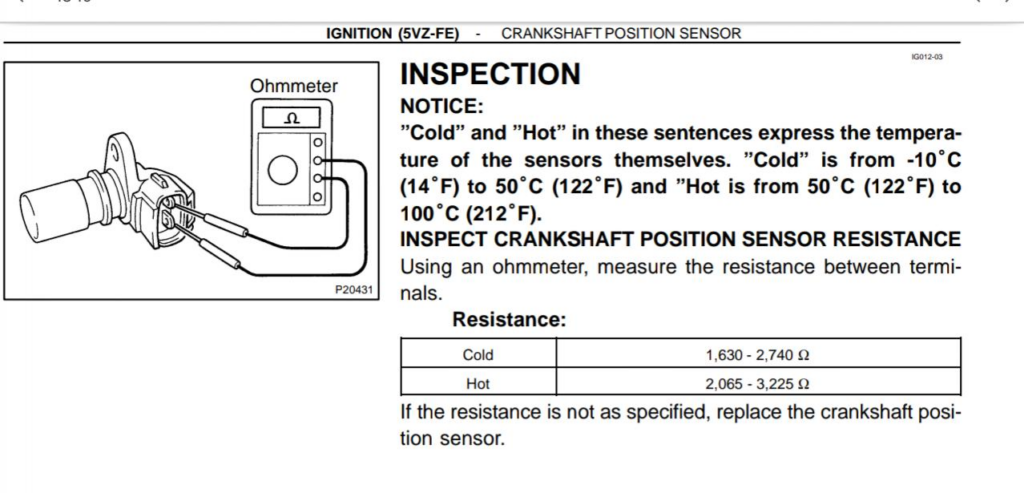
Testing a Crankshaft Position Sensor
| Test Type | Tool | Expected Result |
|---|---|---|
| Resistance Check | Multimeter (Ω) | Within manufacturer-specified range |
| Voltage Output | Multimeter (AC V) while cranking | Small AC voltage signal present |
| Signal Pattern | Oscilloscope | Consistent sine wave pattern |
A missing or irregular pattern indicates a failing sensor or corrupted ECU signal processing.
Related Diagnostic Resource
If you’re facing similar starting problems, explore our full troubleshooting hub:
Mercedes No Start Issues: Causes, Fixes & Case Studies : a complete guide covering electrical, fuel, and ECU-related no-start scenarios across multiple Mercedes models.
Key Takeaways
- – Intermittent shutdowns can mimic sensor failure but may stem from defective or non-original ECUs.
- – Always confirm OEM part authenticity before replacing key modules.
- – Combine PicoScope signal analysis with voltage and continuity tests for accurate fault isolation.
Preventive Maintenance Tips
| Action | Why It Helps |
|---|---|
| Use only genuine ECU units | Ensures proper CAN communication |
| Periodically inspect connectors for corrosion | Prevents signal interruptions |
| Perform ECU software updates via XENTRY | Fixes logic faults and improves reliability |
| Replace crankshaft sensor every 100 000 km (as preventive measure) | Avoids random stalls and misfires |
FAQ: Car Shuts Off While Driving
1. Why did my Mercedes shut off while driving but restart later?
This usually indicates an intermittent crankshaft sensor or ECU fault that temporarily interrupts ignition synchronization.
2. Can a faulty ECU cause random shutdowns?
Yes. A defective or non-OEM ECU can misinterpret signals, causing sudden engine cut-off even when sensors are working.
3. What are the symptoms of a bad crankshaft sensor?
Engine stalling, no-start conditions, rough idle, or erratic tachometer readings.
4. How can I confirm if my ECU is original?
Check the part number via XENTRY or EPC Net and compare it with the VIN-specific OEM number.
Author Bio
Written by Mercedes Expert
With years of hands-on experience diagnosing and repairing Mercedes-Benz systems, he brings technical depth and practical case studies to help car owners, technicians, and enthusiasts troubleshoot complex automotive issues. His work focuses on clear repair guides, OEM-level procedures, and knowledge-sharing to empower both professionals and drivers.
Last update: October 2025
