Table of Contents
Case Study: Mercedes-Benz C300 ; Engine Check Light On
When the check engine light illuminates in a Mercedes-Benz C300, it’s easy to assume the issue is minor maybe a sensor or a loose gas cap. But sometimes, the light signals a deeper problem that can trigger multiple malfunctions across the vehicle.
In this real-world case study, a Mercedes-Benz C300 arrived at the workshop with the engine check light on. What started as a seemingly routine issue quickly turned into a complex diagnostic journey involving electrical failures, a headlight fault, and disabled driver assistance systems. The root cause? Rodent damage to the wiring harness.
This article walks you through the full diagnostic process, repair steps, and key takeaways with tables, FAQs, and practical advice for prevention.
Customer Complaint
- – Vehicle: Mercedes-Benz C300
- – Main Issue: Check Engine Light On
- – Additional Issues (developed over time):
- – Performance drop
- – Right headlight failure
- – Parking assist not working
- – Front camera inoperative
Step 1: Diagnosing the Check Engine Light
The check engine light is one of the most common warning indicators in any vehicle, but in this case, it was accompanied by a noticeable performance drop.
Diagnostic Actions Taken
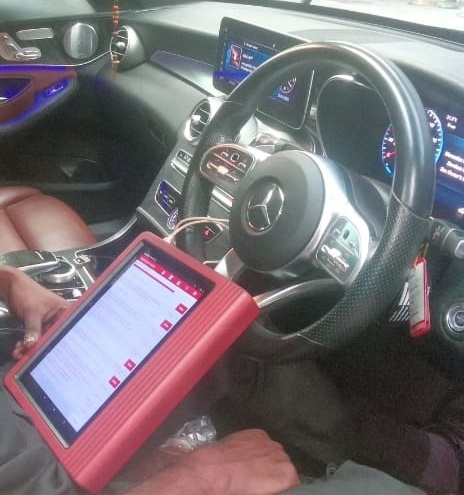
- 1. Performed a full system scan with Mercedes-Benz STAR diagnostic system.
- 2. Multiple fault codes appeared, many pointing to wiring irregularities.
- 3. Simultaneous faults across unrelated systems suggested electrical harness damage.
At this point, the evidence indicated that the problem wasn’t an isolated sensor but a larger electrical issue affecting multiple control units.
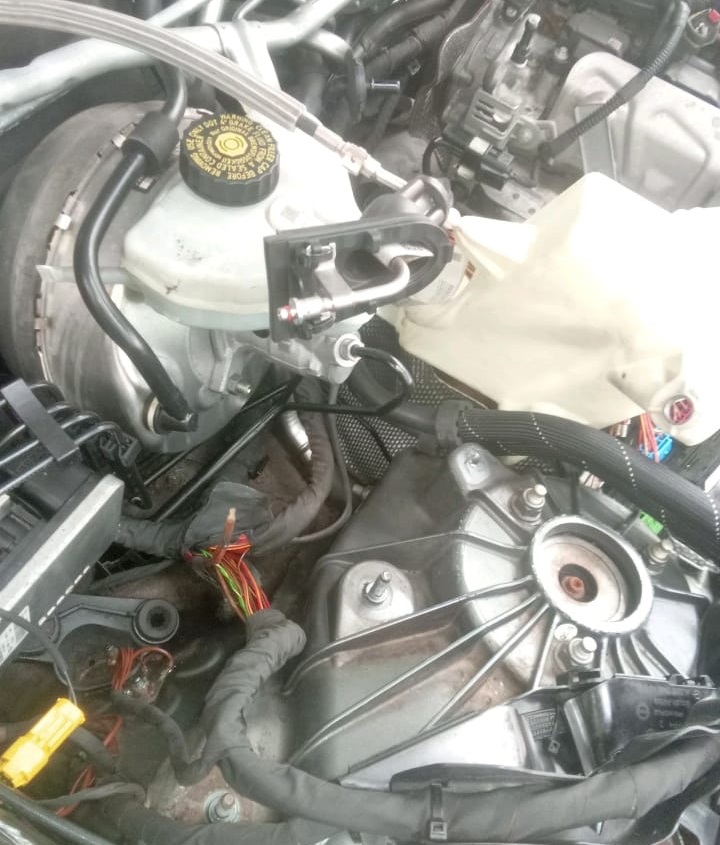
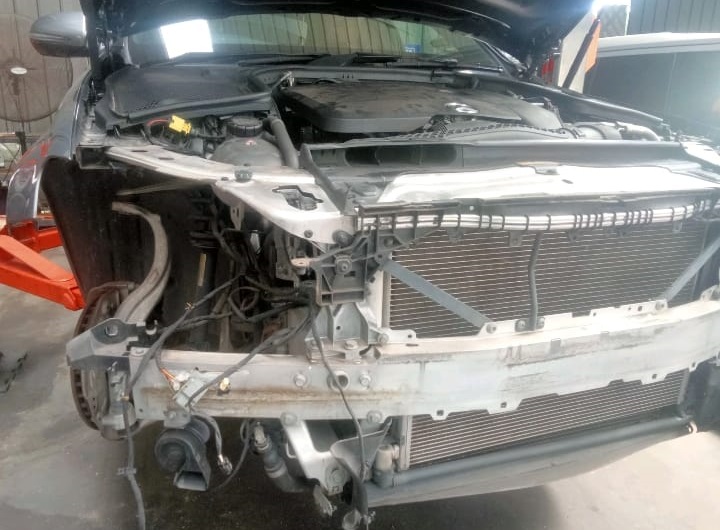
Step 2: Tracing the Damage : The “Sherlock Holmes” Moment
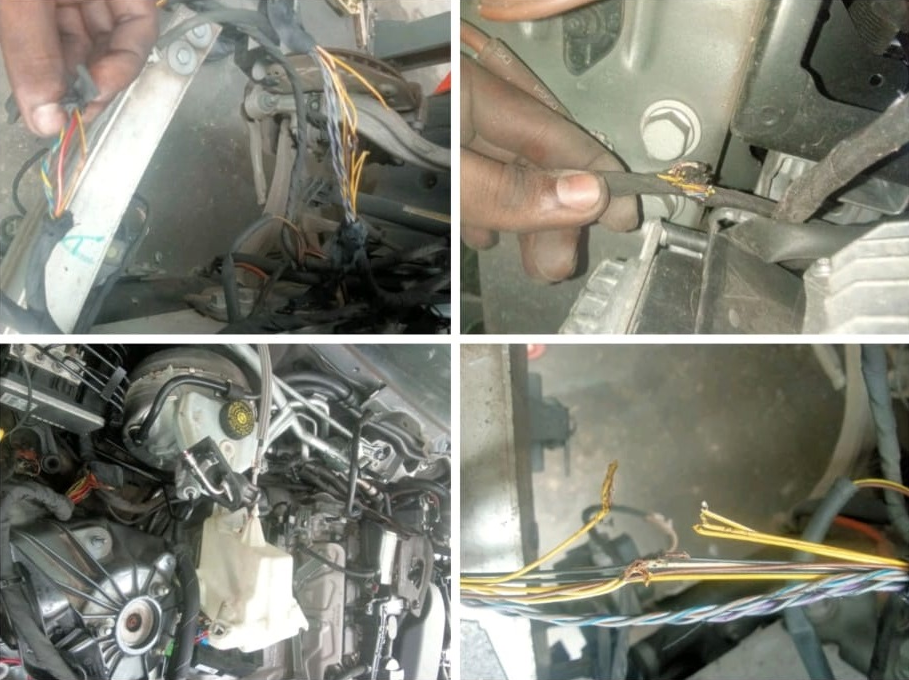
During a detailed inspection under the hood, the culprit became clear: rodents had chewed through wiring harnesses and wire loom leading to the front of the vehicle.
Why Rodents Attack Cars
- – Warm engine bays provide shelter.
- – Soy-based wire insulation attracts rodents.
- – Chewed wires disrupt circuits, triggering error codes and warning lights.
The rodent damage explained why the engine check light, performance issues, and system malfunctions appeared simultaneously.
Step 3: Repairing the Engine Harness
The repair process required precision to avoid further complications.
Repair Steps
- 1. Locate all damaged wiring within the harness.
- 2. Cut out corroded sections and strip affected ends.
- 3. Solder new wires with heat-shrink tubing for durability.
- 4. Re-wrap harness with protective loom and insulation.
- 5. Recheck fault codes to confirm the electrical integrity.
Result: The engine check light was cleared, and the vehicle’s performance returned to normal.
Step 4: Solving the Headlight Malfunction
Even after repairing the main harness, the right headlight remained non-functional.
Diagnosis
- – Fuses and relays were checked ; all functional.
- – Headlight assembly tested ; no defect.
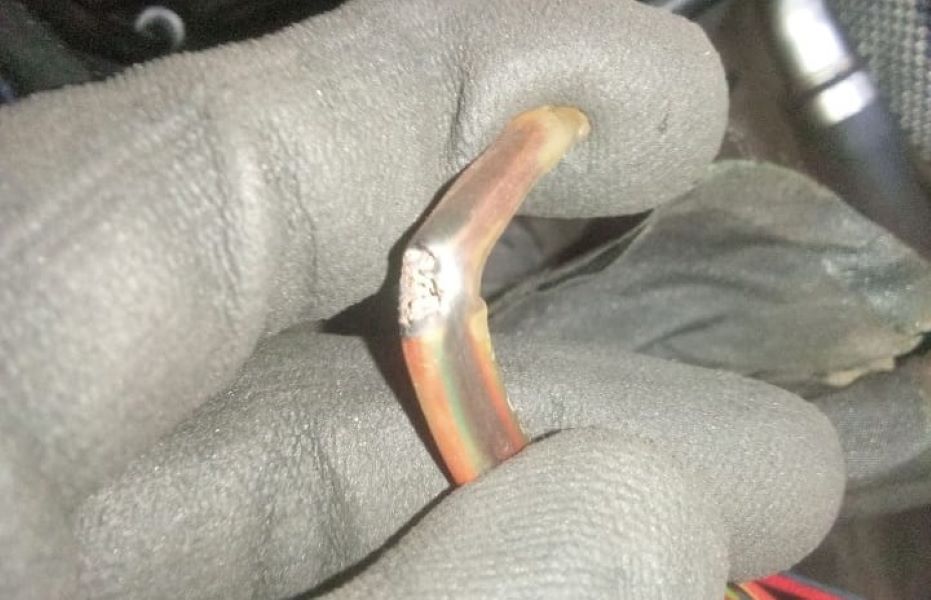
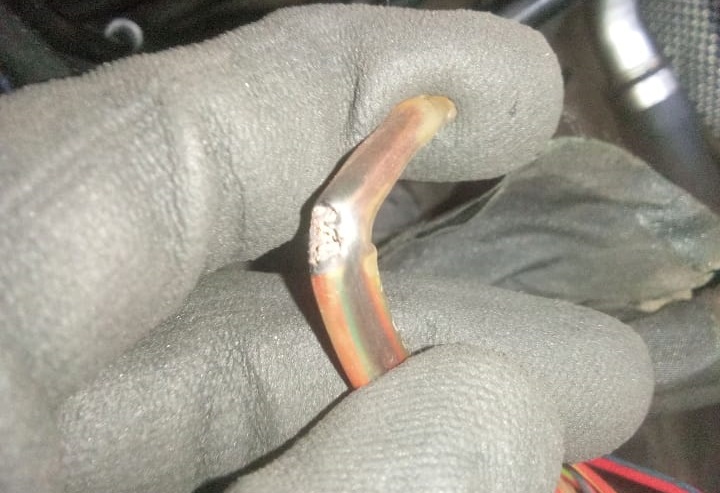
- – Wiring traced back to a junction point where corrosion was present.
The corrosion was caused by rodent urine, which had burned part of the wire and prevented current flow.
Fix
- – Replaced the corroded wire section.
- – Restored proper current supply to the headlight.
Result: The right headlight worked again, resolving the final issue.
Symptom, Cause and Fix Table
| Symptom | Cause | Fix |
|---|---|---|
| Check engine light on + performance drop | Chewed engine harness wires | Replaced/rewired damaged harness |
| Headlight not working | Corroded wire at junction point | Repaired and replaced damaged section |
| Parking assist + cameras inoperative | Broken communication signals due to rodent damage | Harness repair restored functionality |
Step 5: Final Testing & Customer Delivery
- – Cleared all fault codes and re-ran system scans.
- – Test drive confirmed smooth performance, fully operational lighting, and working assistance systems.
- – Customer left satisfied, relieved that the issue had been identified and resolved completely.
Prevention & Maintenance Tips
Rodent damage may sound unusual, but it’s a growing problem in modern vehicles.
How to Prevent Rodent Damage in Your Mercedes:
- – Park in a clean garage free of food waste and nesting materials.
- – Use rodent repellents (ultrasonic devices, peppermint spray, or commercial deterrents).
- – Regularly inspect engine bay wiring for bite marks or debris.
- – Install wire mesh covers to block rodents from accessing warm engine compartments.
- – Avoid long-term parking in areas with known rodent activity.
FAQs
Q: Can rodent damage cause the engine check light to come on?
Yes. Rodents chewing wires can disrupt sensor signals and ECU communication, directly triggering the check engine light.
Q: How much does it cost to fix rodent wiring damage in a Mercedes?
Depending on severity, costs range from $200 for small repairs to $2,000+ for full harness replacement.
Q: Will insurance cover rodent damage to my car?
Some insurance policies cover rodent damage under “comprehensive coverage.” Always check your policy.
Q: Is it safe to drive with rodent-damaged wiring?
No. Damaged wiring can cause unpredictable faults, from engine misfires to headlight failure, posing a safety risk.
Conclusion
This Mercedes-Benz C300 check engine light case shows how what appears to be a minor issue can spiral into multiple system failures when the underlying cause is electrical damage. By carefully diagnosing fault codes, inspecting wiring, and repairing damaged harnesses, the vehicle was restored to full health.
Preventing rodent damage is essential it saves not only money but also the frustration of dealing with recurring electrical faults.
Related Hub
This case study is part of our Mercedes Check Engine Light – Complete Troubleshooting Hub, where you can explore more real-world case studies, fixes, and diagnostic strategies.
— Salim, Mercedes Expert
Independent specialist in Mercedes-Benz diagnostics, CAN Bus analysis, troubleshooting case studies, and EV systems.