Table of Contents
Case Study: Fixing an Oil Leak in a Mercedes C-Class with M271 Engine
Oil leaks are among the most common issues in Mercedes engines especially around components like the oil filter housing, oil cooler seals, and crankcase system. If you’d like the complete diagnostic logic behind every type of engine leak, check the Mercedes Engine Leaks: Full Troubleshooting Guide, which explains symptoms, causes, and fix procedures across all Mercedes engines.
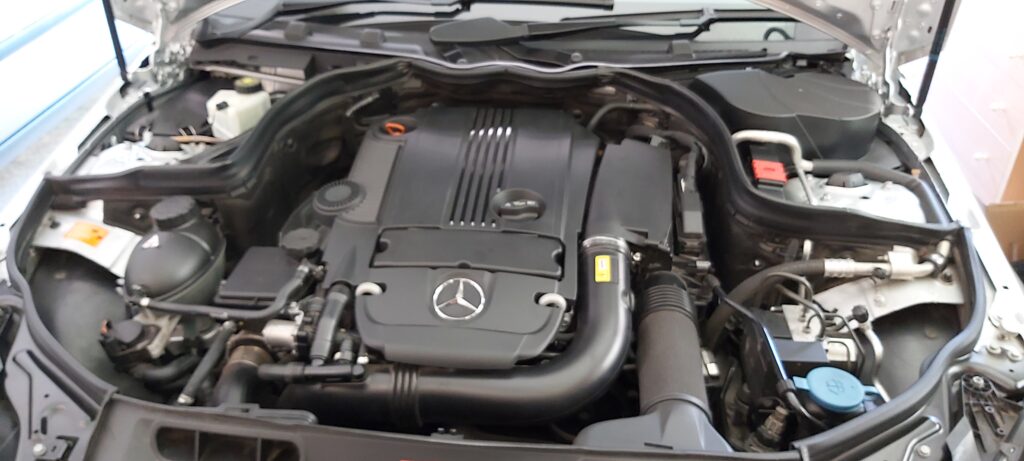
In this case study, we focus on a Mercedes-Benz C-Class equipped with the M271 Engine, where the customer reported visible oil puddles under the vehicle.
Customer Complaint
The owner reported oil spots under the car after parking overnight. Concerned about possible engine damage, they visited a Mercedes dealership for diagnosis.
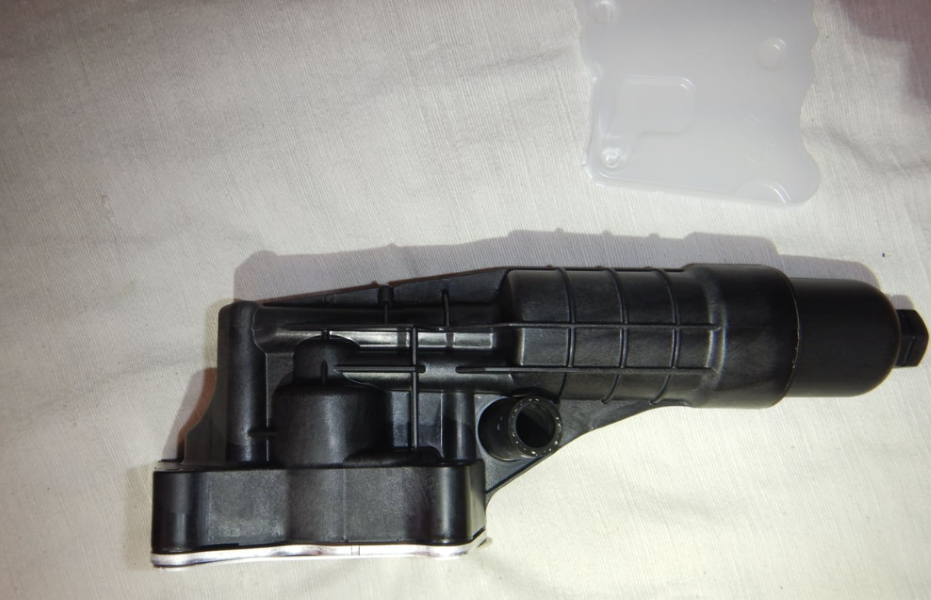
Oil Leak from Oil Filter Housing
Initial Inspection and Diagnosis
A certified Mercedes technician performed a visual inspection and quickly noticed oil residue around the oil filter housing. To confirm the exact location of the leak, the technician:
- – Cleaned the area thoroughly
- – Ran the engine
- – Monitored for fresh oil seepage
The leak clearly originated from the oil filter housing area.
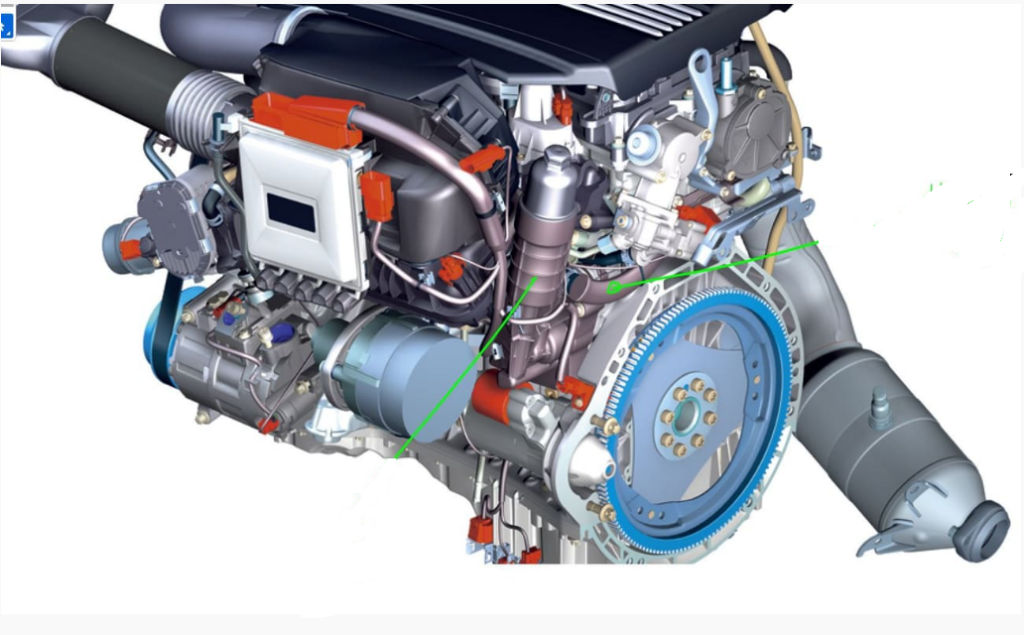
Identifying the Source of the Leak
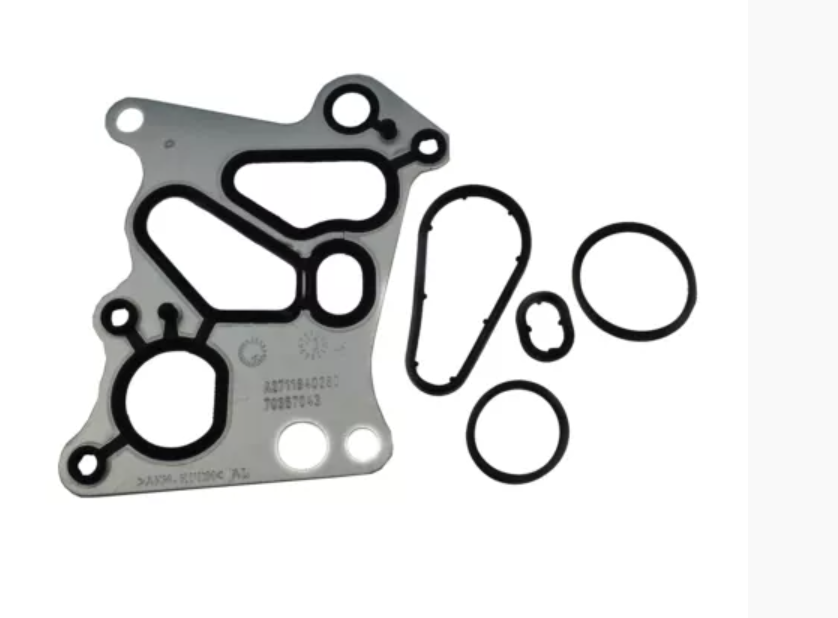
After cleaning the surrounding components and observing the engine while idling, the technician confirmed that the oil filter housing gasket had failed.
This gasket seals the oil filter to the housing, and when it wears out, it allows oil to escape at the sealing point.
This is one of the most common leak points on the M271 engine.

How to Replace the Oil Filter Housing Gasket
Tools and Materials Needed
- – New oil filter housing gasket
- – New oil filter (recommended)
- – Oil drain pan
- – Wrenches
- – Oil filter wrench
- – Clean rags
- – Engine oil
- – Torque wrench
Step-by-Step Repair
1. Safety Precautions
- – Allow engine to cool
- – Engage parking brake
- – Wear gloves and eye protection
2. Drain the Engine Oil
-> Position an oil drain pan under the car and remove the drain plug.
-> Let the oil fully drain to avoid spills during disassembly.
3. Remove the Oil Filter Housing
-> Use an oil filter wrench to remove the filter.
-> Detach the housing to access the gasket.
4. Inspect the Housing
-> Clean all surfaces and check for cracks or warping.
-> Only the gasket was worn in this case.
5. Replace the Gasket
-> Remove the old gasket and fit the new one securely.
-> Ensure proper seating to prevent future leaks.
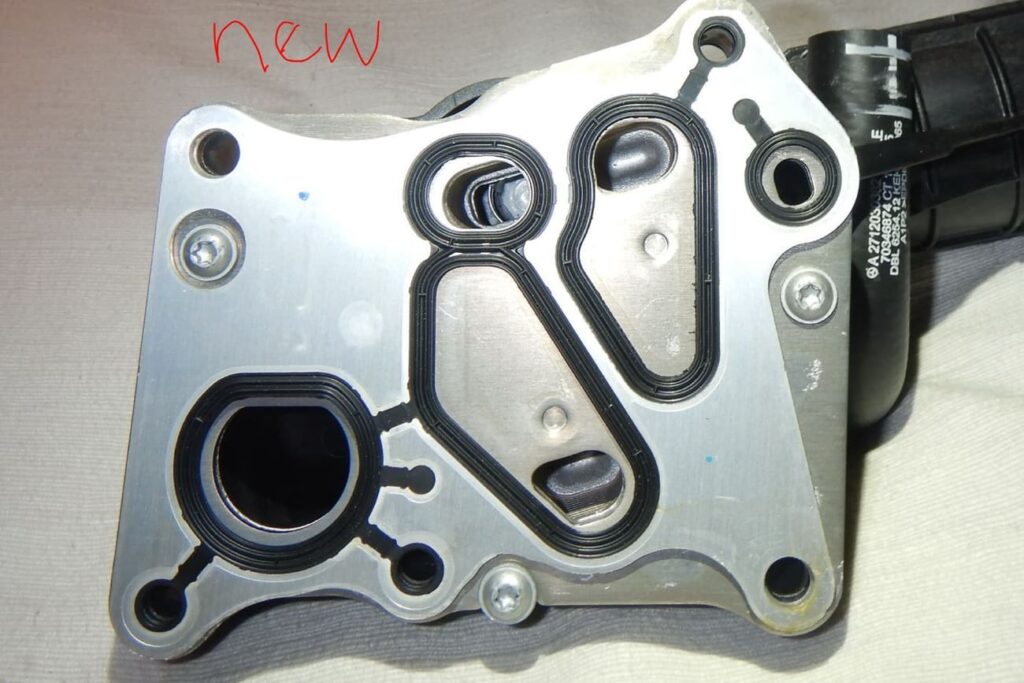
6. Reassemble the Oil Filter Housing
-> Reinstall the housing and a new oil filter.
-> Follow Mercedes torque specifications to avoid:
- – Over-tightening (damages gasket)
- – Under-tightening (causes leaks)
7. Refill the Engine Oil
Install the drain plug and refill the engine with the correct oil type and quantity.
Post-Repair Testing
The technician performed a complete verification to ensure the repair was successful.
1. Engine Idle Test
The engine was run for several minutes while inspecting the gasket area for leaks.
2. Road Test
A short test drive verified:
- – Normal oil pressure
- – No warning lights
- – No new leaks
3. Final Inspection
-> After the road test, the housing was rechecked.
-> No oil residue was detected.
Conclusion
The issue was caused by a worn oil filter housing gasket, which was successfully replaced.
The Mercedes C-Class M271 engine returned to normal operation with no further oil leaks.
Regular inspections and using high-quality gaskets are essential for preventing repeat failures.
If you observe oil spots or low oil levels, addressing the issue early saves you from costly engine damage.
Understanding Oil Filter Housing Leaks
The oil filter housing ensures that clean, filtered oil circulates through your engine. Any leak from this component can immediately reduce lubrication quality.
Common Causes of Oil Filter Housing Leaks
- 1. Worn-Out Gasket : The most frequent cause
- 2. Incorrect Installation : Misalignment can cause gaps
- 3. Cracks in Housing : Often due to overtightening
- 4. Improper Torque : Over or under tightening leads to gasket failure
Diagnosing an Oil Leak from This Area
You may be experiencing this issue if you notice:
- – Oil puddles under your vehicle
- – Low oil level readings
- – Oil pressure warning light
- – Burning smell if oil drips onto hot components
How to Fix an Oil Filter Housing Leak (General Guide)
Step-by-Step Summary
- 1. Cool the engine
- 2. Drain the oil
- 3. Remove the old filter
- 4. Clean and inspect the housing
- 5. Replace the gasket
- 6. Install the new filter
- 7. Refill with oil
- 8. Inspect for leaks
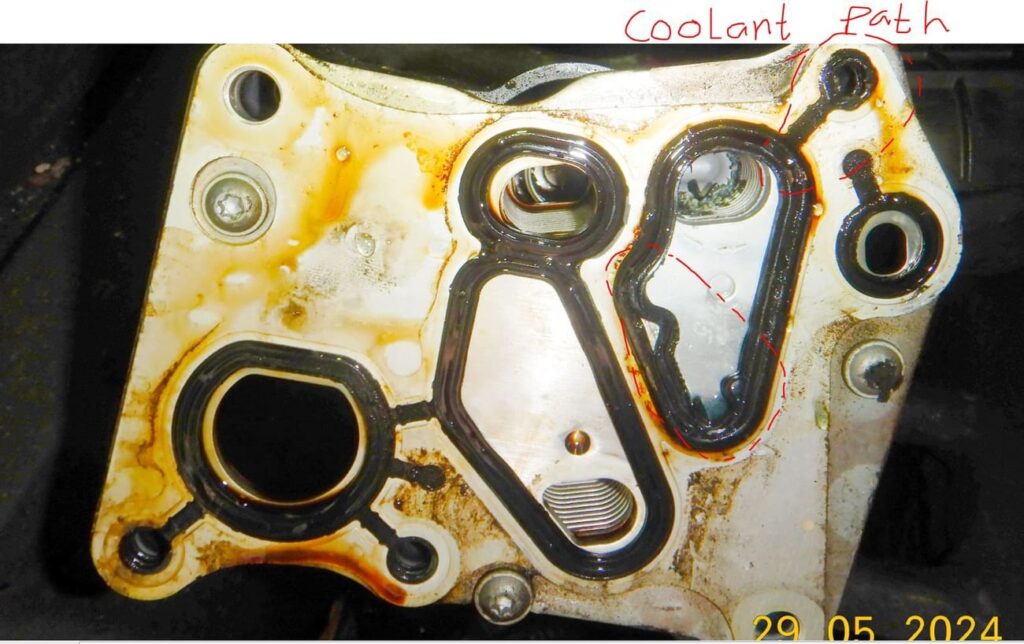
Related Issue: Oil in Coolant / Oil in Water
If you ever notice oil mixing with coolant, refer to this guide:
Oil in water engine : Case study & solution
— Salim, Mercedes Expert
Independent specialist in Mercedes-Benz diagnostics, CAN Bus analysis, troubleshooting case studies, and EV systems.