Table of Contents
Oil Mixing With Coolant in Mercedes-Benz CLA W117 (M270 Engine): Causes and Fixes
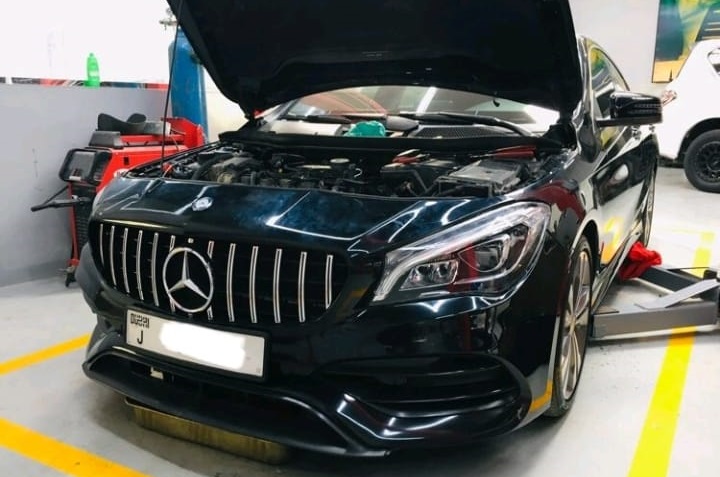
Vehicle: Mercedes-Benz CLA W117 with M270 Engine
Complaint: Oil Mixing With Coolant
Few problems are as concerning for Mercedes-Benz owners as oil mixing with coolant. This issue doesn’t just dirty the cooling system it can lead to engine overheating, reduced lubrication, and catastrophic engine failure if left unresolved.
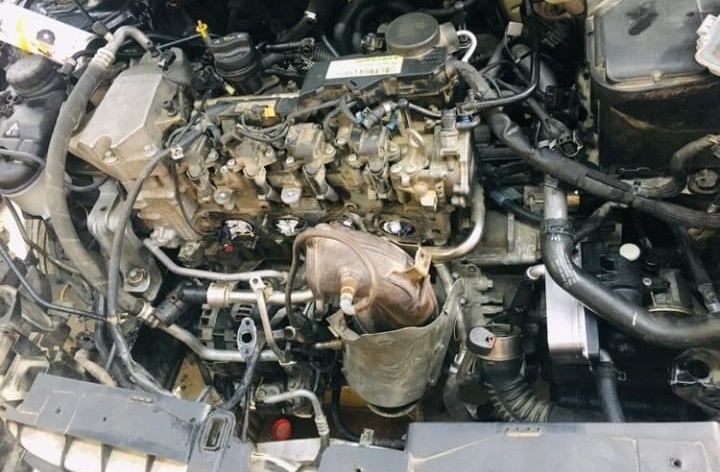
In this case study, a Mercedes-Benz CLA W117 with the M270 Engine arrived at our workshop with this exact complaint. The owner had already replaced the oil cooler twice, yet the issue persisted. This diagnostic journey reveals how we uncovered the true root cause and restored the cooling system back to health.
Symptoms of Oil Mixing With Coolant
The following warning signs were present on arrival:
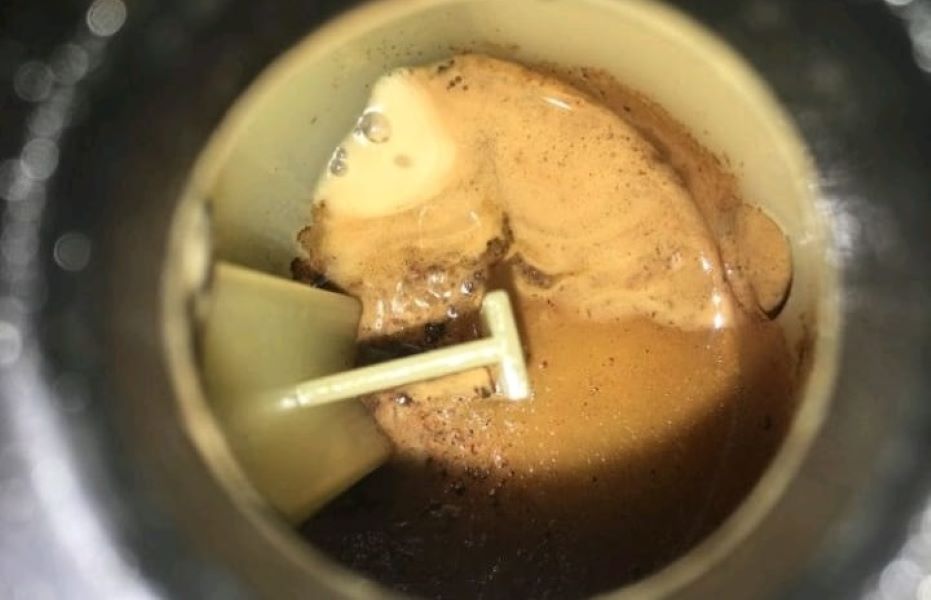
- – Milky coolant inside the reservoir tank (a classic sign of oil contamination).
- – Overheating incident reported by the customer prior to the leak.
- – High engine temperature readings in diagnostic data.
These symptoms suggested that the issue extended beyond the oil cooler itself.
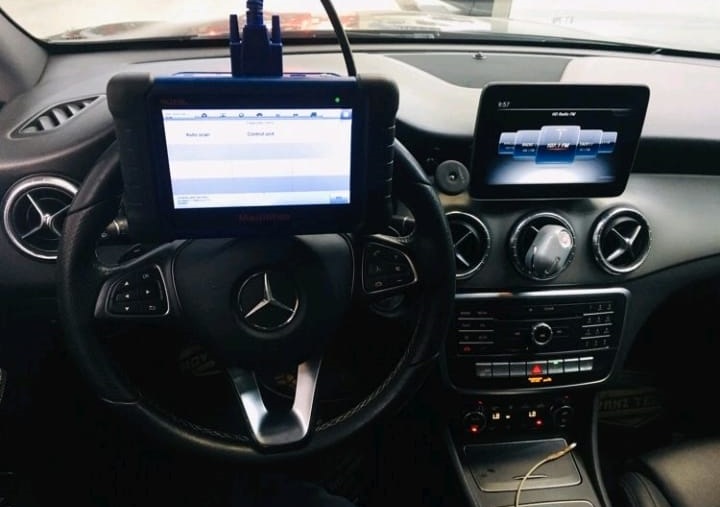
Step 1: Diagnosis
Visual Inspection
The coolant reservoir showed visible oil contamination, giving the coolant a cloudy, brownish texture. This confirmed the mixing of oil and coolant.
Cooling System Data
Engine temperature values were consistently above the normal range, pointing to a fault in the cooling regulation system.
Step 2: Identifying the Root Cause
After careful investigation, multiple components were found to be contributing to the issue:
| Component | Finding | Impact on System |
|---|---|---|
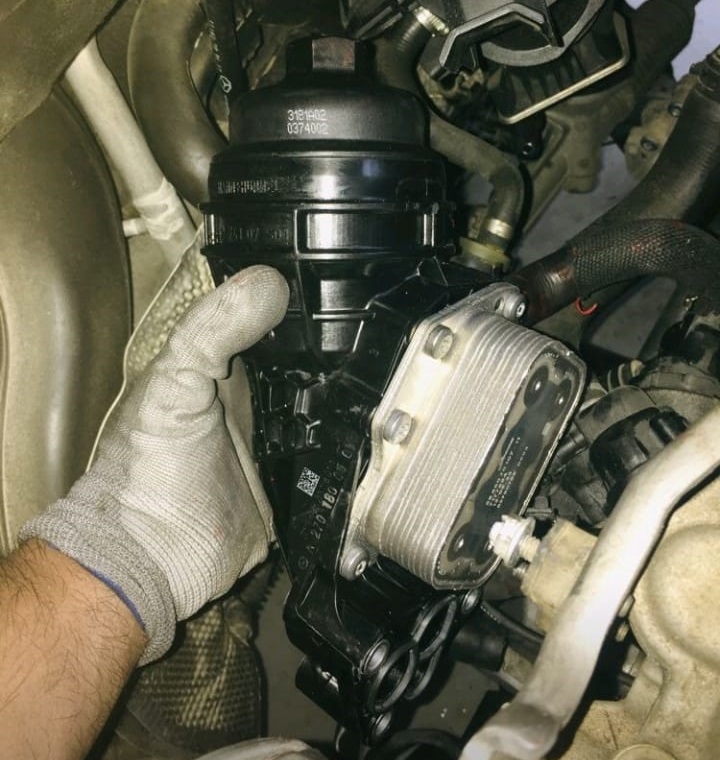
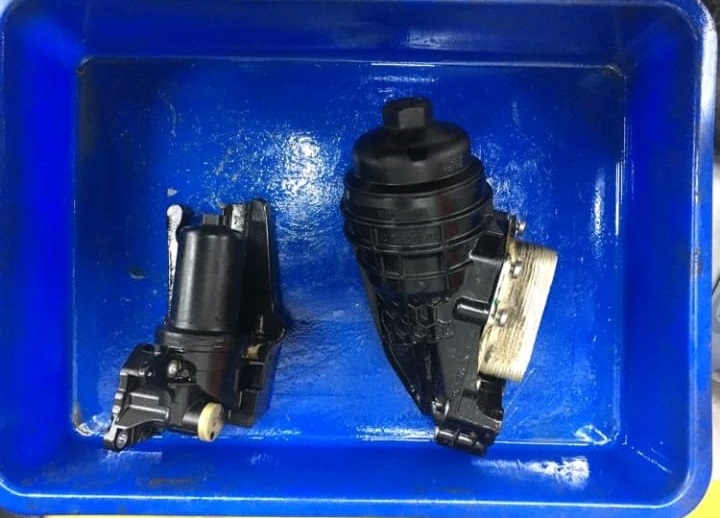
| Engine Oil Cooler | Internal leak detected | Allowed oil into coolant |
| Gearbox Oil Cooler | Also leaking | Secondary contamination source |
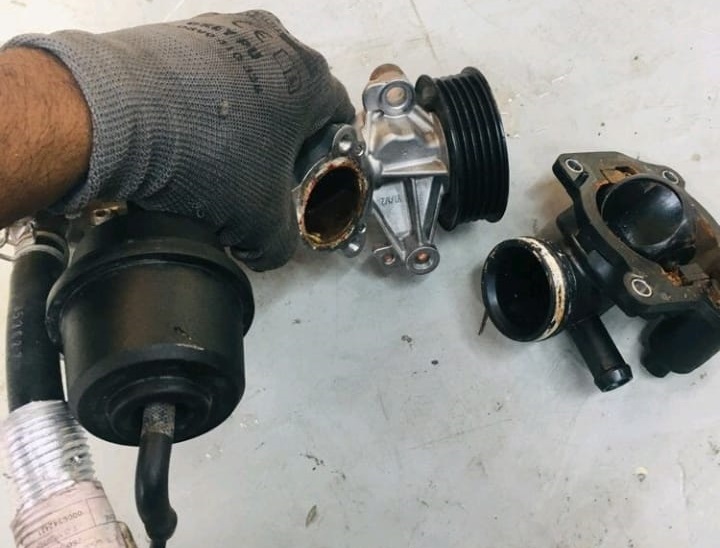
| Thermostat Valve | Diaphragm-type valve malfunction | Caused higher-than-normal temperatures |
| Coolant Pump | Not operating at full efficiency | Poor circulation |
| Water Pump Valves (M270-specific) | One valve stuck closed | Restricted coolant flow |
| Auxiliary Pump & Radiator | Checked for blockages | Needed cleaning but not replaced |
This multi-component failure explained why replacing only the oil cooler did not solve the problem.
Step 3: Repair Process
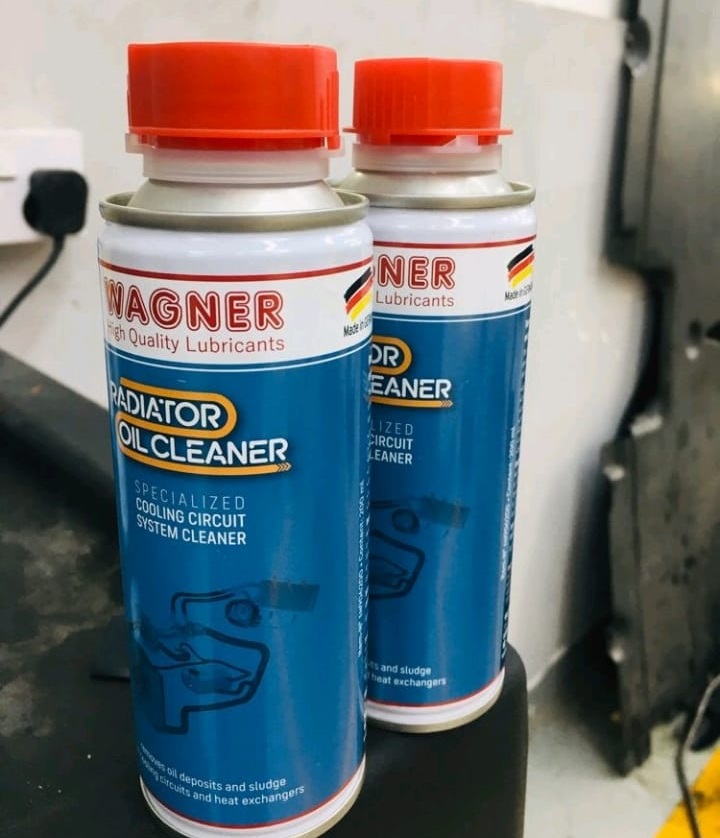
1. Flushing the Cooling System
- – The system was thoroughly flushed with a radiator oil cleaner.
- – Multiple flushes ensured all traces of contaminated coolant and oil residue were removed.
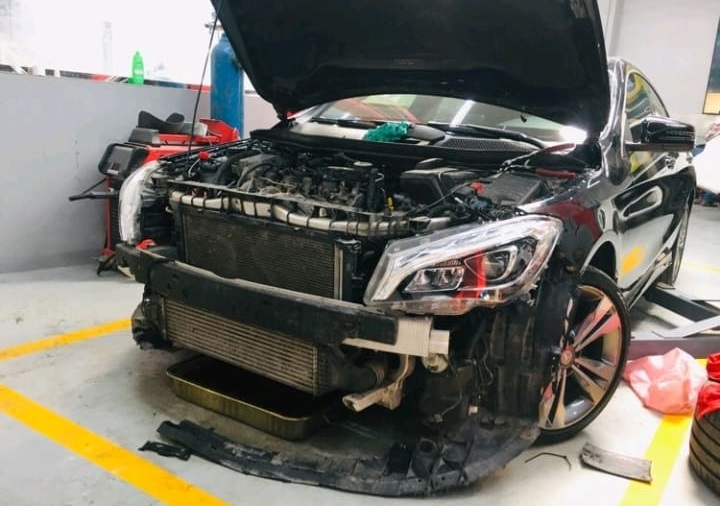
2. Replacing Defective Components
- – Installed a new thermostat valve, coolant pump, and OEM water pump valve.
- – Replaced the leaking engine and gearbox oil coolers.
3. Correct Coolant Refill
- – The system was refilled with Mercedes-Benz approved coolant, not ordinary water.
- – Using the correct coolant is essential to maintaining temperature stability and corrosion resistance.
4. Testing and Verification
- – Repeated pressure test confirmed no further leaks.
- – System bleeding removed trapped air.
- – Road test under different driving conditions verified that the engine temperature remained stable.
How to remove oil from coolant?
Removing oil from coolant is crucial to restore your vehicle’s cooling system to proper working order and prevent engine damage. Here’s a step-by-step guide on how to remove oil from coolant:
1. Identify the Source of the Leak
- – Inspect the Engine Components: Before attempting to remove oil from the coolant, it’s essential to identify and fix the root cause. Common sources include a blown head gasket, a faulty oil cooler, or a cracked engine block.
- – Repair the Leak: Address the underlying issue by repairing or replacing the defective component. This prevents further contamination of the coolant.
2. Drain the Contaminated Coolant
- – Locate the Radiator Drain Plug: Position a large drain pan under the radiator drain plug. Unscrew the plug and allow the contaminated coolant to drain completely.
- – Drain the Engine Block: Some vehicles have drain plugs on the engine block to ensure all the coolant is removed. Open these plugs if available.
3. Flush the Cooling System
- – Use a Coolant Flush Solution: Purchase a commercial coolant flush solution designed to remove oil and other contaminants. Fill the cooling system with the flush solution, following the manufacturer’s instructions.
- – Run the Engine: Start the engine and let it run for the time specified by the flush solution manufacturer, usually 10-15 minutes. This will circulate the solution throughout the cooling system, helping to break down and remove the oil.
- – Drain the Flush Solution: After running the engine, drain the flush solution as you did with the coolant.
4. Rinse with Distilled Water
- – Refill with Distilled Water: Fill the system with distilled water and run the engine again for a few minutes to rinse out any remaining contaminants.
- – Drain the System Again: Drain the distilled water from the system.
5. Repeat if Necessary
- – Check for Residual Oil: Inspect the drained water for signs of oil. If there’s still oil present, repeat the flushing and rinsing process until the drained water is clear.
6. Refill with Fresh Coolant
- – Choose the Correct Coolant: Once the system is clean, refill it with the manufacturer-recommended coolant. Using the proper coolant ensures optimal performance and protects the engine from overheating.
- – Bleed the Cooling System: To avoid air pockets, bleed the system according to your vehicle’s manual. This ensures the coolant circulates properly.
7. Dispose of Contaminated Fluids Properly
- – Follow Local Regulations: Dispose of the contaminated coolant and flush solution according to local environmental regulations, as these fluids can be hazardous.
8. Monitor the System
- – Check for Leaks: After refilling the system, monitor it for leaks and ensure the oil contamination does not recur. If you notice any issues, revisit the source of the leak and confirm the repair was effective.
Conclusion
Oil mixing with coolant in the Mercedes-Benz CLA W117 (M270 engine) is more than just an oil cooler failure it often points to deeper cooling system problems. In this case, defective coolers, a faulty thermostat valve, and a malfunctioning water pump valve all contributed.
By replacing the defective parts, performing a complete flush, and refilling with the correct coolant, we restored the cooling system and prevented further engine damage.
Takeaway: Regular maintenance and prompt action at the first sign of overheating or milky coolant can save thousands in repair costs and prolong the life of your Mercedes-Benz engine.
More Mercedes Cooling System Resources
Want to explore more causes, symptoms, and repair tips for coolant leaks, overheating, and contamination?
Learn more about Mercedes cooling system faults in our full Cooling System Guide.
ectively cleanse your cooling system and prevent further damage to your vehicle.
FAQ: Oil Mixing With Coolant in Mercedes
Q1: What causes oil to mix with coolant in Mercedes?
A faulty oil cooler, head gasket failure, or cracked engine components are the most common causes.
Q2: Can I drive if oil is in the coolant?
No. Driving with oil-contaminated coolant risks overheating and severe engine damage.
Q3: How do I know if coolant has oil in it?
Look for milky, frothy fluid in the coolant reservoir, overheating symptoms, and a sweet burnt smell.
Q4: How do you fix oil in coolant?
Identify and repair the source of the leak, flush the cooling system, and refill with fresh coolant.
— Salim, Mercedes Expert
Independent specialist in Mercedes-Benz diagnostics, CAN Bus analysis, troubleshooting case studies, and EV systems.