Table of Contents
Tire Pressure Light On? What It Means and How to Fix It
Maintaining the correct tire pressure is one of the simplest ways to protect your tires, improve fuel economy, and stay safe on the road. According to the National Highway Traffic Safety Administration (NHTSA), properly inflated tires can improve gas mileage by up to 3% and significantly reduce the risk of tire-related crashes.
If your tire pressure light has come on, or you just want to prevent it from happening, this guide will walk you through causes, risks, and step-by-step checks and adjustments.
For a full overview of essential maintenance tasks, see our hub:
Mercedes Maintenance and Service Guide
Why Correct Tire Pressure Matters
Driving with the wrong tire pressure affects:
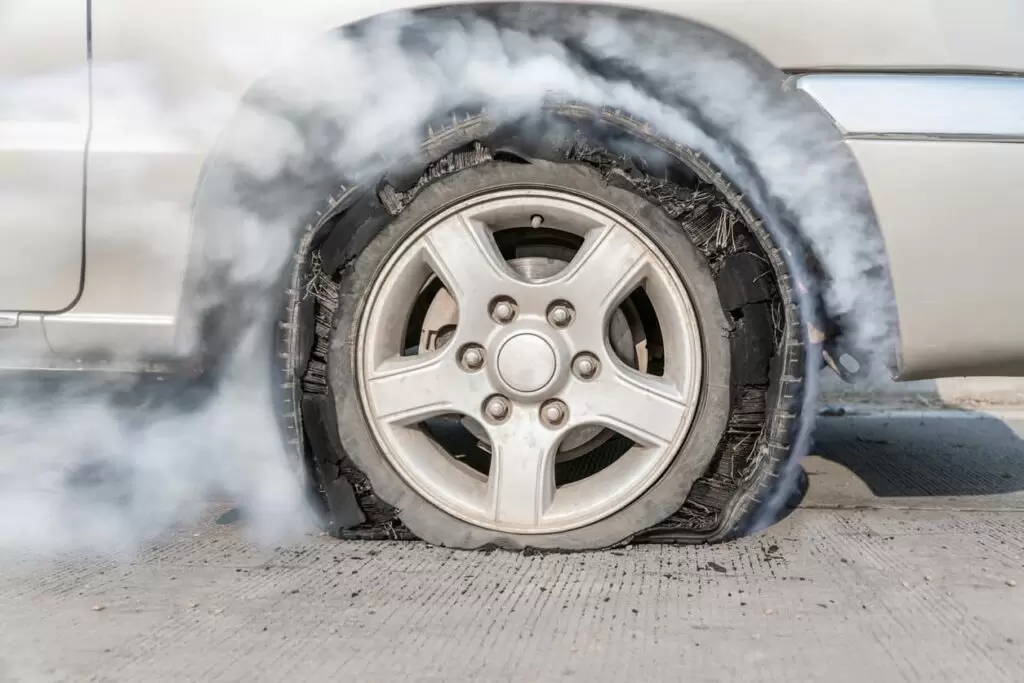
- – Safety : Under-inflated tires overheat and are more likely to suffer a blowout.
- – Handling & Braking : Low tire pressure reduces grip, increases stopping distance, and makes emergency maneuvers less stable.
- – Fuel Economy : More rolling resistance = more fuel consumption.
- – Tire Life : Incorrect pressure causes uneven and accelerated wear.
That’s why you shouldn’t wait for the tire pressure light to turn on. Make it a habit to check your tire pressure at least once a month and before long trips.
What Is the Tire Pressure Light?
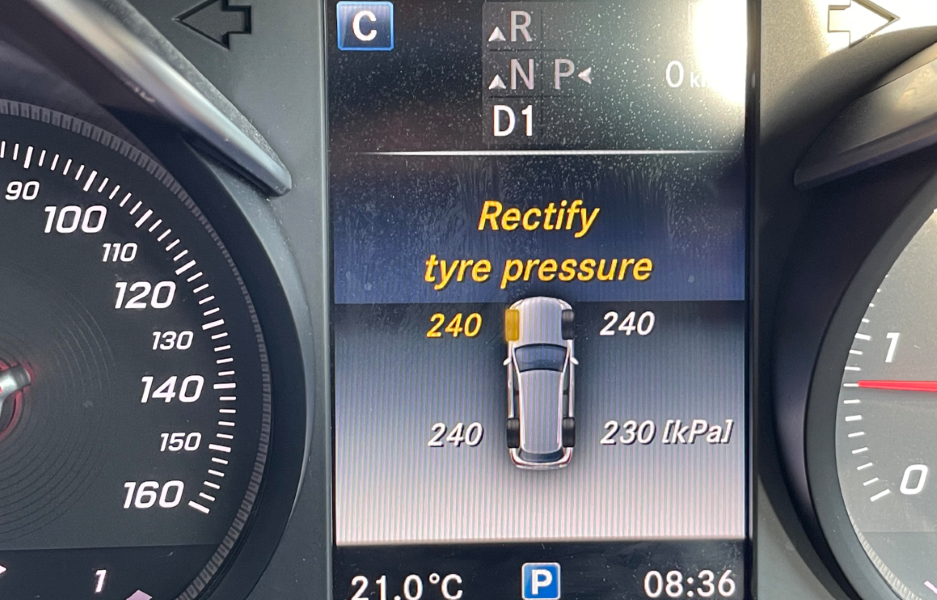
The tire pressure light is a warning symbol on the dashboard that illuminates when one or more tires are significantly below the recommended pressure.
This warning is part of the Tire Pressure Monitoring System (TPMS), designed to alert you before low pressure becomes dangerous.
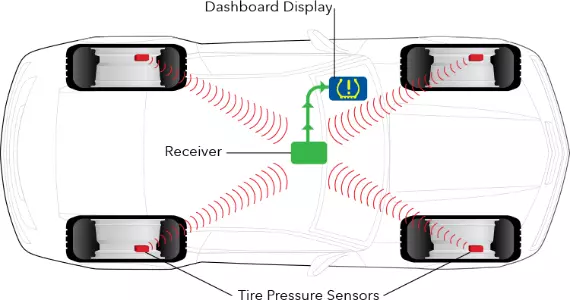
How TPMS Works
There are two main types of TPMS:
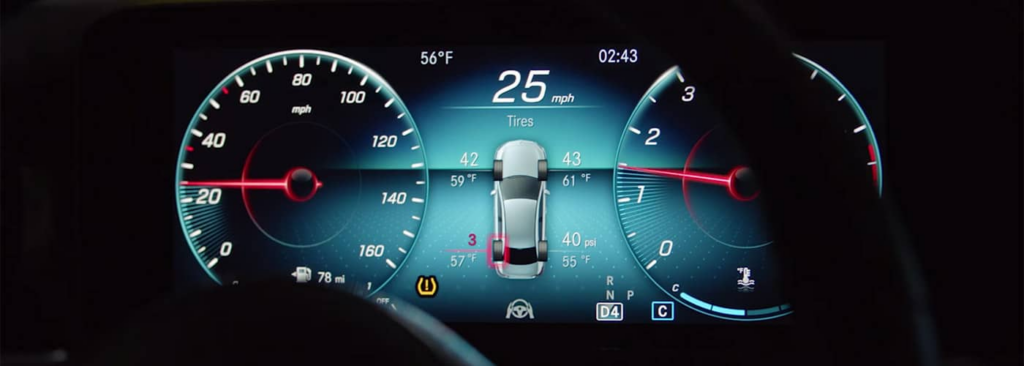
- 1. Direct TPMS
- – Each wheel has a pressure sensor inside the tire.
- – Sensors send exact pressure values to the control unit.
- – If pressure drops below a set threshold, the tire pressure light comes on.
- 2. Indirect TPMS
- – Uses ABS wheel speed sensors.
- – An under-inflated tire has a smaller rolling radius and spins faster.
- – The system detects this difference and triggers the warning.
Why Does the Tire Pressure Light Come On?
Common reasons include:
- – Natural Air Loss
Tires lose small amounts of air over time, even with no visible damage. - – Temperature Changes
- => Cold weather → air contracts → pressure drops.
- => Hot weather → air expands → pressure rises.
For every ~10°F (≈5–6°C) drop in temperature, tire pressure can fall by about 1–2 psi.
- – Punctures or Slow Leaks
Nails, screws, glass, or sharp debris can cause gradual leaks. - – Valve Stem Problems
Damaged, corroded, or loose valve stems/cores can let air escape. - – Faulty TPMS Sensor
The sensor battery may be dead, or the sensor itself may be damaged.
Whenever the light comes on, you should measure and adjust tire pressure as soon as possible. If the light remains on after correction, there might be a leak or sensor fault that needs professional diagnosis.
Main Causes of Low Tire Pressure
1. Natural Causes
- – Temperature Fluctuations
Cold mornings often trigger the tire pressure light even if tires were correctly inflated the day before.
→ Re-check and adjust pressure whenever seasons change.
2. Tire Leaks
- – Punctures in the Tread Area
Often cause slow leaks rather than immediate flats. - – Valve Stem Leaks
Cracked rubber, corroded metal stems, or loose valve cores can all leak air.
3. Poor Maintenance
- – Skipping Regular Checks
Tires naturally lose air over time; if you never check them, they can end up severely under-inflated. - – Ignoring Visible Damage
Cracks, bulges, or very worn tread can be signs of air loss or structural weakness.
Why Regular Checks Matter
- – Check pressure monthly and before long journeys.
- – Follow recommended values from the driver’s door sticker or owner’s manual.
- – Inspect tires and valve stems for cracks, cuts, and embedded objects.
Risks of Driving With Low Tire Pressure
Driving with the tire pressure light on is more than a small annoyance—it can be dangerous and expensive.
1. Safety Risks
- – Tire Blowouts
Under-inflated tires flex more and overheat, especially at highway speeds, increasing blowout risk. - – Poor Handling
The car feels “floaty” or slow to respond to steering input, especially in corners or emergency maneuvers. - – Longer Stopping Distances
Reduced contact and grip can noticeably increase braking distances.
2. Performance & Comfort Issues
- – Reduced Fuel Efficiency
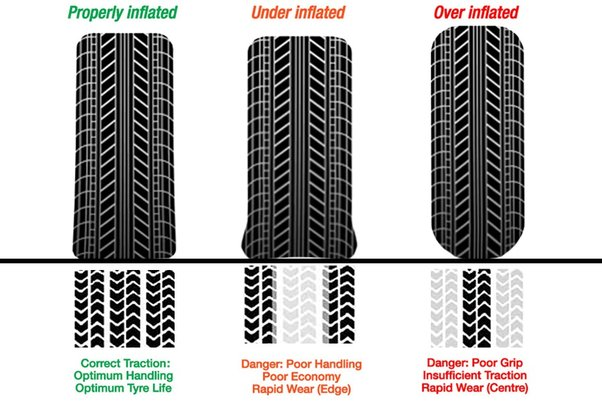
More rolling resistance means the engine must work harder → higher fuel consumption. - – Increased Tire Wear
Under-inflation wears shoulders; over-inflation wears the center of the tread.
3. Higher Running Costs
- – More Fuel Used Over Time
Even a small drop in fuel economy becomes expensive over thousands of kilometers. - – Frequent Tire Replacement
Premature wear means buying new tires sooner. - – Potential Suspension & Alignment Damage
Driving long-term on incorrect pressure stresses other components.
4. Environmental Impact
- – Higher CO₂ Emissions
More fuel burned = more emissions. Keeping tires correctly inflated is a simple way to reduce your car’s footprint.
How to Check and Adjust Tire Pressure (Step-by-Step)
Tools You Need
- – Tire pressure gauge (digital or analog)
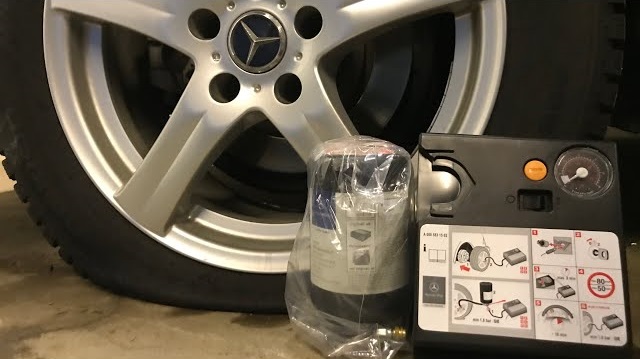
- – Air compressor (at home or fuel station)
- – Vehicle owner’s manual (or door-jamb sticker) for correct psi/bar values
1. How to Check Tire Pressure
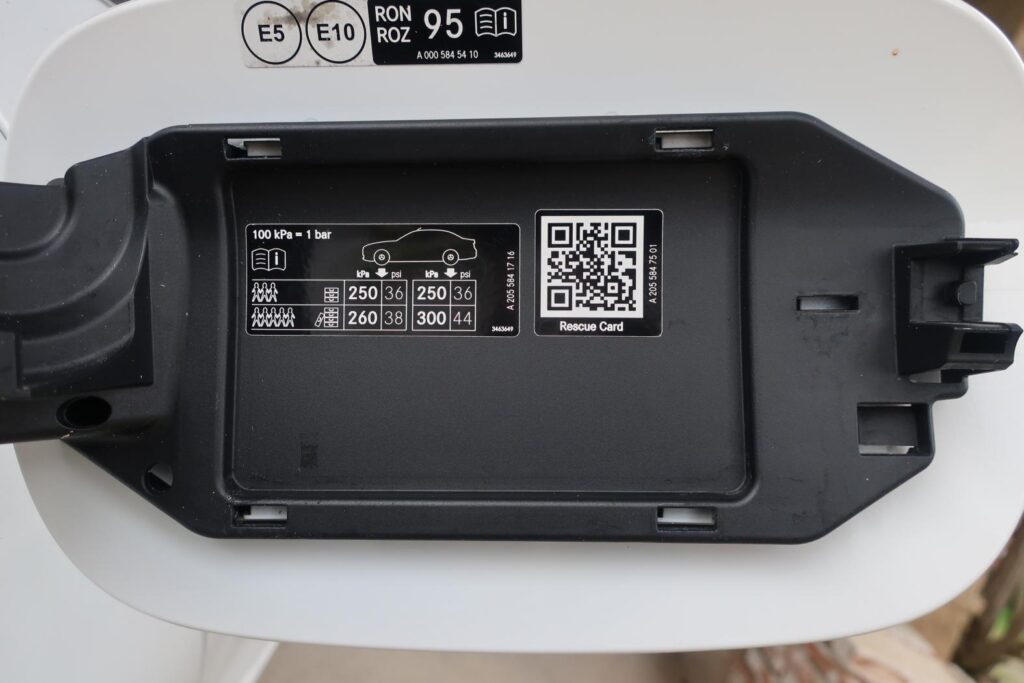
Step 1 : Find the Recommended Pressure
- – Look at the sticker inside the driver’s door or in the owner’s manual.
- – Values may differ front/rear and loaded/unloaded.
Step 2 : Check When Tires Are Cold
- – Ideally in the morning, before driving.
- – Driving heats the tires and can give a falsely high reading.
Step 3 : Measure Each Tire
- 1. Remove the valve cap.
- 2. Press the gauge firmly onto the valve stem.
- 3. Read and note the pressure.
- 4. Repeat for all four tires and the spare (if your car has one).
Compare each reading to the recommended value.
2. How to Adjust Tire Pressure
If the pressure is too low:
- 1. Attach the air hose to the valve stem.
- 2. Add air in short bursts.
- 3. Re-check pressure with the gauge.
- 4. Stop once you reach the recommended psi/bar.
If the pressure is too high:
- 1. Press the valve core gently (with a tool or the back of the gauge) to release air.
- 2. Check the pressure again.
- 3. Repeat until you reach the correct value.
Finalize:
- – Refit all valve caps to protect against dirt and moisture.
- – Recheck each tire once more to confirm the readings.
If the tire pressure light stays on after adjustment, drive a few kilometers; some systems need a short drive to update. If it still doesn’t go off, get the tires and TPMS checked professionally.
When to Seek Professional Help
You should visit a workshop or tire center if:
- – The tire pressure light keeps coming back.
- – You see visible damage, bulges, or sidewall cracks.
- – One tire loses pressure repeatedly, even after topping up.
- – You suspect a TPMS sensor fault (light on, but pressures are all correct).
A professional can:
- – Perform a leak test (tire bath, spray test).
- – Inspect and replace valve stems and repair punctures properly.
- – Diagnose and reprogram/replace faulty TPMS sensors.
— Salim, Mercedes Expert
Independent specialist in Mercedes-Benz diagnostics, CAN Bus analysis, troubleshooting case studies, and EV systems.