Table of Contents
Why is My Car Vibrating? A Case Study on the Mercedes-Benz S560
“Why is my car vibrating?” is a question many drivers ask when unusual noises or shaking disturb their daily drive. For luxury sedans like the Mercedes-Benz S560, even subtle vibrations can be unsettling. These vehicles are engineered for quiet precision, so any abnormal vibration immediately feels out of place.
In this case study, we’ll examine a real-world Mercedes-Benz S560 vibration problem, trace it through the diagnostic process, and detail the repair steps that restored the vehicle’s hallmark smoothness.

Customer Complaint: Abnormal Vibrations in the Cabin
The customer reported persistent vibrations when shifting the car into Drive (D) and Reverse (R). The shaking was transmitted through the steering wheel, seats, and overall cabin.
This was more than just a comfort issue. In a high-performance, luxury-oriented vehicle like the S560, vibrations often point to underlying suspension, drivetrain, or engine support problems that require immediate attention.
Diagnostic Process: Tracking Down the Source
Step 1: Functional Check
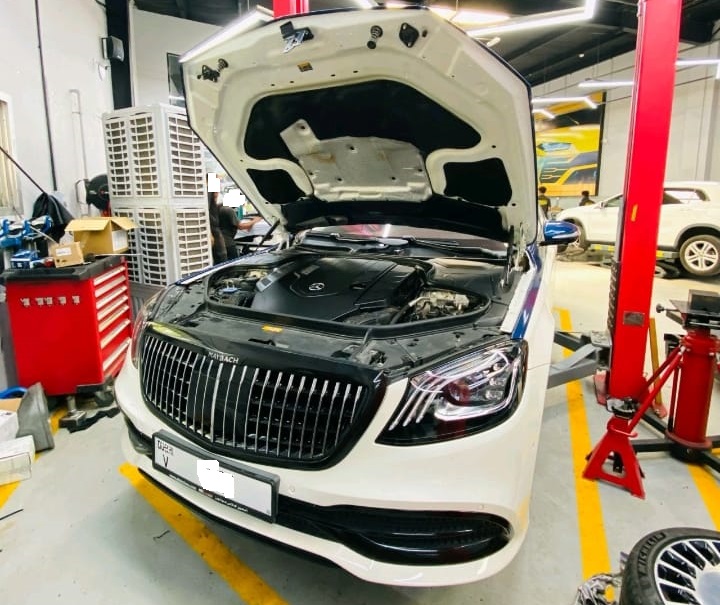
Technicians first observed the vehicle’s behavior when shifting between gears D and R. The vibrations were visible and could be felt strongly inside the cabin.
Step 2: Visual Inspection
The inspection revealed abnormal engine movement during gear engagement. This indicated that the problem was not with the transmission itself, but with the system designed to stabilize and cushion the engine.
Step 3: Identifying the Culprit : Faulty Engine Mounts
Further checks confirmed that the engine mounts were worn out.
- – What are engine mounts?
Engine mounts secure the engine to the subframe while dampening engine vibrations. - – What happens when they fail?
When mounts deteriorate, they lose their ability to isolate vibrations, causing them to transfer directly into the cabin.
For a luxury car like the S560, even small vibrations are magnified, making this a critical issue to resolve.
Repair Process: Replacing the Engine Mounts
Step 1: Preparation and Safety
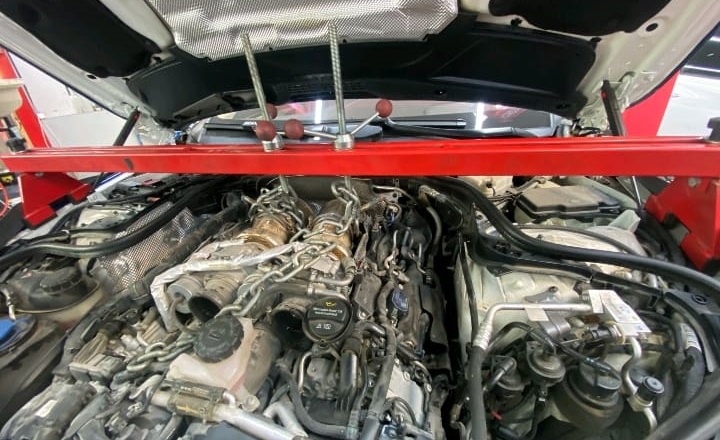
The vehicle was lifted securely. A supporting jack was placed beneath the engine to hold it steady during the repair.
Step 2: Removing the Subframe
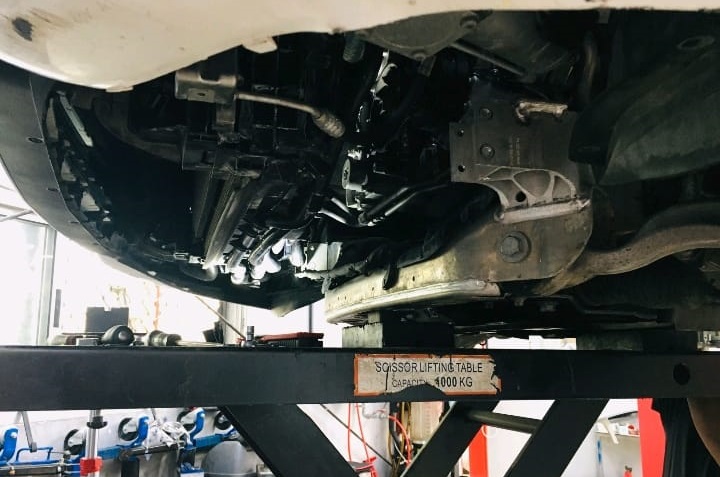
The front subframe had to be detached to access the engine mounts. This step required precision, as the subframe supports multiple critical components.
Step 3: Extracting the Faulty Mounts
The old engine mounts were removed and showed visible cracks and wear, confirming they were no longer functioning properly.

Step 4: Installing New Engine Mounts
New OEM-grade engine mounts were installed. These parts are designed to absorb engine movement and restore the car’s smoothness.


Step 5: Reinstalling the Subframe
The subframe was carefully refitted, with all bolts torqued to Mercedes-Benz specifications to ensure alignment and safety.
Step 6: Testing and Verification
After reassembly, the S560 was tested:
- – Engine movement was stable.
- – Vibrations in Drive and Reverse were eliminated.
- – A road test confirmed that the vehicle returned to its signature quiet and refined ride.
Symptom –> Cause –> Fix Table
| Symptom | Likely Cause | Repair Solution |
|---|---|---|
| Vibrations in D or R | Worn engine mounts | Replace engine mounts with OEM parts |
| Excessive engine movement | Broken or loose subframe connections | Inspect subframe and torque bolts correctly |
| Cabin shake on idle | Degraded shock-absorbing mounts | Replace mounts and recheck torque |
| Persistent rattling after repair | Secondary suspension component wear | Inspect bushings, tie rods, or control arms |
| Vibration at higher speeds | Wheel balance or driveline issue | Perform wheel balancing or driveshaft inspection |
Explore More Mercedes Suspension Issues
For a deeper dive into suspension problems such as uneven ride height, AIRMATIC malfunctions, “Stop Vehicle Too Low” warnings, and vibration faults, visit our hub: Mercedes-Benz Suspension Issues – Symptoms, Causes & Fixes. There you’ll find grouped case studies, step-by-step diagnostics, symptom, cause, fix tables, and preventive tips to keep your Mercedes riding smoothly.
Why Prompt Repair Matters
Ignoring vibration issues can lead to:
- – Increased wear on drivetrain components.
- – Cabin discomfort that undermines the luxury driving experience.
- – Safety risks, as unstable engine mounts can affect steering and braking.
- – Higher costs, since unresolved vibration often spreads damage to other parts.
FAQs: Why is My Car Vibrating
Q: Why does my Mercedes vibrate when shifting gears?
A: The most common cause is worn engine mounts, but it could also be linked to transmission mounts or misalignment in the subframe.
Q: How long do engine mounts last?
A: Typically, 70,000–100,000 miles, depending on driving conditions. Frequent stop-and-go traffic or aggressive driving can shorten their lifespan.
Q: Can I keep driving with bad engine mounts?
A: It’s not recommended. Bad mounts worsen vibrations, stress the drivetrain, and reduce safety. Prompt replacement is the best solution.
Q: How much does it cost to replace engine mounts in a Mercedes S560?
A: On average:
- – Parts: $500–$700
- – Labor: $600–$1,000 (due to subframe removal)
Total costs usually fall between $1,100 and $1,700, depending on location.
Q: How do I know if engine mounts are failing?
A: Signs include:
- – Strong vibrations in the cabin.
- – Clunking noises when shifting gears.
- – Engine visibly shifting when accelerating or braking.
Conclusion
The case of the Mercedes-Benz S560 vibration issue shows how small faults can disrupt a luxury vehicle’s defining trait its smooth ride.
- – Diagnosis revealed faulty engine mounts.
- – Replacement and recalibration restored stability and eliminated vibrations.
- – The customer’s vehicle was returned with its hallmark refinement intact.
For S-Class owners, the lesson is simple: don’t ignore vibrations. They are often the first sign of failing mounts or suspension components. By acting quickly, you can protect your car’s performance, comfort, and safety.
Author
Written by Mercedes Expert
With years of hands-on experience diagnosing and repairing Mercedes-Benz systems, he brings technical depth and practical case studies to help car owners, technicians, and enthusiasts troubleshoot complex automotive issues. His work focuses on clear repair guides, OEM-level procedures, and knowledge-sharing to empower both professionals and drivers.
Last Updated: September 2025


Leave a Reply