Table of Contents
Case Study: Resolving Wiper Blades Not Working on a Mercedes CLA W118
When the wiper system stops working on a modern Mercedes especially a model like the CLA W118 it’s more than an inconvenience. The entire system is electronically managed through the Front SAM, the wiper motor control unit, and a series of protected wiring circuits. A failure in any part of this chain can stop the wipers completely.
This detailed case study explains how a CLA W118 with non-functional wiper blades was diagnosed and repaired using a structured, professional diagnostic approach.
Customer Complaint: Wiper Blades Not Working at All
The owner of a Mercedes-Benz CLA W118 reported that:
- – The wiper blades did not activate on any speed setting
- – There was no sound coming from the wiper mechanism
- – Visibility during rain became unsafe, forcing the driver to stop using the vehicle
The customer attempted basic troubleshooting:
-> Checking the wiper blades
-> Inspecting the fuses
-> Restarting the vehicle
But the issue persisted, leading them to seek professional help.

Professional Diagnostic Intervention
1. Arrival at the Dealership & System Overview
At the Mercedes dealership, a certified technician began by gathering information:
- – When did the failure occur?
- – Was it intermittent or sudden?
- – Any recent repairs (bodywork, windshield replacement, battery disconnection)?
These details matter because wiper failures can be caused by anything from moisture intrusion to an incorrectly fitted linkage.
2. Using Professional Diagnostic Tools
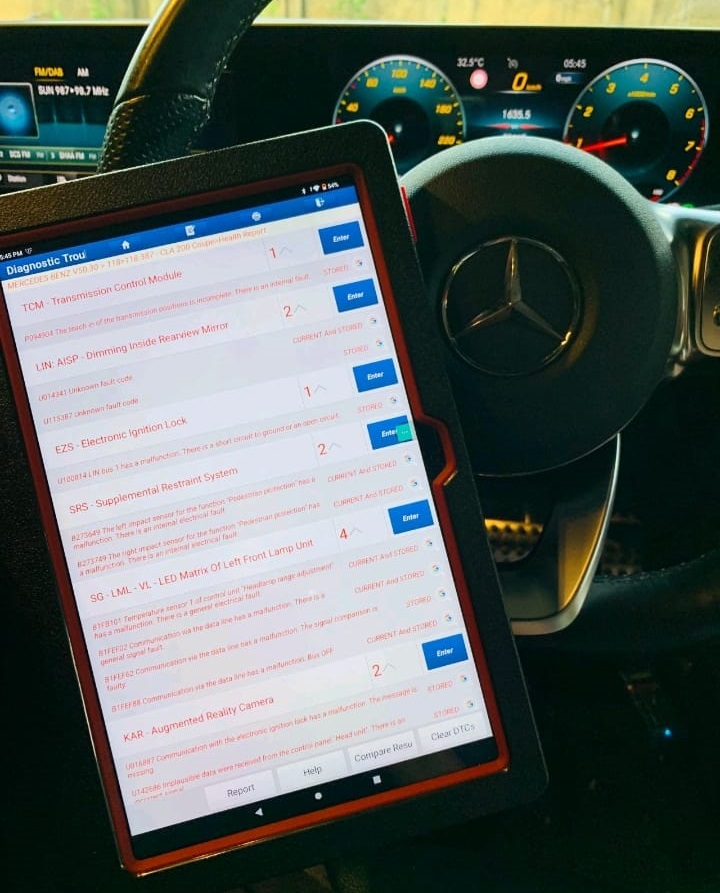
Diagnostic Tool Used: LAUNCH Scanner
The technician connected a LAUNCH diagnostic scanner, capable of reading:
- – Front SAM (Signal Acquisition Module) data
- – Wiper motor status
- – LIN/CAN communication
- – Voltage readings at the wiper motor
No communication or implausible values indicated a deeper electrical issue beyond just a blown fuse.
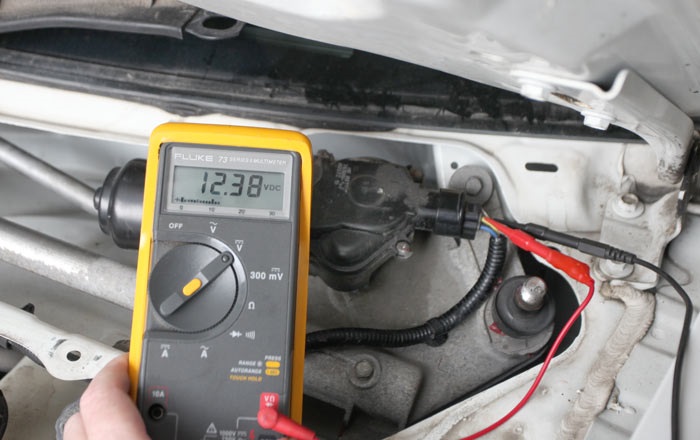
Multimeter Electrical Testing
A multimeter was then used to:
- – Check power feed to the wiper motor
- – Test ground integrity
- – Verify continuity in the wiper circuit
- – Confirm voltage drops under load
3. Wiring Diagram Analysis
A complete wiring diagram for the CLA W118 wiper system was pulled from Mercedes documentation.
The diagram helped the technician:
- – Trace the power feed line from the Front SAM to the wiper motor
- – Inspect intermediate connectors
- – Verify whether a LIN-controlled or relay-controlled motor system was used
- – Identify potential choke points where wiring damage may occur
Localizing the circuit allowed the technician to avoid unnecessary disassembly and focus directly on the wiper assembly area.
4. Identifying the Root Cause
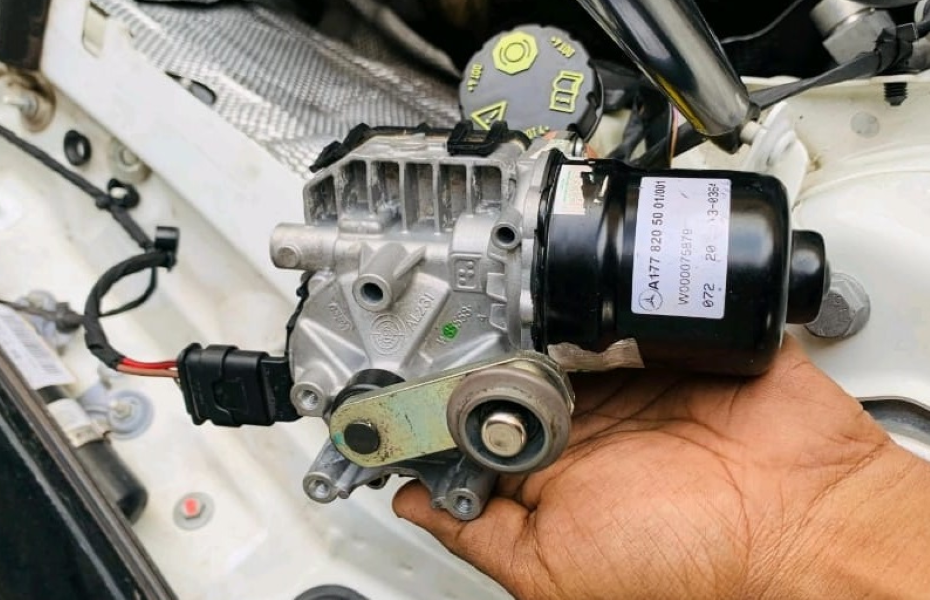
After following the wiring diagram and checking each segment of the circuit, the technician removed the wiper mechanism cover and inspected the wiper motor itself.
Root Cause Found: Faulty Wiper Motor
The motor showed:
- – No response
- – No internal continuity on key pins
- – No movement when directly energized
Even though the SAM sent correct voltage output, the motor did not react.
This confirmed a complete internal motor failure.
Common causes for motor failure in CLA models include:
- – Water intrusion
- – Worn internal brushes
- – Burned-out motor driver electronics
- – Mechanical seizure of the linkage causing motor overload

5. The Repair: Replacing the Faulty Wiper Motor
Step 1 : Disconnect the Battery
Prevents accidental motor activation and protects electronic modules.
Step 2 : Remove the Wiper Arms
The technician marked their position before removal to ensure correct reinstallation.
Step 3 : Access the Wiper Linkage and Motor
The cowl panel was removed, allowing access to the complete wiper assembly.
Step 4 : Remove the Old Motor
- – Unbolt linkage connections
- – Unplug electrical connectors
- – Extract the old motor
Step 5 : Install the New Wiper Motor
- – Connect electrical plugs
- – Secure the motor with factory torque specifications
- – Reattach the linkage
- – Reinstall the wiper arms in their calibrated position

Step 6 : System Testing
After reconnecting the battery:
-> Wipers activated at all speeds
-> Intermittent mode worked correctly
-> No abnormal noises or mechanical resistance
-> Rain-sensing mode responded properly
The repair was confirmed successful.
6. Final Checks & Delivery
The technician performed additional steps:
- – Checked the Front SAM for any stored error codes
- – Applied lubrication to the linkage joints
- – Verified windshield coverage and blade alignment
- – Ensured no water leaks into the cowl area
The customer left with fully functional wipers and a clear explanation of the failure.
How to Change Car Wiper Blades
1. Determine Blade Size
Check your owner’s manual or measure existing blades.
2. Lift the Wiper Arm
Position it perpendicular to the windshield.
3. Remove the Old Blade
- – Locate release tab
- – Slide blade downward
- – Detach from hook or clip
4. Install the New Blade
- – Slide into the arm until you hear a click
- – Ensure secure engagement
5. Test the Blades
Verify smooth, streak-free operation.
For additional troubleshooting and maintenance guidance, visit the:
Mercedes Electrical Problems: Fix SAM, ECU & CAN Bus Faults
— Salim, Mercedes Expert
Independent specialist in Mercedes-Benz diagnostics, CAN Bus analysis, troubleshooting case studies, and EV systems.