Table of Contents
Hissing Sound When Braking in a Mercedes C-Class: A Case Study
Hearing a hissing sound when braking can be alarming for any driver. It often indicates a problem in the braking system from worn components to vacuum leaks that can affect both safety and comfort.
This real-world case study of a Mercedes-Benz C-Class (2010) explores how a qualified Mercedes technician identified and resolved a hissing noise when braking, using a systematic diagnostic approach that restored quiet, confident braking.
For a complete overview of how Mercedes brake, ABS, ESP, and Brake Assist systems interact, explore our full guide: Mercedes Brake System Problems: ABS, ESP & Brake Assist Guide
Customer Complaint
The customer reported a persistent hissing noise when pressing the brake pedal, especially during low-speed stops. Concerned about potential brake failure, they brought the vehicle to an authorized Mercedes-Benz dealership for inspection.
Initial Assessment
The technician began with a test drive to confirm the complaint.
During light and moderate braking, a consistent hiss was heard from the front of the vehicle, matching pedal application.
This noise is typically linked to:
- – Air escaping from a vacuum-assisted brake booster, or
- – Excessive friction between worn brake components.
The next step was to perform a full visual inspection.
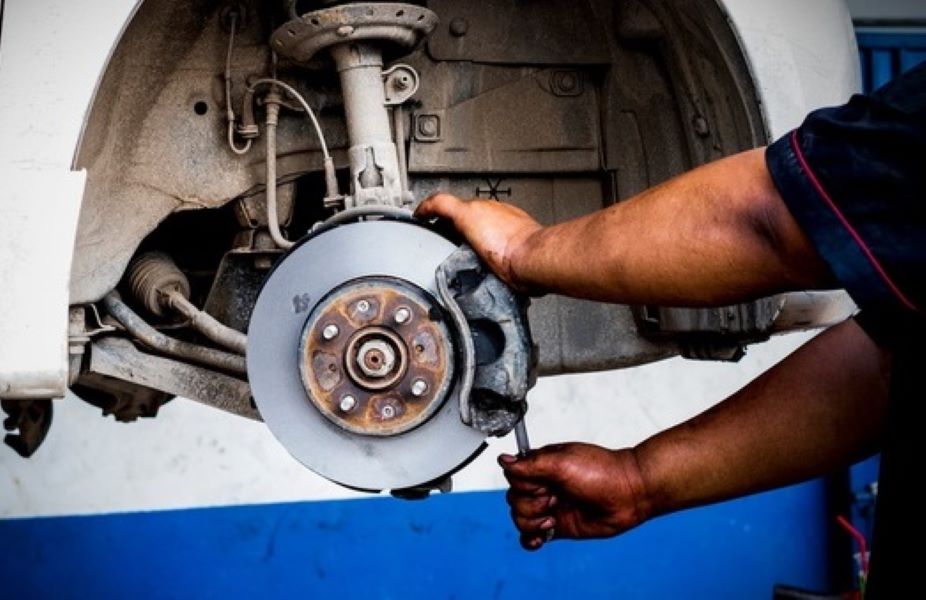
Step 1: Visual Inspection of Brake Components
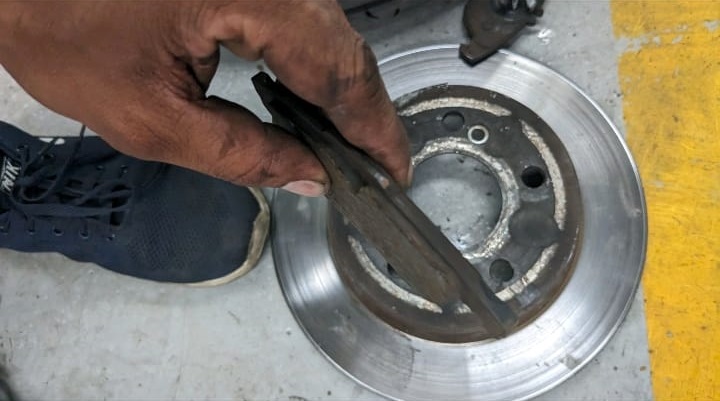
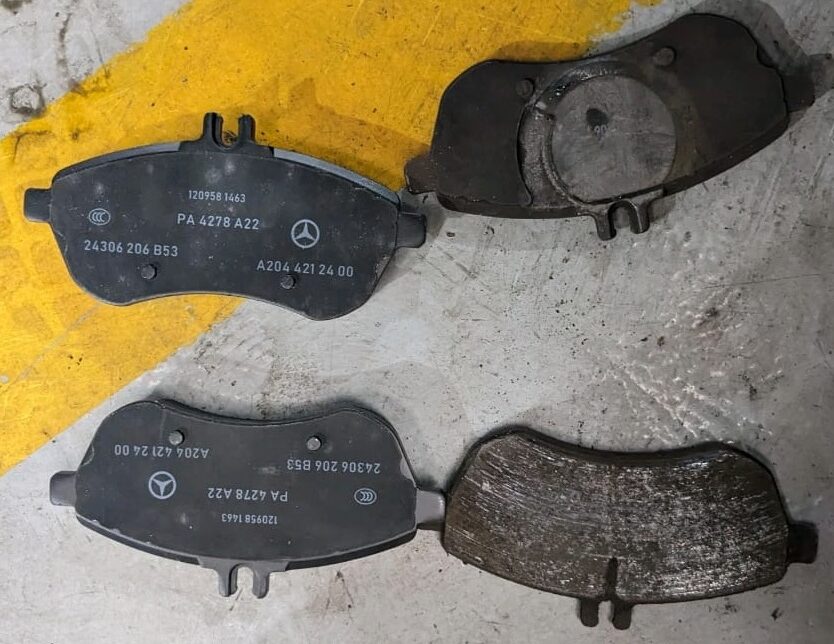
Brake Pads
The front brake pads were severely worn, showing minimal friction material remaining.
Thin pads can create a metallic scraping or hissing sound when pressed against the rotor, especially at low speed.
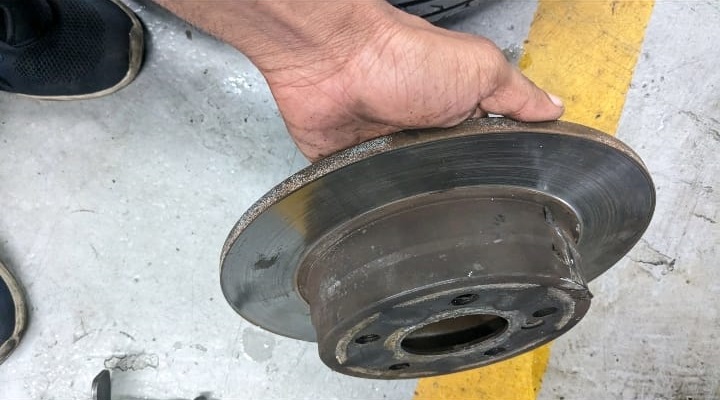
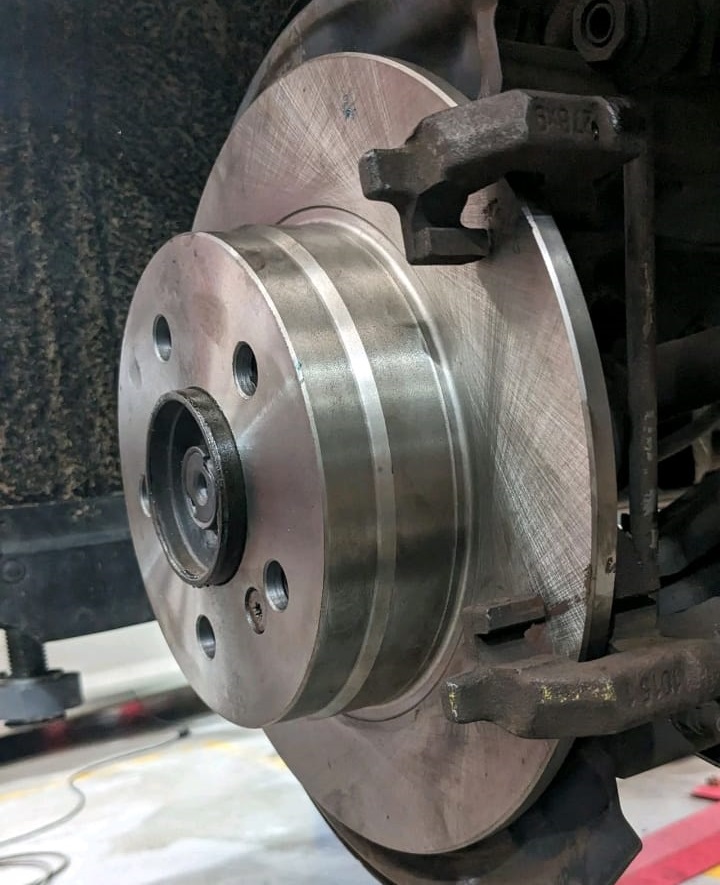
Brake Rotors
Both front rotors showed deep scoring and glazing, which prevents proper pad contact and produces a high pitched hiss during braking.
Replacement was recommended.
Brake Booster and Vacuum Lines
A vacuum test confirmed the brake booster was functioning correctly no leaks or cracks in the vacuum hose or check valve were detected.
This ruled out air leaks as the noise source.
Brake Fluid
The fluid level and condition were checked within specifications, no contamination found.
Conclusion: The hissing sound was mechanical, caused by worn pads and rotors, not a vacuum or hydraulic fault.
Step 2: Repair Procedure
1. Removing Worn Components
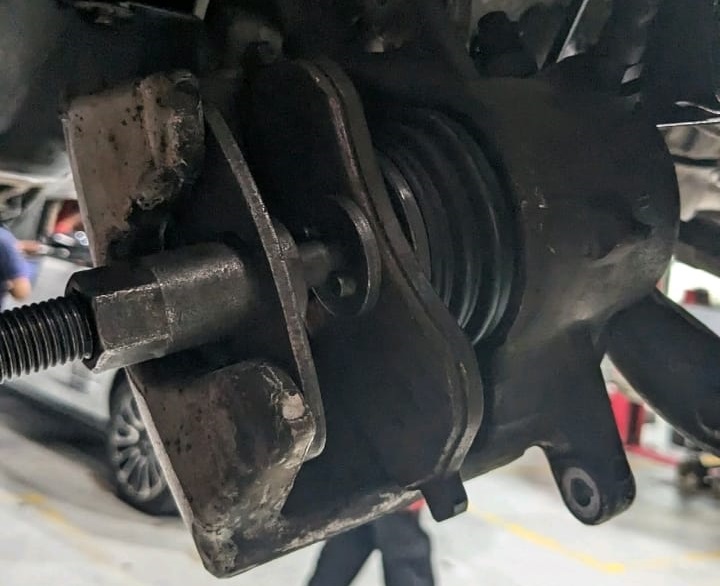
- – Vehicle lifted and wheels removed.
- – Calipers unbolted and suspended with support hooks to avoid tension on brake lines.
- – Worn brake pads and rotors removed.

2. Installing New Components
- – New OEM Mercedes brake pads installed for proper fit and noise reduction.
- – New brake rotors fitted and torqued to manufacturer specs.
- – Caliper guide pins cleaned and lubricated to ensure smooth operation.
3. Bleeding and Final Checks
- – Brake fluid level confirmed.
- – System bled to remove trapped air.
- – Caliper and pad alignment checked for even pressure distribution.
Step 3: Test Drive and Verification
The technician performed multiple test drives:
- – Gradual braking at various speeds.
- – Emergency stop test.
- – Idle pedal test (checking for vacuum consistency).
Result: No hissing sound detected.
Pedal feel was firm and responsive, confirming the braking system was fully restored.
Root Cause Summary
| Component | Condition | Impact |
|---|---|---|
| Brake Pads | Severely worn | Friction noise & heat buildup |
| Brake Rotors | Scored & glazed | Hissing and reduced braking efficiency |
| Brake Booster | Normal | No vacuum leak detected |
| Vacuum Hoses | Intact | No air leak or hiss from booster |
Additional Technical Procedures
Brake Rotor Replacement Steps
To change the brake rotor, follow the next steps;
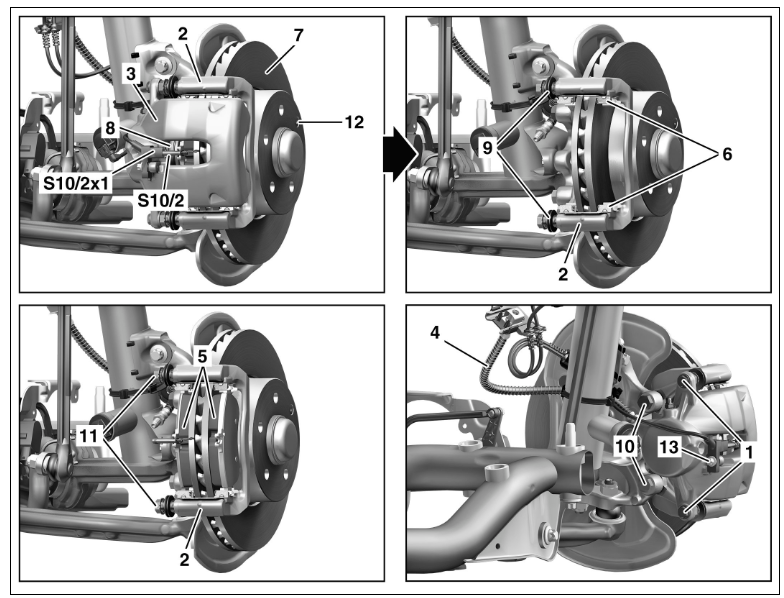
Step 1 : Deposit and set down
- 1. Remove the brake caliper (3) with the brake pads (5) and secure them to the vehicle with the cables connected without applying stress.
- 2. Detach the screw (1) from the upper sliding pin (11) and remove the brake caliper (3).
- 3. Detach and remove the screws (10) from the brake caliper bracket (2).
- 4. Detach the locking screw (12) from the wheel hub and remove the brake disc (7).
Step 2 : Clean
- 5. Clean the contact surfaces and the fitting areas of the brake disc (7).
- 6. Lightly grease the fitting areas of the brake disc (7).
- 7. Perform the installation in reverse order.
Brake Pad Replacement Steps
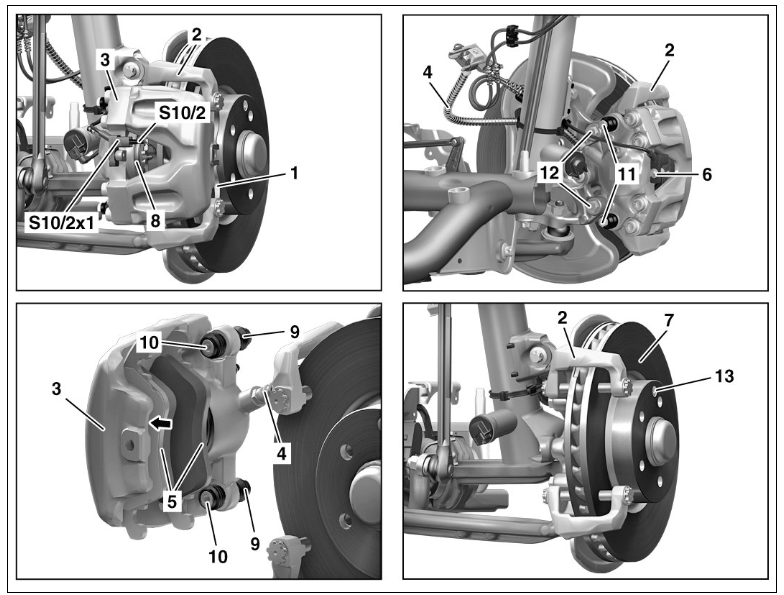
To check and replace the brake pads, follow the next steps;
Step 1 : Deposit and set down
- 1. Unscrew the cap of the brake fluid reservoir and extract a small amount of brake fluid.
- 2. Remove the corresponding front wheel.
- 3. Unscrew the screws (11) from the brake caliper bracket (2).
- 4. Remove the brake caliper (3).
- 5. Remove the brake pads (5).
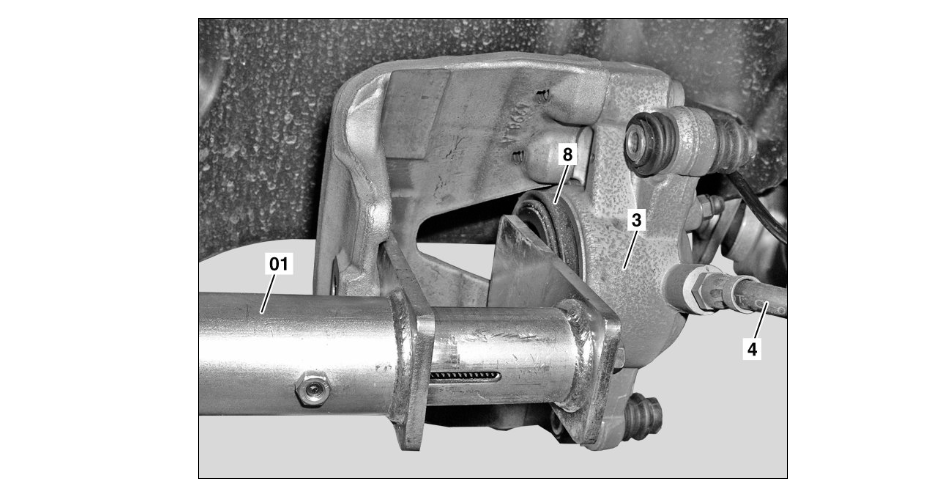
- 6. Push back the brake piston using the resetting tool (01).
- 7. Extract the wear sensor from the right front brake pads (S10/2) from the pad wear sensor holder of the brake pads (5).
Step 2 : Checking
- 8. Check the wear and condition of the brake pads (5).
- 9. Check the wear and condition of the brake discs (7).
- 10. Check the condition and proper installation of the sealing boot (9), as well as the proper mobility of the guide sleeve (10).
Step 3 : Cleaning
- 11. Clean the contact surfaces of the brake pads (5) on the brake caliper (3) and on the brake caliper bracket (2).
- 12. Perform the installation in the reverse order.
How Long Do Brake Pads Last?
Brake pads generally last 30,000–70,000 miles, depending on driving conditions and pad material.
| Driving Condition | Expected Lifespan |
|---|---|
| City stop-and-go traffic | 30,000–40,000 miles |
| Highway / steady driving | 60,000–70,000 miles |
| Aggressive driving | <30,000 miles |
Tip: Replace pads before they reach 3 mm thickness to avoid damaging rotors.
Preventive Maintenance Tips
- 1. Regular Brake Inspections: Check pads and rotors every 10,000 miles.
- 2. Use OEM Parts: They reduce noise and fit precisely.
- 3. Replace Pads & Rotors Together: Prevent uneven wear and noise.
- 4. Maintain Brake Fluid: Replace every 2 years (DOT 4+).
- 5. Avoid Aggressive Braking: Smooth, steady braking extends component life.
For a full DIY brake service guide, see: Service B on Mercedes C-Class: Steps & Tips
Conclusion
This Mercedes C-Class case study shows how a simple hissing sound when braking was traced to worn brake pads and rotors not a vacuum leak.
Replacing the components restored smooth, quiet braking and eliminated the noise completely.
Ignoring these early warning signs could have led to rotor damage and reduced stopping power.
For complete guides on diagnosing and fixing ABS, ESP, and Brake Assist issues, visit:
Mercedes Brake System Problems: ABS, ESP & Brake Assist Guide
— Salim, Mercedes Expert
Independent specialist in Mercedes-Benz diagnostics, CAN Bus analysis, troubleshooting case studies, and EV systems.