Table of Contents
AIRMATIC Problems Mercedes: Case Study in a Mercedes-Benz C350e W205
The Mercedes-Benz C-Class W205 C350e combines hybrid efficiency with luxury and comfort. A key contributor to this comfort is the AIRMATIC suspension system, which automatically adjusts ride height and damping to ensure smooth performance. However, like any advanced system, it can develop faults over time.
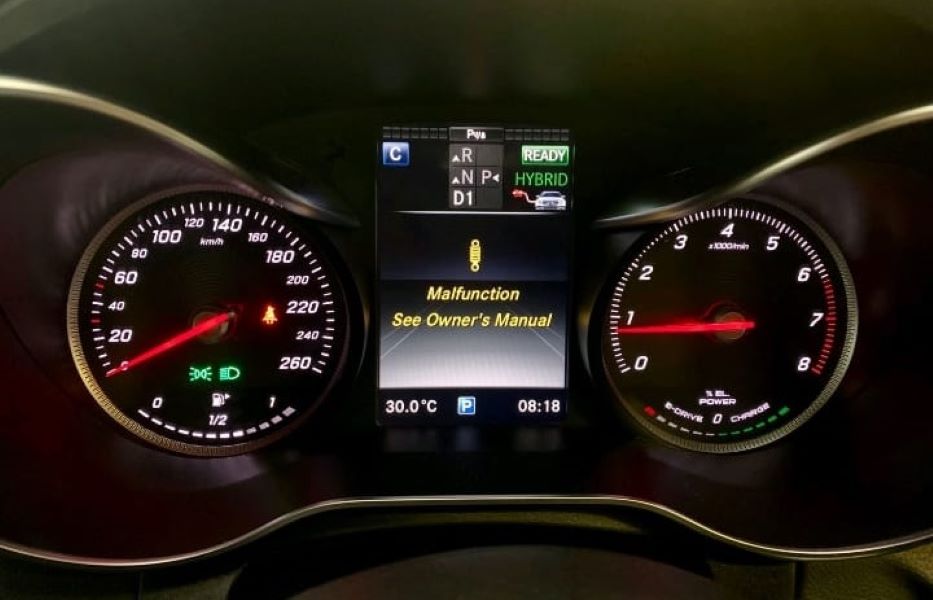
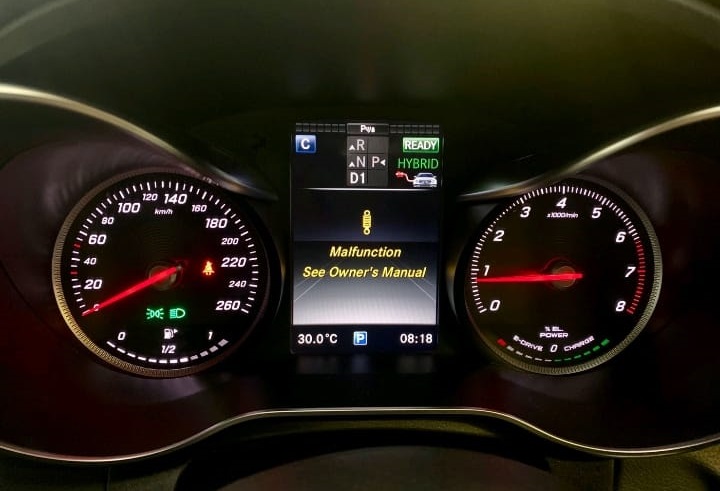
One of the most frequent issues owners face is the dreaded “AIRMATIC malfunction” warning on the cluster. This case study explores a real-world scenario of AIRMATIC problems in a Mercedes C350e W205, including the diagnosis, repair process, and final resolution.
Customer Complaint
- Vehicle: Mercedes-Benz C350e W205
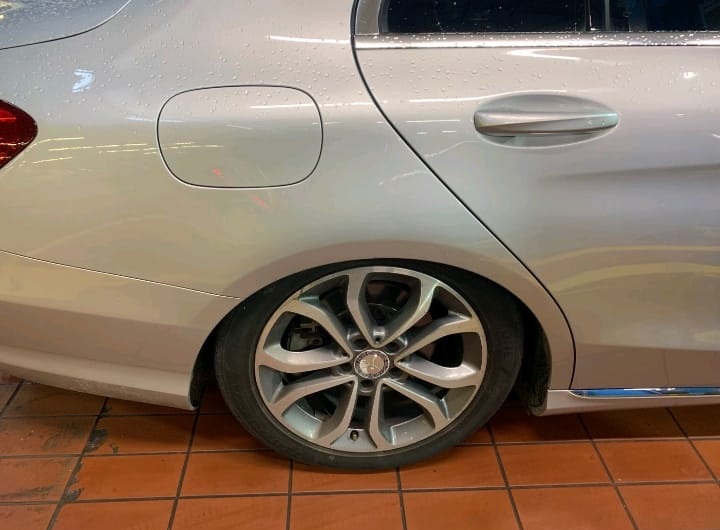
- Symptom: AIRMATIC malfunction message on the instrument cluster, with the rear suspension sitting too low.
This not only compromised ride quality but also raised safety concerns, as uneven suspension can affect stability, braking, and tire wear.
Step-by-Step Diagnostic Process
Step 1: Complaint Verification
Upon arrival, the rear of the vehicle was visibly lower than the front. The dashboard displayed the AIRMATIC malfunction warning. Both observations confirmed the customer’s concern.
Step 2: Xentry Diagnostic Scan
Using the Xentry diagnostic tool (Mercedes-Benz OEM software), fault codes were retrieved from the AIRMATIC control unit.
- – Faults indicated problems with the rear ride height level.
- – This suggested air pressure loss or faulty component control.
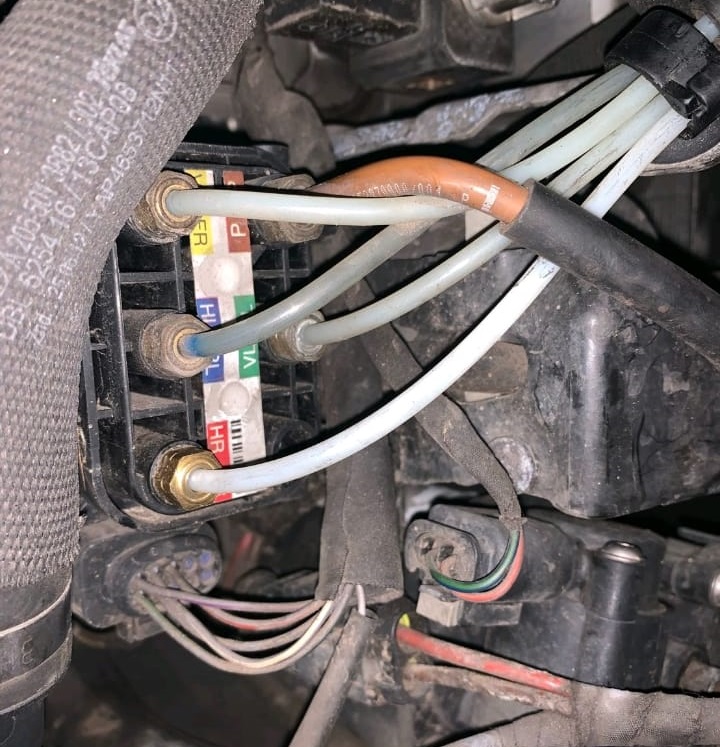
Step 3: Physical Inspection
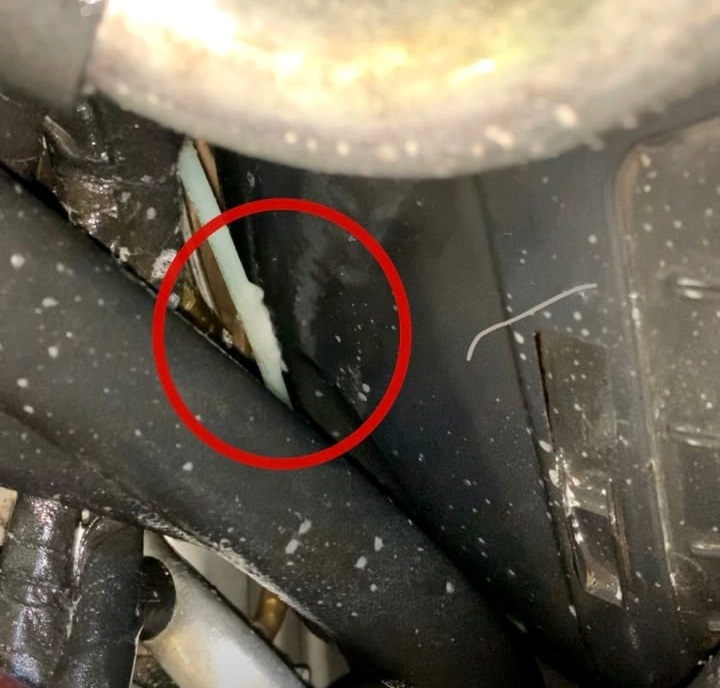
A thorough inspection of the air lines, struts, and valve block was carried out. During this process, the root cause was discovered:
- – A damaged AIRMATIC line between the valve block and the rear right strut.
- – The damaged line caused continuous air leakage, preventing the system from maintaining proper ride height.
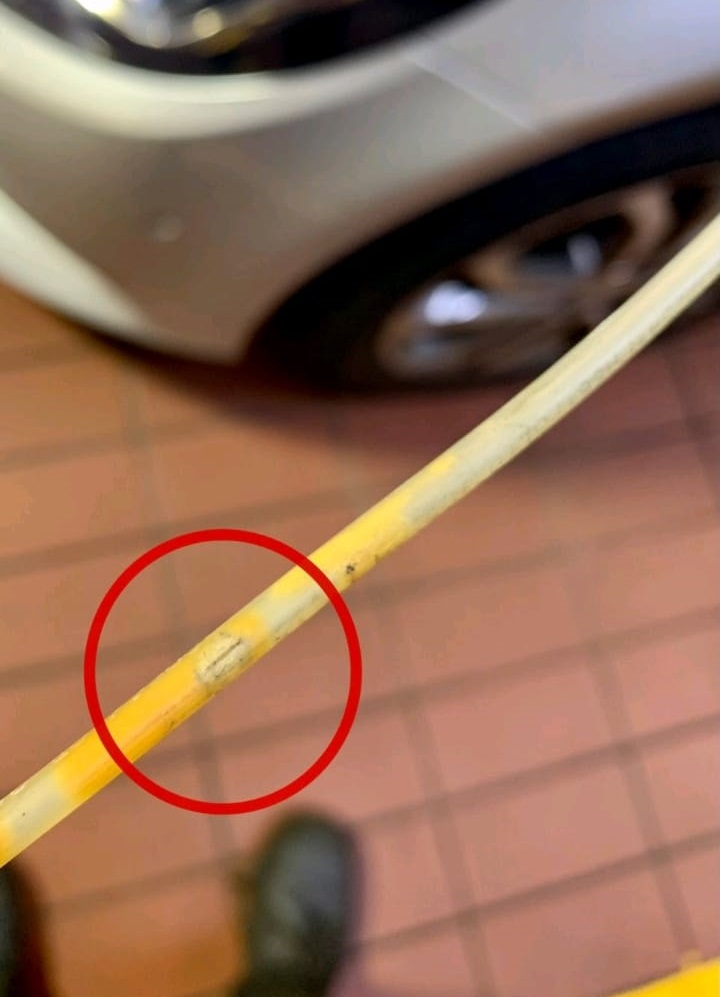
Step 4: Confirming the Diagnosis
- – Leak confirmed by applying soapy water around the damaged area (bubbles formed as air escaped).
- – No other leaks were detected in the system.
Final Diagnosis: Damaged AIRMATIC line caused the malfunction and sagging rear suspension.
Repair Process
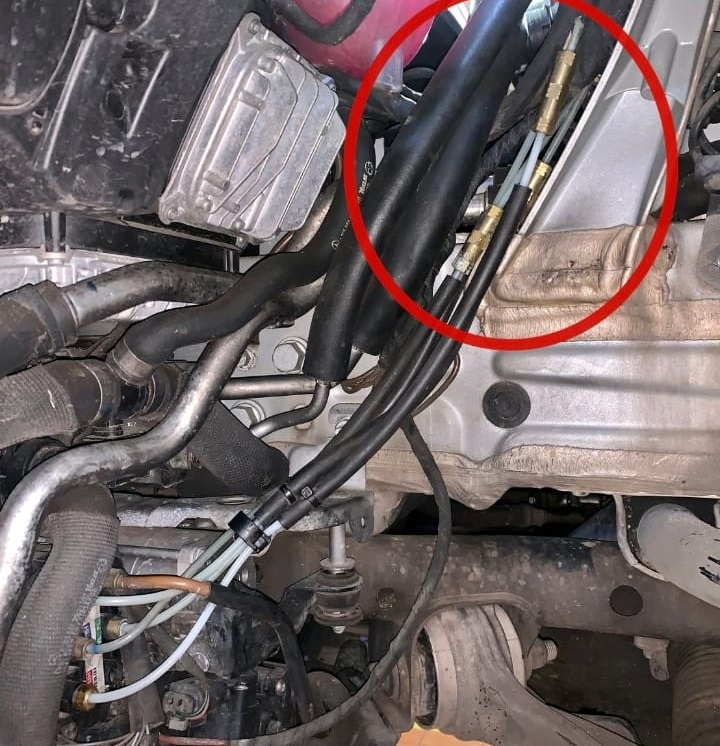
Step 1: Replacement of Damaged Line
- – Ordered and fitted a new OEM AIRMATIC line.
- – Ensured secure connections at the valve block and strut.
- – Checked for leaks after installation none detected.
Step 2: Calibration
- – Performed manual calibration using Xentry.
- – Adjusted rear suspension height to manufacturer specifications.
- – Cleared all stored fault codes.
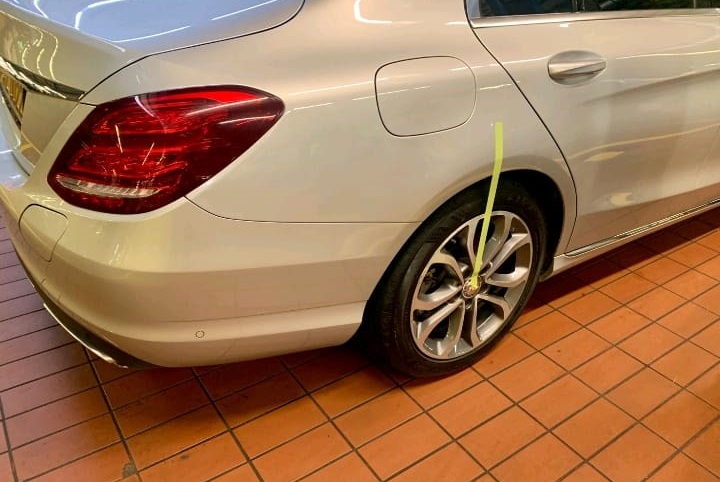
Step 3: Quality Check
- – Conducted a test drive to evaluate system performance.
- – Suspension adjusted normally; no warnings reappeared.
- – Vehicle maintained stable and correct ride height.
Symptom –> Cause –> Fix Table
| Symptom | Likely Cause | Repair Solution |
|---|---|---|
| Rear of car too low | Damaged or leaking AIRMATIC line | Replace faulty line, recalibrate system |
| “AIRMATIC malfunction” warning | Air pressure loss / faulty control | Diagnose with Xentry, repair or replace defective part |
| Vehicle bounces excessively | Leaking struts or failed dampers | Replace struts, recalibrate suspension |
| Compressor running constantly | Leak in system or failing compressor | Repair leaks, replace compressor if defective |
| Vehicle leaning to one side | Air leak in one corner | Inspect air springs, valve block, and lines |
Explore More Mercedes Suspension Issues
For a deeper dive into suspension problems such as uneven ride height, AIRMATIC malfunctions, “Stop Vehicle Too Low” warnings, and vibration faults, visit our hub: Mercedes-Benz Suspension Issues – Symptoms, Causes & Fixes. There you’ll find grouped case studies, step-by-step diagnostics, symptom, cause, fix tables, and preventive tips to keep your Mercedes riding smoothly.
Why AIRMATIC Problems Occur in Mercedes
The AIRMATIC system is a mix of pneumatic and electronic components. Common reasons for failure include:
- – Air leaks in lines, struts, or valve blocks.
- – Compressor failure from overuse.
- – Electrical faults in sensors or control unit.
- – Age-related wear on rubber components.
In this case, the issue was a damaged AIRMATIC line a relatively small component causing major system failure.
Symptoms of AIRMATIC Problems Mercedes Owners Should Watch For
- 1. Dashboard warning: “AIRMATIC Malfunction.”
- 2. Vehicle sitting too low, especially after parking overnight.
- 3. Compressor runs for long periods or continuously.
- 4. Uneven suspension car leans to one side.
- 5. Rough, bouncy ride due to loss of damping control.
- 6. Clicking or hissing noises from air leaks.
FAQs: Airmatic Problems Mercedes
Q: Can I drive my Mercedes with an AIRMATIC malfunction?
A: It may still drive, but it’s not safe. The suspension will be unbalanced, affecting stability and braking. Driving long-term can also damage tires and drivetrain.
Q: How much does it cost to repair AIRMATIC suspension?
A: Costs vary. Replacing an AIRMATIC line is relatively inexpensive (~$300–$600), but replacing struts or compressors can range from $1,000–$2,500 per component.
Q: Do I need to replace both sides if only one line is damaged?
A: Unlike struts, lines can be replaced individually. However, full inspection is recommended to avoid future failures.
Q: How often should I service the AIRMATIC system?
A: Inspect lines, struts, and compressor every 12 months or during major services. Early leak detection prevents bigger failures.
Q: How long does AIRMATIC suspension last?
A: With proper care, 6–10 years. However, exposure to harsh climates or poor roads can shorten lifespan.
Conclusion
This case study of a Mercedes-Benz C350e W205 highlights how even a small defect a damaged AIRMATIC line can cause major AIRMATIC problems. By following a systematic approach with Xentry diagnostics, physical inspections, leak testing, and calibration, the root cause was found and resolved.
After replacing the faulty line and recalibrating the system, the vehicle was restored to its proper ride height, comfort, and safety standards.
— Salim, Mercedes Expert
Independent specialist in Mercedes-Benz diagnostics, CAN Bus analysis, troubleshooting case studies, and EV systems.