Table of Contents
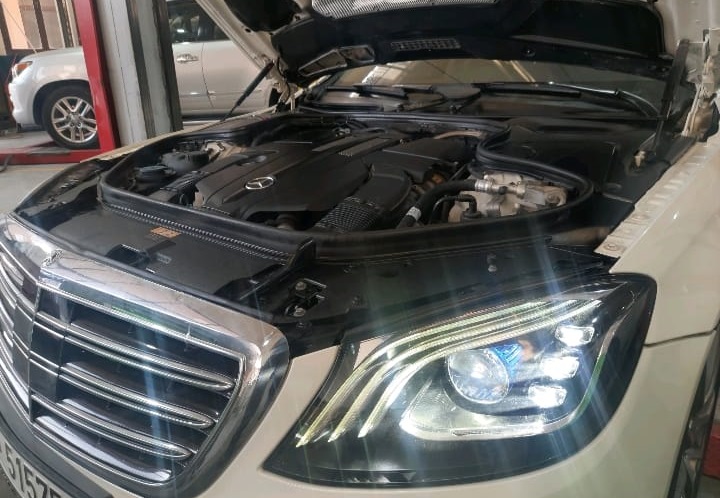
Air conditioner in car repair: Case Study on a Mercedes S-Class W222
When the air con in a car is not working, it can quickly turn a comfortable drive into an unpleasant one, especially in a luxury sedan like the Mercedes-Benz S-Class W222. Owners expect flawless climate control, and even slight underperformance can be frustrating.
In this case study, we’ll explore how technicians diagnosed and repaired a low cooling performance issue in a Mercedes S-Class. We’ll detail each diagnostic step, the findings, the repair process, and final verification, along with a summary table and FAQs to help you understand similar AC problems.

Vehicle & Complaint
- – Model: Mercedes-Benz S-Class W222
- – Customer Complaint: AC system not cooling properly. Airflow was present, but not cold enough, even when the temperature was set to the lowest setting.
Step 1: Fault Code Scan
Technician Action: Connected a diagnostic scanner to the vehicle’s onboard OBD system.
Result:
- – No fault codes were present.
- – This suggested that electrical controls, sensors, and actuators were functioning correctly.
Key takeaway: Just because there are no fault codes doesn’t mean there isn’t a problem. Mechanical issues like low refrigerant often won’t trigger a fault code.
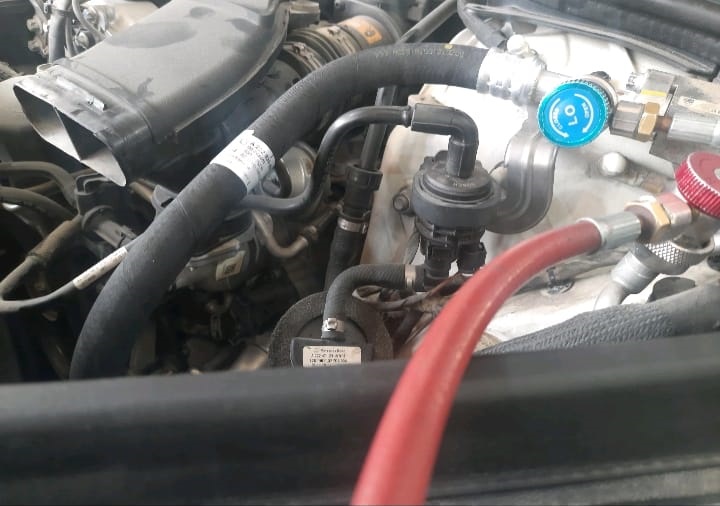
Step 2: Refrigerant Pressure Check
Technician Action: Used a manifold gauge set to measure refrigerant pressures on both the high- and low-pressure sides.
Result:
- – Refrigerant pressure was low, significantly reducing cooling efficiency.
- – Low pressure usually indicates a refrigerant leak somewhere in the system.
Step 3: Refrigerant Recovery & Vacuum
Technician Action:
- 1. Recovered the remaining refrigerant from the system.
- 2. Performed a vacuum procedure to remove moisture and air.
Purpose:
- – Moisture and air contamination can cause corrosion, ice formation, or blockages inside the AC system.
- – Vacuuming ensures the system is clean before refilling refrigerant.
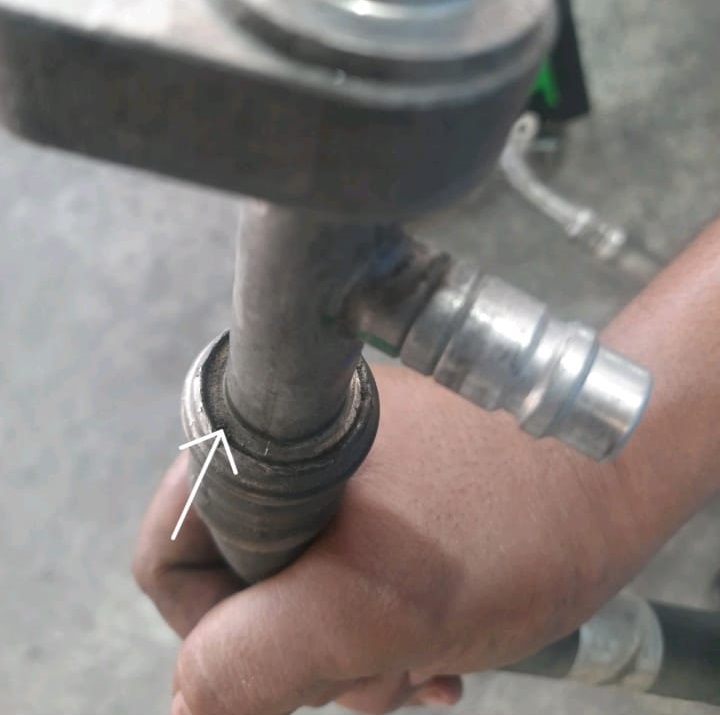
Step 4: Leak Inspection
Technician Action:
- – Performed a leak detection test using UV dye and electronic tools.
- – Carefully inspected hoses, connections, and the condenser.
Result:
- – Leak identified at the low-pressure top hose.
- – This explained the refrigerant loss and weak cooling performance.
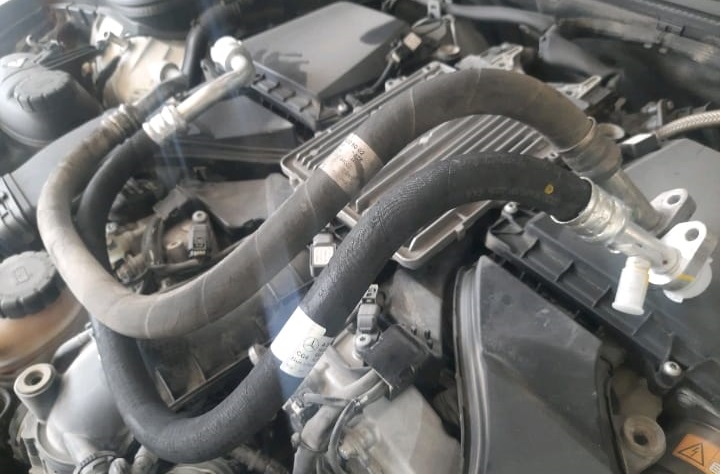
Step 5: Hose Replacement
Technician Action:
- – Replaced the faulty low-pressure top hose with a new, genuine Mercedes-Benz part.
Reason:
- – Sealing the system was necessary to prevent further refrigerant loss.
- – Using OEM parts ensures correct fit and long-term durability.
Step 6: Car Air Conditioning Recharge
Technician Action:
- – Refilled the AC system with the correct type and exact quantity of refrigerant as per manufacturer specifications.
Specification:
- – Mercedes-Benz specifies refrigerant type and charge weight for each model.
- – Accurate filling is crucial: too little or too much refrigerant can both cause poor performance.
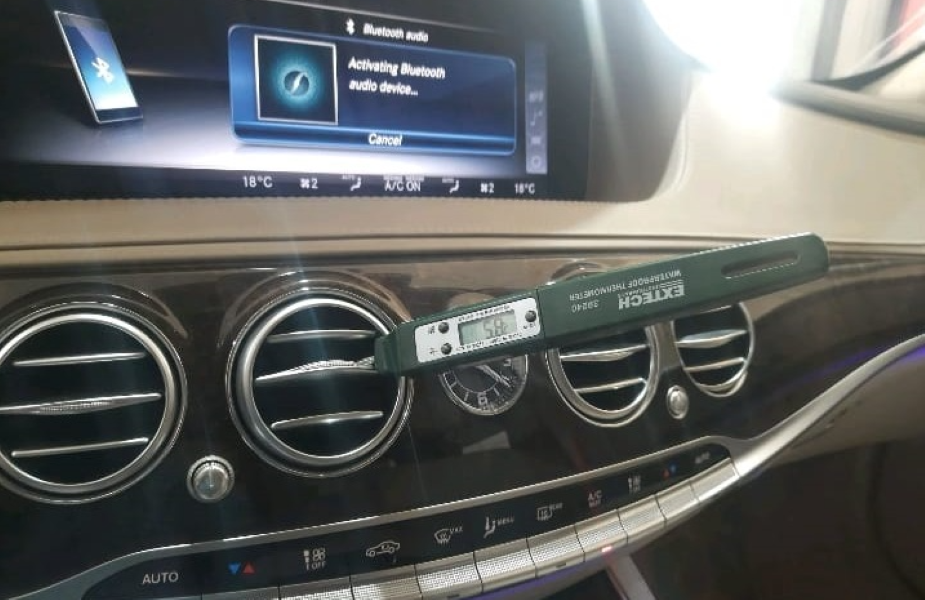
Step 7: Final Verification & Performance Testing
Technician Action:
- – Tested AC operation under load.
- – Measured internal cooling performance with a thermometer at the vents.
Result:
- – Cabin vent temperature: 5.8°C.
- – System produced consistent cold air, confirming that the repair was successful.

Quick Reference Table : Case Summary
| Step | Action Taken | Finding | Result |
|---|---|---|---|
| Fault code scan | Connected diagnostic tool | No faults detected | Electronics OK |
| Pressure check | Used manifold gauges | Low refrigerant pressure | Leak suspected |
| Recovery & vacuum | Removed refrigerant + vacuumed system | System cleaned | Ready for inspection |
| Leak inspection | Used UV dye & tools | Leak at low-pressure top hose | Root cause found |
| Hose replacement | Installed new OEM hose | Old hose leaking | System sealed |
| Recharge | Refilled refrigerant to spec | Correct charge | Cooling restored |
| Final test | Checked vent temps | 5.8°C cold air | Issue resolved |
Explore More Mercedes AC and Climate Control Issues
For a deeper dive into all AC-related issues, visit our hub page: Mercedes AC and Climate Control Problems – Complete Troubleshooting Guide. You’ll find grouped case studies, step-by-step diagnostics, and prevention tips.
Why AC in Cars Stops Cooling
| Cause | Explanation | Symptom |
|---|---|---|
| Low refrigerant | Leak in hoses, condenser, or evaporator | Weak cooling or warm air |
| Faulty compressor | Can’t circulate refrigerant properly | No cooling at all |
| Blocked condenser | Dirt or debris restricts airflow | Cooling loss in hot weather |
| Expansion valve issue | Improper refrigerant flow | Inconsistent cooling |
| Blend door actuator fault | Wrong hot/cold air mixing | Uneven temperatures inside |
Preventive Maintenance Tips for Car AC Systems
- – Regular inspections: Have refrigerant levels and hoses checked every 1–2 years.
- – Run AC in winter: Keeps seals lubricated and prevents leaks.
- – Replace cabin filters: At least once a year to ensure airflow and reduce strain.
- – Clean condenser: Remove debris that can block cooling efficiency.
- – Check for odors or noises: These may signal early AC system faults.
FAQs: Air Con in Car Not Working
Q1. Why does my car AC stop cooling even if no fault codes are present?
Mechanical problems like low refrigerant won’t trigger error codes. Pressure checks are necessary.
Q2. How do I know if my Mercedes AC has a leak?
Symptoms include gradual cooling loss, refrigerant levels below spec, or oily residue on hoses and fittings.
Q3. Can I recharge my car AC at home?
While DIY kits exist, only a professional refill with the exact amount prevents overcharging or undercharging.
Q4. How much does it cost to fix an AC leak in a Mercedes S-Class?
- – Hose replacement: $400–$700
- – Refrigerant recharge: $200–$400
- – Full system service: $800+ depending on labor and parts.
Q5. Is it safe to drive if my AC isn’t cooling?
Yes, but ignoring AC issues can damage the compressor, leading to more expensive repairs later.
Conclusion
This Mercedes S-Class W222 case study shows that an air con not working complaint can often be traced to low refrigerant from a small leak.
By following a structured diagnostic approach scanning for codes, checking pressures, recovering refrigerant, performing leak detection, and replacing the faulty hose technicians restored full AC performance.
For drivers, the key lessons are:
- – Don’t ignore weak cooling it often signals leaks.
- – No fault codes ≠ no problems.
- – Always insist on OEM parts and proper refrigerant recharge for long-lasting repairs.
A well-maintained AC system not only keeps the cabin comfortable but also protects the long-term reliability of your Mercedes-Benz.
— Salim, Mercedes Expert
Independent specialist in Mercedes-Benz diagnostics, CAN Bus analysis, troubleshooting case studies, and EV systems.