Table of Contents
Auxiliary Battery Malfunction Mercedes ; Complete Diagnosis & Case Study
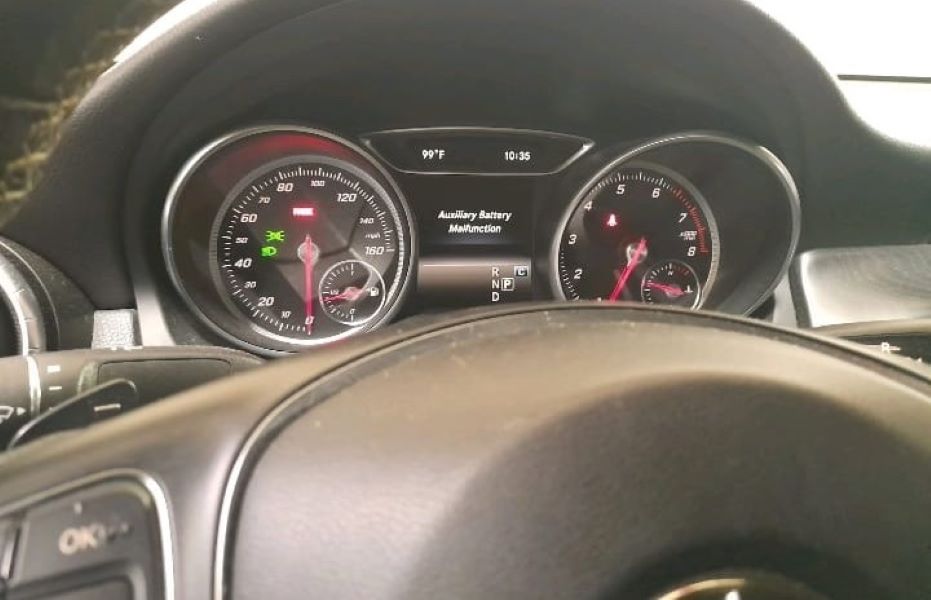
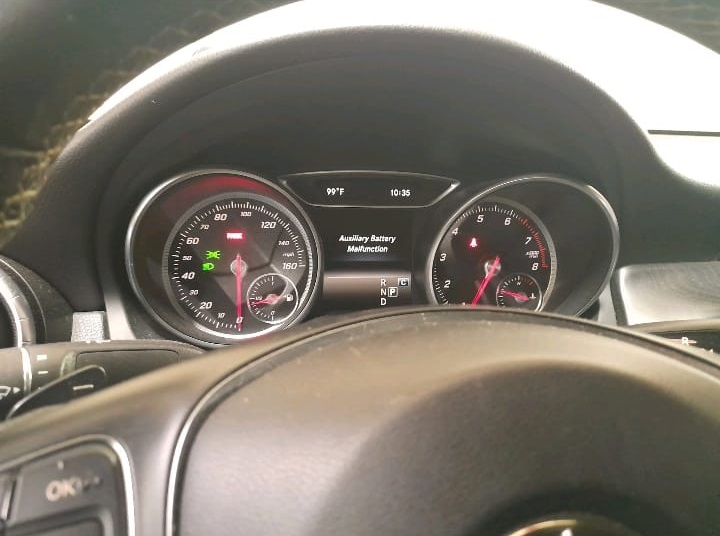
Seeing the dreaded “Auxiliary Battery Malfunction” warning on your Mercedes dashboard?
You’re not alone, this is one of the most common electrical warnings in modern Mercedes-Benz vehicles, from the A-Class, E-Class, C-Class and GLE.
While it might seem like a small issue, the auxiliary battery plays a vital role in supporting critical electrical systems. Ignoring this warning can lead to a chain of electrical malfunctions, especially in vehicles with Start/Stop, COMAND, or Keyless-Go systems.
For more advanced troubleshooting of power-supply issues, SAM communication, and module faults, see our master guide:
Mercedes Electrical Problems: Fix SAM, ECU & CAN Bus Faults
What Does the Auxiliary Battery Do?
Modern Mercedes models use two batteries:
- – Main 12 V battery for engine cranking and major power loads.
- – Auxiliary (support) battery for low-voltage systems like:
- => ECO Start/Stop
- =>Keyless-Go & EIS memory
- =>COMAND infotainment and clock retention
- =>Parking pawl actuator
- =>Electric trunk and climate pre-conditioning
When the auxiliary battery weakens, the system can’t maintain these circuits, and the instrument cluster displays “Auxiliary Battery Malfunction.”
Common Symptoms
| Symptom | Description |
|---|---|
| Dashboard warning | “Auxiliary Battery Malfunction” or “See Owner’s Manual” |
| Start/Stop not working | ECO Start/Stop deactivated |
| Accessory malfunctions | Clock resets, flickering lights, radio cut-offs |
| Slow cranking or intermittent power | Especially after parking overnight |
Case Study 1: Mercedes-Benz A-Class; Auxiliary Battery Malfunction After Main Battery Replacement
Customer Complaint & Initial Observation
A customer brought in a Mercedes-Benz A-Class (W176) complaining of:
“Car cranks slowly; I replaced the main battery, but now the dash says ‘Auxiliary Battery Malfunction.’”
- – Vehicle started normally after main battery replacement.
- – Warning remained active immediately afterward.
- – No other DTCs (diagnostic trouble codes) were present.
The owner wanted to know whether the car was safe to drive and if the issue could be fixed at home.
Diagnostic Assessment
Using XENTRY Diagnostics, the following fault code appeared:
- – B21DC01 : Buffer battery of EIS has a malfunction. General electrical fault.
Voltage readings:
- – Main battery: 12.7 V → OK
- – Auxiliary battery: 10.8 V → below threshold
Interpretation:
The auxiliary battery had insufficient voltage and was not being charged by the DC/DC converter.
Since this model’s auxiliary battery is easy to access, a DIY replacement was feasible.
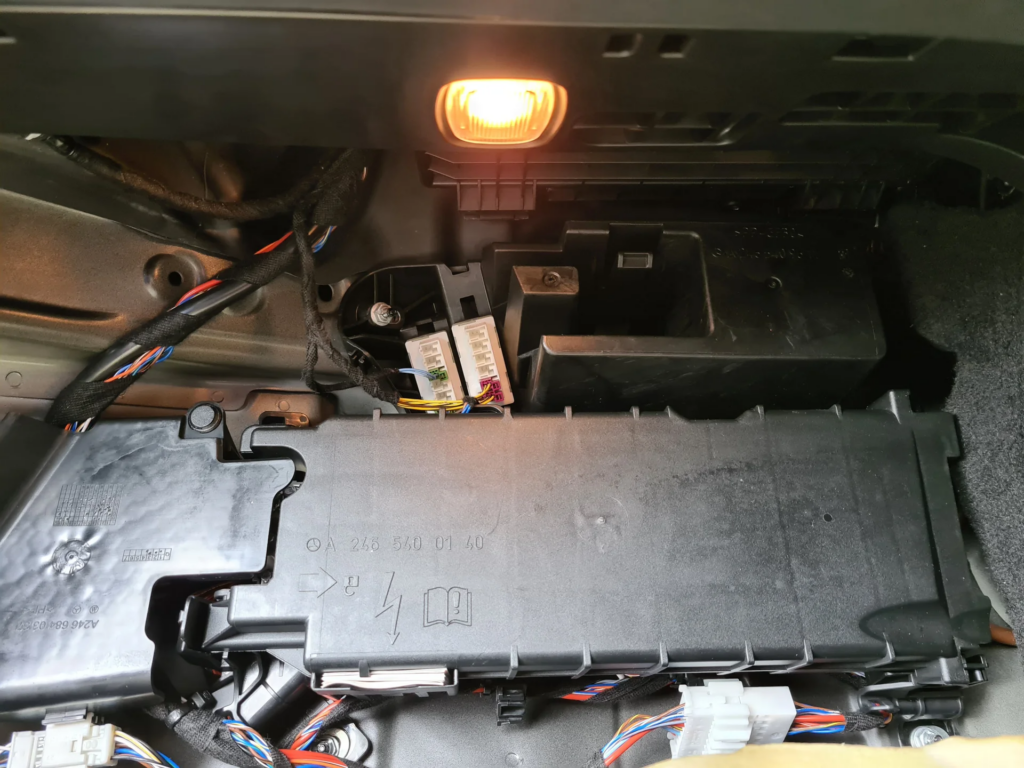
Component Location & Access
For A Class, B-Class, CLA, and GLA, the auxiliary battery is located in the passenger footwell, behind the glovebox or under the floor cover.
Tools required:
- – 8 mm socket / small wrench
- – Flat-head trim tool
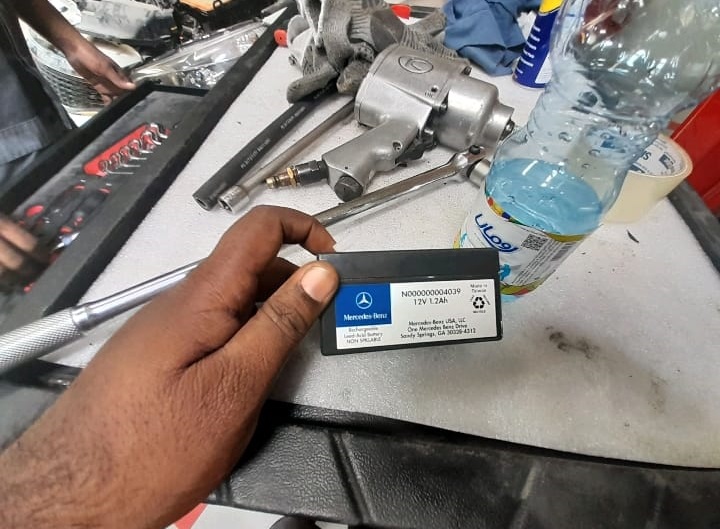
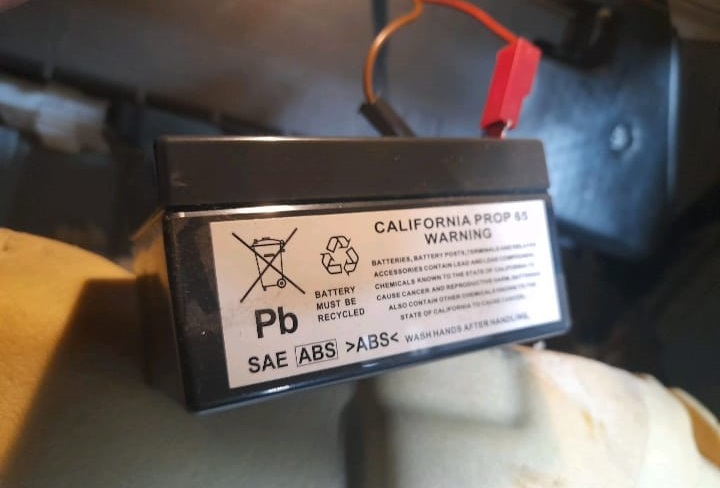
- – OEM auxiliary battery (12 V, 1.2 Ah AGM type)
DIY Approach to Fixing the Auxiliary Battery
1. Removing the Auxiliary Battery Cover:
- – Initial Steps: Pop the clips holding the cover in place. This can usually be done with a flat-head screwdriver or a trim removal tool.
- – Hinge Issue: The hinge at the top may interfere with the glove box. Gently pull the cover upwards, and if the hinge is blocking access, carefully maneuver the cover to avoid damaging it.
2. Battery Replacement Procedure:
- – Disconnecting the Old Battery:
- => Use a wrench to disconnect the negative terminal first, followed by the positive terminal.
- => Label the terminals if needed to ensure correct reconnection.
- – Installing the New Battery:
- => Position the new battery in the compartment, connecting the positive terminal first, followed by the negative terminal.
- => Secure the battery with the bracket and ensure all connections are tight.
3. Reassembling the Battery Cover:
- – Reattach the cover, ensuring all clips are securely fastened.
- – Check for any loose parts or tools left behind.
Post-Replacement Reset
If the warning persists:
- – Perform a soft reset (disconnect main battery 10–15 min).
- – Or, clear fault codes using XENTRY / OBD-II diagnostic tool under: Energy Management → Battery Control Module → Clear Fault Memory.
After clearing, the dashboard warning disappeared and the ECO Start/Stop resumed normal operation.
Root Cause Analysis
| Cause | Description |
|---|---|
| Aged auxiliary battery | Weak charge capacity after 3–5 years. |
| Converter module fault | Fails to recharge the auxiliary battery. |
| Corroded terminals/fuse | Causes voltage drop or intermittent disconnection. |
| Software residual fault | ECU memory retains malfunction status after replacement. |
Technician Tips
- – Always test both main and auxiliary batteries together a weak main battery can prevent proper support-battery charging.
- – Use only OEM or AGM-type replacements; cheap lead-acid cells trigger low-voltage faults.
- – After water leaks or footwell dampness, check for corrosion in battery connectors.
- – When using diagnostic tools, verify that the converter output voltage reaches 13.2–13.8 V.
Case Study 2: Mercedes-Benz E350 ; Persistent Auxiliary Battery Malfunction
Complaint
The driver noticed the “Auxiliary Battery Malfunction” message and Start/Stop disabled.
Diagnostic Steps
- – Fault codes: B1D13 and B212D in the Energy Management module.
- – Auxiliary battery voltage: 11.1 V (low).
- – Converter output: 13.7 V → OK.
- – Physical inspection revealed loose positive terminal in the trunk battery compartment.
Repair
- – Cleaned and tightened all terminals.
- – Replaced the 5-year-old auxiliary battery (12 V 1.2 Ah).
- – Cleared codes → Warning gone after ignition cycle.
Outcome: All Start/Stop and comfort systems returned to normal.
Lesson: Loose connectors can mimic a dead battery always verify physical contact before parts replacement.
Technical Insight
Mercedes’ auxiliary battery works in coordination with:
- – The Front SAM (Signal Acquisition Module) distributes voltage supply.
- – The DC/DC converter maintains voltage regulation between main and auxiliary circuits.
- – The CAN Bus network ensures communication between charging control units.
A voltage drop or open circuit in any of these can cause an “Auxiliary Battery Malfunction” even if the battery itself is fine.
Learn more about how these systems interconnect in
Mercedes Electrical Problems: Fix SAM, ECU & CAN Bus Faults, including real network schematics and troubleshooting workflows.
Common Fault Codes
| Code | Description |
|---|---|
| B21DC01 | Auxiliary buffer battery, general electrical fault |
| B1D13 | Battery voltage below threshold |
| B212D | DC/DC converter malfunction |
| U118B00 | CAN communication fault with battery control module |
Can You Drive With “Auxiliary Battery Malfunction”?
Yes, temporarily.
The vehicle remains drivable, but some features may be disabled:
- – ECO Start/Stop
- – Power trunk or soft-close
- – Electric parking brake (on some models)
However, continued driving with a dead auxiliary battery may overwork the converter and main battery. Replace the battery promptly to avoid cascading electrical faults.
Preventive Maintenance
- – Replace auxiliary battery every 4–5 years or at first voltage drop (< 12 V).
- – Perform a quick battery test at each oil service interval.
- – Keep footwell and trunk areas dry and sealed to prevent moisture corrosion.
- – After major software updates, run an energy management calibration with XENTRY.
Conclusion
The “Auxiliary Battery Malfunction” message may seem minor but is a key indicator of electrical health in your Mercedes.
As demonstrated in the A-Class and E350 case studies, the solution can range from a simple 12 V support-battery swap to repairing a corroded connector or faulty converter.
With proper diagnosis voltage checks, fault-code reading, and connector inspection you can restore full system stability and prevent costly module damage.
For deeper network-level troubleshooting, always cross-reference your findings with:
— Salim, Mercedes Expert
Independent specialist in Mercedes-Benz diagnostics, CAN Bus analysis, troubleshooting case studies, and EV systems.