Table of Contents
Mercedes AC Not Working: Case Study in Mercedes Benz C Class W205
A Mercedes AC not working can quickly turn a luxury driving experience into an uncomfortable one, especially during hot weather. Air conditioning problems in modern Mercedes-Benz models are often complex because they rely on sensors, pressure control, and hidden components such as the evaporator.
In this case study, we explore a real-world repair on a Mercedes Benz C Class W205 that came into the workshop with the customer’s complaint: “Mercedes AC not working.” We’ll walk through the diagnostic steps, the hidden challenge of detecting leaks, the repair process, and practical tips for detecting and fixing AC leaks in cars.
Complaint Overview
- – Vehicle: Mercedes-Benz C Class W205
- – Customer Complaint: AC system not working, no cold air.
- – Initial Observation: No fault codes stored in the AC control unit, making the problem less straightforward.
Despite the system appearing electronically healthy, the lack of cooling confirmed there was an underlying issue.
Step-by-Step Diagnostic Process
1. Checking Actual Values
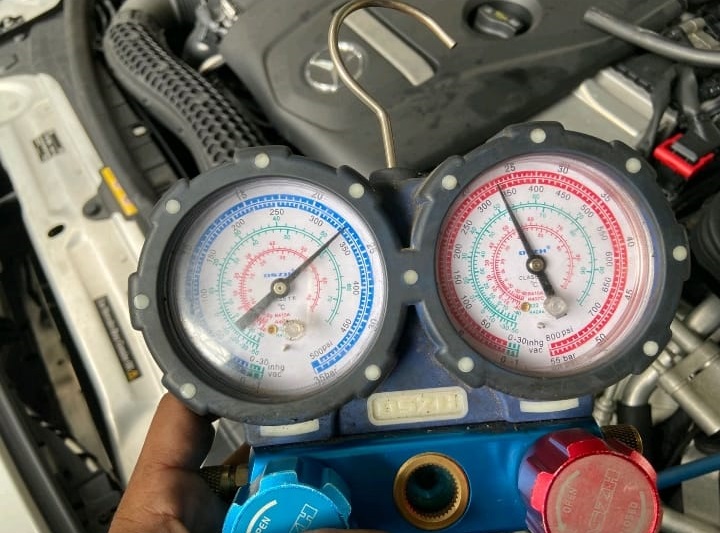
- – Action: Used diagnostic tool to check refrigerant pressure.
- – Finding: Refrigerant pressure was significantly low, indicating a possible leak.
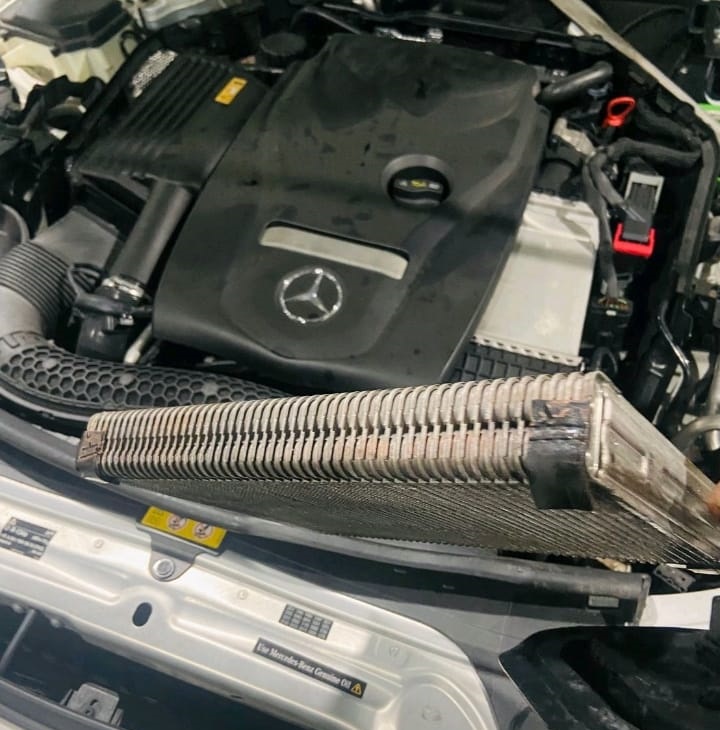
- – Challenge: No obvious leaks were visible in the engine bay.
2. Leak Detection and Refill
- – Action: Refilled the AC system with refrigerant and added a UV dye leak detection product.
- – Finding: After some time, pressure dropped again, confirming there was a hidden leak.
3. Deeper Investigation
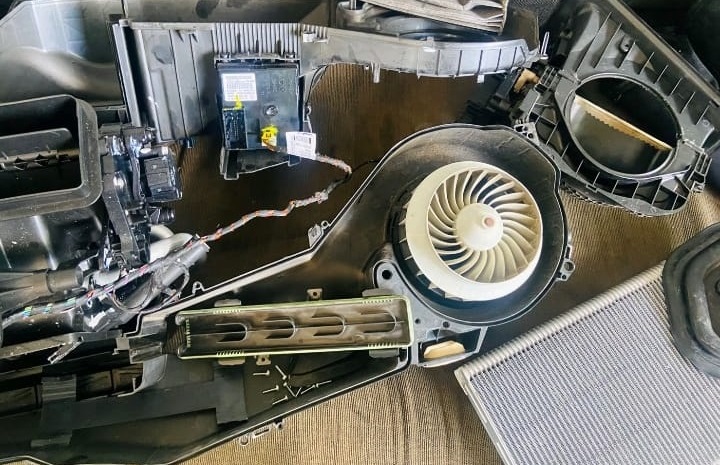
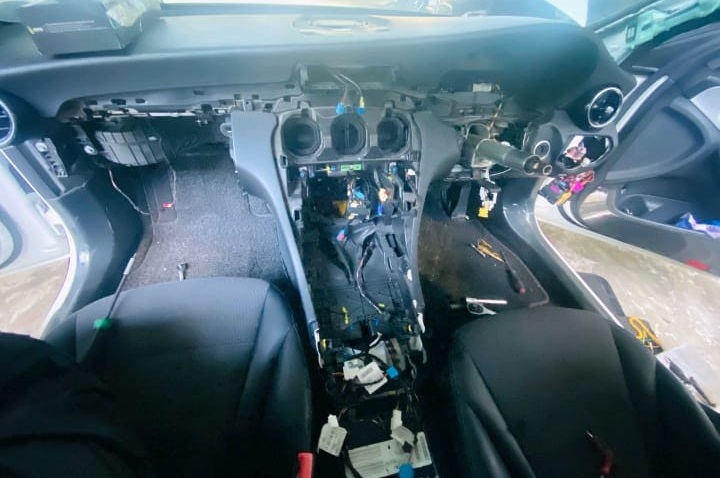
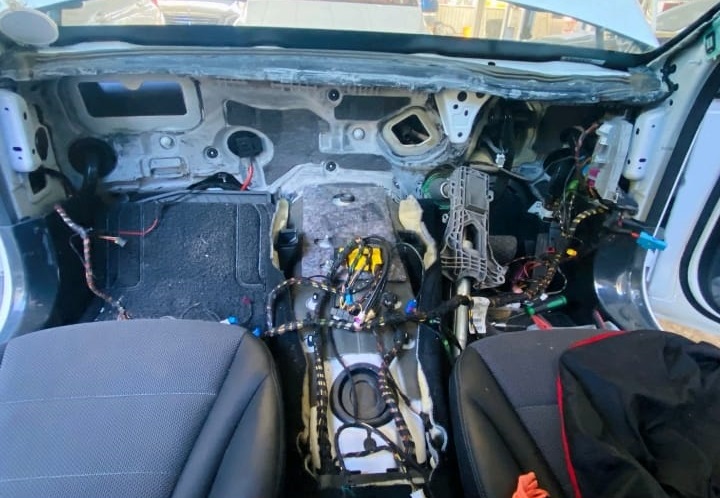
- – Since visible components like the compressor, hoses, and condenser appeared intact, attention shifted to the evaporator, which is hidden behind the dashboard.
- – This required disassembling the dashboard to gain access.
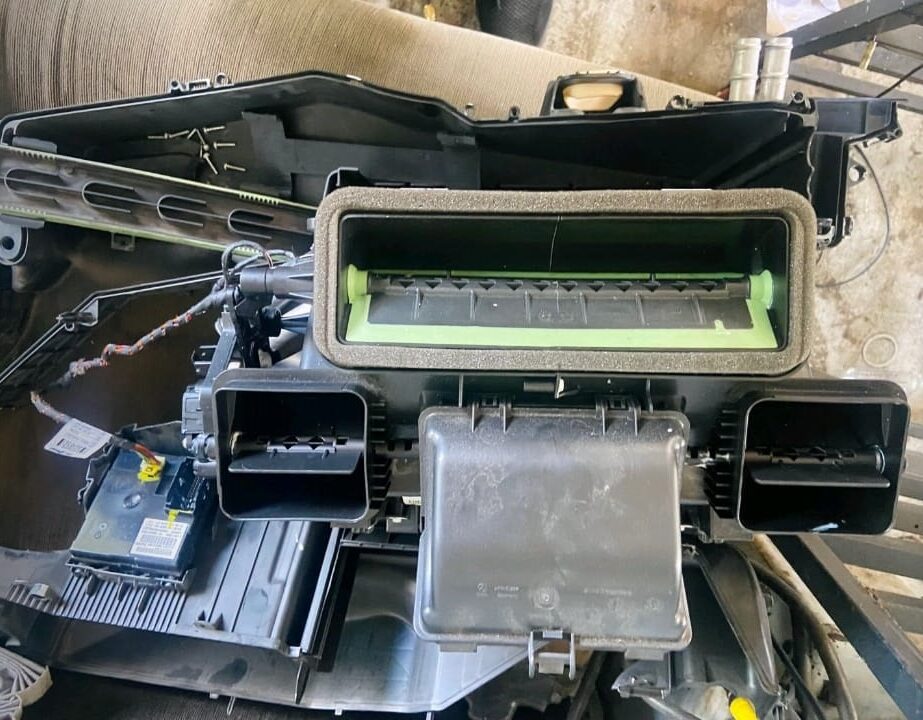
4. Root Cause Identified
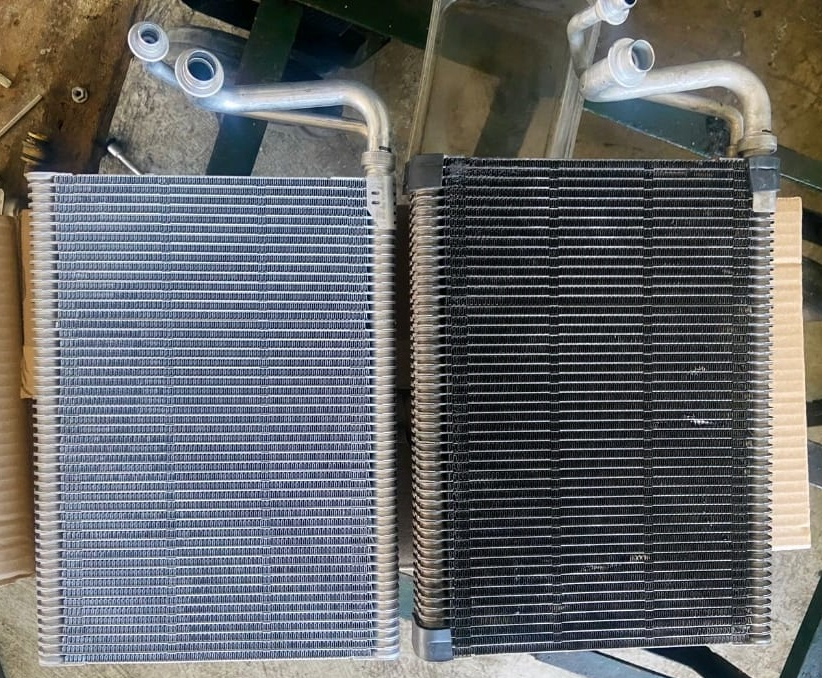
- – Finding: The evaporator was leaking, a fault that could not be detected through simple visual inspection.
Solution – Fixing the AC Leak
1. Evaporator Replacement
- – Removed the leaking evaporator.
- – Installed a genuine Mercedes-Benz replacement to ensure durability and performance.
2. System Leak Check & Recharge
- – Pressurized the system after replacement.
- – Verified no leaks remained.
- – Recharged refrigerant to the manufacturer’s specifications.
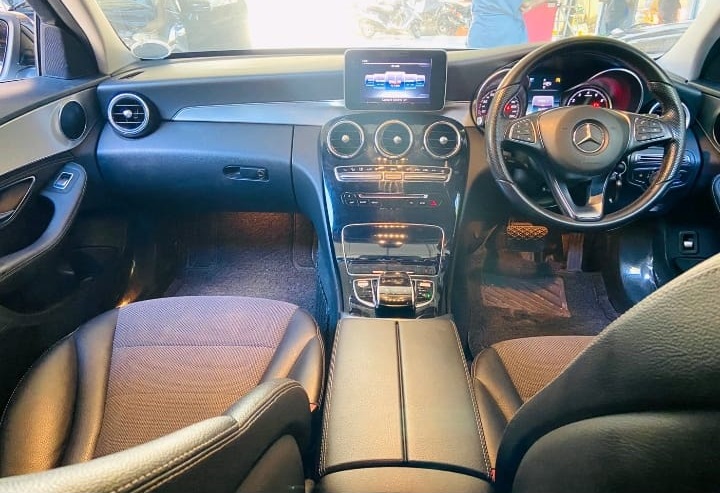
Outcome
After repairs were completed:
- – The air conditioning system delivered cold air as designed.
- – System pressure remained stable, confirming no further leaks.
- – Customer complaint of “Mercedes AC not working” was fully resolved.
Quick Reference Table – Diagnostic Summary
| Step | Action | Finding | Result |
|---|---|---|---|
| Initial scan | Checked AC control unit | No fault codes stored | Required manual inspection |
| Pressure test | Verified refrigerant levels | Low pressure detected | Suspected leak |
| Leak check | Refilled & used UV dye | Pressure dropped again | Confirmed hidden leak |
| Component inspection | Dashboard disassembly | Evaporator leaking | Replaced with OEM part |
| Final check | Leak test + recharge | Stable pressure & cooling restored | Issue resolved |
Explore More Mercedes AC and Climate Control Issues
For a deeper dive into all AC-related issues, visit our hub page: Mercedes AC and Climate Control Problems – Complete Troubleshooting Guide. You’ll find grouped case studies, step-by-step diagnostics, and prevention tips.
How to Find an AC Leak in a Car
Finding an AC leak isn’t always simple. Here are the standard methods technicians use:
1. Visual Inspection
- – Look for oil stains or refrigerant residue on hoses, compressor, or condenser.
- – Check for UV dye stains if previously added.
2. UV Dye & UV Light
- – Inject UV dye into the AC system.
- – Run the AC so dye circulates.
- – Inspect with a UV light; leaks will glow.
3. Electronic Leak Detector (Sniffer)
- – Detects small amounts of escaping refrigerant.
- – Run the probe around hoses, joints, and components.
4. Soap and Water Method
- – Spray soapy solution on suspected connections.
- – Leaks will create bubbles.
5. Checking the Evaporator
- – Located behind the dashboard, making it hard to inspect.
- – Requires dashboard disassembly in many cases.
6. Monitor System Pressure
- – Use a manifold gauge set.
- – Watch for gradual pressure drops over time.
7. Seek Professional Help
- – For hidden or tiny leaks, professional tools and experience are essential.
Preventative Tips for Mercedes AC Systems
| Maintenance Task | Recommended Interval | Benefit |
|---|---|---|
| Cabin filter replacement | Every 12 months / 15,000 km | Keeps airflow clean and prevents odor |
| AC service (refrigerant + leak check) | Every 2 years | Maintains pressure and efficiency |
| Run AC regularly | Weekly, even in winter | Lubricates seals and prevents leaks |
| Inspect evaporator & hoses | During servicing | Catches leaks early before major repairs |
FAQs: Mercedes AC Not Working
Q1. Why is my Mercedes AC not working if there are no fault codes?
Some failures, such as leaks or evaporator faults, don’t trigger fault codes. Low refrigerant is often the cause.
Q2. What is the most common hidden AC leak in a Mercedes?
The evaporator is a common hidden culprit because it sits behind the dashboard.
Q3. How do I know if my evaporator is leaking?
If refrigerant pressure keeps dropping with no visible leaks, and dye or sniffers detect gas near the dash area, the evaporator is suspect.
Q4. How much does it cost to replace a Mercedes evaporator?
Typically $1,000–$1,800, since it requires dashboard removal plus labor.
Q5. Can I use aftermarket AC components in my Mercedes?
It’s best to use genuine OEM parts, as cheaper alternatives may not last and can lead to repeated failures.
Conclusion
This Mercedes-Benz C Class W205 case study demonstrates how diagnosing “Mercedes AC not working” often requires more than basic checks. In this case, a hidden evaporator leak was the root cause.
By following a systematic diagnostic process pressure testing, leak detection, and component inspection the problem was resolved, restoring cooling performance.
For Mercedes owners, the lesson is clear: if your AC isn’t working, don’t stop at the obvious checks. Hidden leaks can be the reason, and sometimes a professional inspection is the only way to find and fix the fault properly.
— Salim, Mercedes Expert
Independent specialist in Mercedes-Benz diagnostics, CAN Bus analysis, troubleshooting case studies, and EV systems.