
Table of Contents
Mercedes Auxiliary Battery Warning: What It Means and How to Fix It
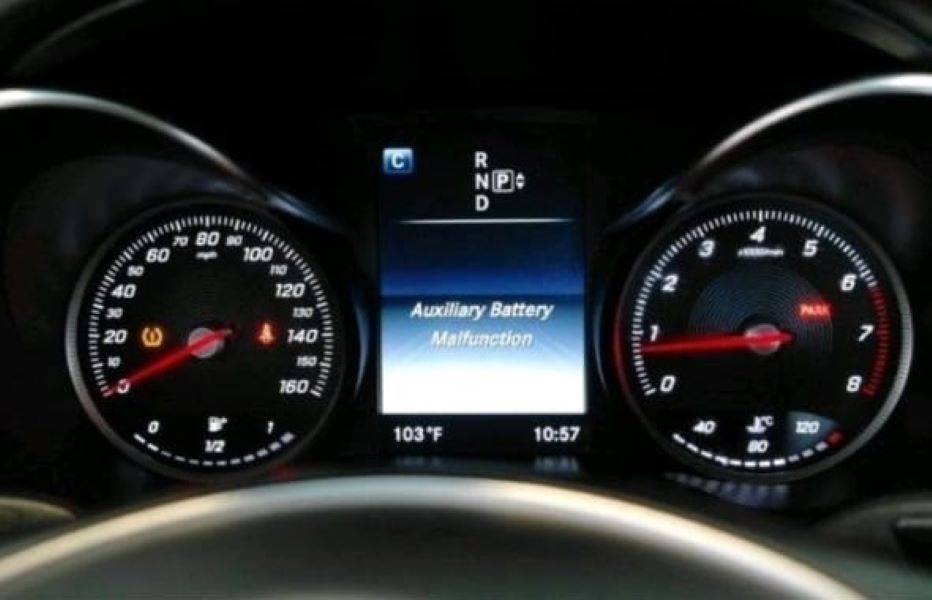
When your Mercedes Auxiliary Battery Warning appears on the dashboard, it doesn’t mean your car is about to fail but it is a signal that one of your vehicle’s most overlooked electrical components is underperforming.
This small yet critical auxiliary (buffer) battery supports functions like Start/Stop, EZS ignition, and emergency systems when the main battery is under load. Ignoring the warning can eventually trigger communication errors, Start/Stop deactivation, or ignition delays.
In this guide, we’ll explore:
- – What the warning means
- – Real-world diagnostics from a Mercedes-Benz C200 case study
- – How to locate and replace the faulty auxiliary battery
- – And how to prevent future electrical issues
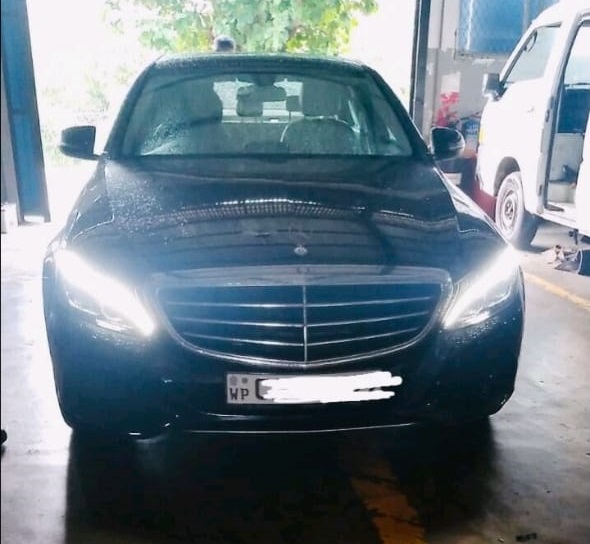
Case Study: Mercedes-Benz C200, Auxiliary Battery Malfunction
Customer Complaint
A customer brought their Mercedes-Benz C200 to the workshop complaining of a recurrent “Auxiliary Battery Malfunction” message on the instrument cluster. The vehicle started normally, but ECO Start/Stop and COMAND memory were inconsistent.
Step 1: Full Diagnostic Scan (XENTRY)
Using Mercedes XENTRY Diagnostics, the technician ran a complete system test. The following fault codes were stored:
- – B21DC01 – Buffer battery of the electronic ignition lock (EIS/EZS): General electrical fault
- – 1321DC01 – Buffer battery of the ignition switch: Voltage below threshold
Interpretation: The auxiliary battery circuit feeding the EIS/EZS system had an undervoltage condition. Possible causes: a weak battery, poor ground, or a failing DC-DC converter.
Step 2: Voltage & Continuity Checks
| Test Point | Expected Value | Measured Value | Status |
|---|---|---|---|
| Main battery (rest / run) | 12.6 V / 14.1 V | 12.7 V / 14.0 V | OK |
| Auxiliary battery (rest) | ≥ 12.5 V | 11.1 V | Low |
| Converter output (Ignition ON) | 13.5–14.3 V | 12.0 V fluctuating | Weak charge |
| Voltage drop across aux feed | < 0.2 V | 0.34 V | Excessive loss |
| Ground resistance (aux → chassis) | < 0.1 Ω | 0.07 Ω | OK |
Findings:
The auxiliary battery was under voltage and the converter feed line showed a voltage drop, likely caused by minor corrosion under the passenger footwell.
Step 3: Visual Inspection
The technician accessed the auxiliary battery under the passenger footwell and discovered:
- – Light oxidation on the positive terminal
- – Damp carpet insulation from prior water ingress
- – Fuse #36 intact but showing slight verdigris on contacts
After cleaning and re-torquing, the warning temporarily disappeared but reappeared after a few drive cycles confirming battery degradation combined with converter under-charging.
Step 4: Repair Procedure
- 1. Isolate the system: Disconnected the main battery for safety.
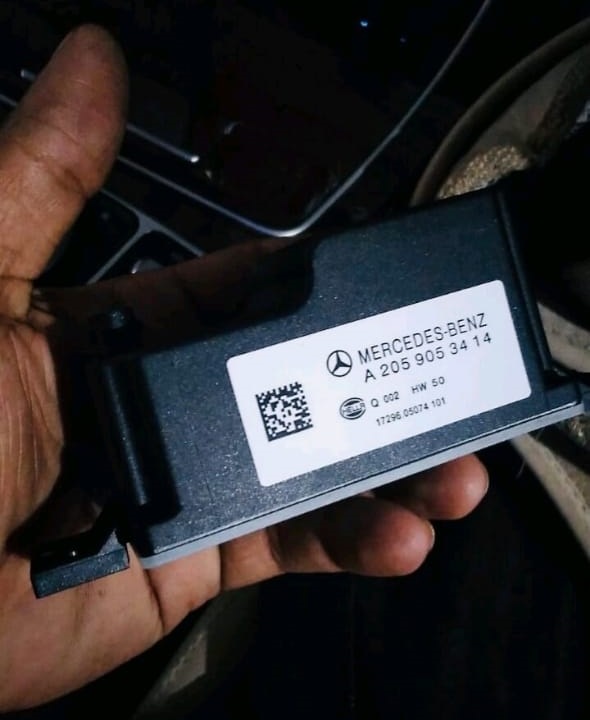
- 2. Remove and replace the auxiliary battery (12 V / 1.2 Ah AGM, genuine OEM).
- 3. Clean and re-pin positive connector terminal.
- 4. Test DC-DC converter output after installation, reading stabilized at 13.8 V.
- 5. Clear all DTCs using XENTRY, then perform a short adaptation drive.
Step 5: Post-Repair Validation
| Parameter | Before Repair | After Repair |
|---|---|---|
| Aux battery voltage | 11.1 V | 12.9 V |
| Converter output | 12.0 V fluctuating | 13.9 V steady |
| Start/Stop system | Inoperative | Fully functional |
| Cluster warning | Displayed | Cleared permanently |
| DTCs | Active | None after drive cycle |
Result: After multiple restarts and overnight testing, the auxiliary battery warning remained cleared. The system regained normal ECO Start/Stop functionality, and no parasitic drain was observed.
Step 6: Root Cause Analysis
| Component | Fault Description | System Impact |
|---|---|---|
| Auxiliary battery | Aged / low-capacity (11.1 V under load) | Undervoltage to EIS/EZS, warning triggered |
| DC-DC converter | Reduced charge output due to oxidation | Incomplete charging cycle |
| Connector terminal | Corroded pin | Added resistance and voltage drop |
Final Root Cause: Combination of aged battery and voltage drop in the converter feed circuit, causing intermittent undervoltage in the ignition module power supply.
Understanding the Auxiliary Battery’s Role
The auxiliary battery in a Mercedes-Benz supports essential systems including:
- – EIS/EZS ignition lock power retention
- – ECO Start/Stop voltage stabilization
- – COMAND & emergency call (SOS) system memory
- – Transmission parking pawl actuator
When this buffer fails, low-voltage errors like B21DC01 or B1D13 appear especially after engine start or voltage surges during cranking.
Common Causes of the Mercedes Auxiliary Battery Warning
| Cause | Effect |
|---|---|
| Natural aging (4–6 years typical life) | Reduced voltage capacity |
| Excessive heat exposure | Accelerated internal resistance |
| Water ingress under footwell | Corrosion and short circuits |
| Faulty DC-DC converter | Prevents aux battery from charging |
| Non-OEM replacements | Improper voltage calibration → recurring warnings |
Preventive Tips
- – Replace the auxiliary battery every 4–5 years or when resting voltage < 12.2 V.
- – Keep the footwell area dry moisture is the #1 cause of connector corrosion.
- – Use only genuine or VARTA-spec replacements (12 V 1.2 Ah AGM).
- – During maintenance, verify converter output ≥ 13.5 V with ignition ON.
- – Perform system resets after any 12 V or auxiliary work to ensure correct module voltage calibration.
Related Diagnostic Resource
If your Mercedes displays electrical warnings or communication faults beyond the auxiliary battery, explore:
Mercedes Electrical Problems: Fix SAM, ECU & CAN Bus Faults
A complete hub covering control-module voltage loss, short circuits, and CAN/LIN communication issues across modern Mercedes models.
This resource complements the auxiliary battery troubleshooting by showing how low-voltage conditions in the SAM or converter can trigger network errors and warning messages across the entire electrical system.
Where Is the Auxiliary Battery Located in a Mercedes-Benz C200?
In Mercedes vehicles, the location of the auxiliary battery can vary depending on the model and body configuration. The three most common locations are:
- 1. In the trunk (boot) ; near the fuse panel or spare tire area
- 2. Under the passenger footwell light ; tucked behind the carpet panel
- 3. Behind the driver-side upper dashboard panel
More information in the next article : How to Solve Auxiliary Battery Malfunction Mercedes Step by Step
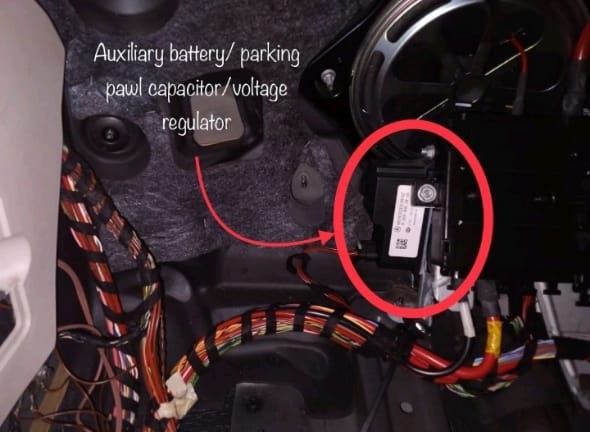
In the Mercedes-Benz C-Class W205 (including C200), the auxiliary battery is located under the passenger footwell light. To access it:
- – Remove the floor mat and carefully pull away the carpet section
- – Unscrew and lift the plastic panel under the glove box
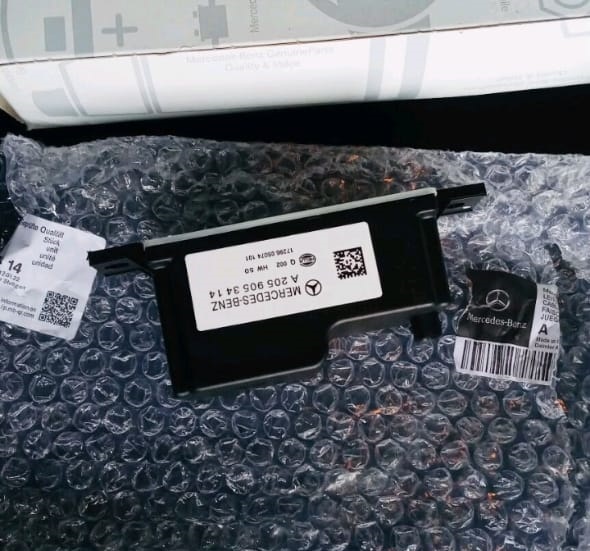
- – You’ll find a small rectangular auxiliary battery mounted in a bracket
How to Replace the Auxiliary Battery
Here’s a quick guide to replacing the auxiliary battery in your Mercedes-Benz C200:
- 1. Disconnect the main battery (for safety)
- 2. Access the auxiliary battery location (under the passenger footwell)
- 3. Unclip the electrical connector attached to the battery
- 4. Remove the screws or clips holding the battery in place
- 5. Replace with a new OEM auxiliary battery
- 6. Reconnect everything and clear the fault codes using a diagnostic tool like XENTRY
After replacement, the Mercedes Auxiliary Battery Warning should disappear, and no new faults should appear after a test drive.
Pro Tip: Use Only Genuine Replacement Batteries
Always opt for an original or high-quality auxiliary battery with matching voltage and capacity (typically 12V/1.2Ah or similar). Cheap alternatives might trigger the warning again or underperform in cold weather.
Key Takeaway
Replacing the auxiliary battery in your Mercedes-Benz C200 is not just about clearing a warning it restores proper voltage stability for ignition, ECO, and comfort functions.
In this case, addressing both the battery and converter feed line ensured permanent resolution and prevented future voltage-related DTCs.
Small component, big impact maintaining your auxiliary battery means fewer electronic headaches and longer main battery life.
Author Bio
Mercedes Expert is an automotive technical trainer and Mercedes-Benz diagnostics expert with extensive hands-on experience in XENTRY, DTS Monaco, and advanced system troubleshooting. He specializes in transforming real workshop case studies into structured learning content to help technicians, car owners, and enthusiasts understand complex vehicle systems.
Last update: November 2025
