
Table of Contents
Case Study: Mercedes Battery Not Charging ; Full Diagnostic Workflow & Repair Guide
Electrical charging faults are among the most frequently misdiagnosed issues in modern Mercedes-Benz vehicles. A simple voltage drop in a single connector can trigger multiple control-unit malfunctions, battery warnings, and CAN network instability. This case study part of our
Mercedes Electrical Problems: Fix SAM, ECU & CAN Bus Faults Hub
shows how a systematic approach reveals the real cause behind a persistent Mercedes Battery Not Charging warning on a W221 S-Class.
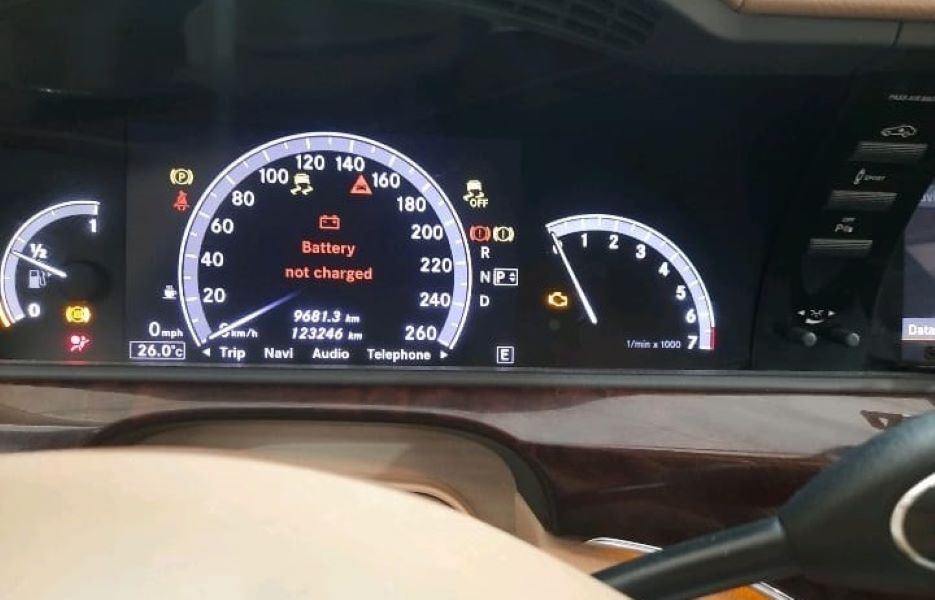
1. Vehicle Overview & Customer Complaint
Model: Mercedes-Benz S-Class W221
Main Symptoms Reported:
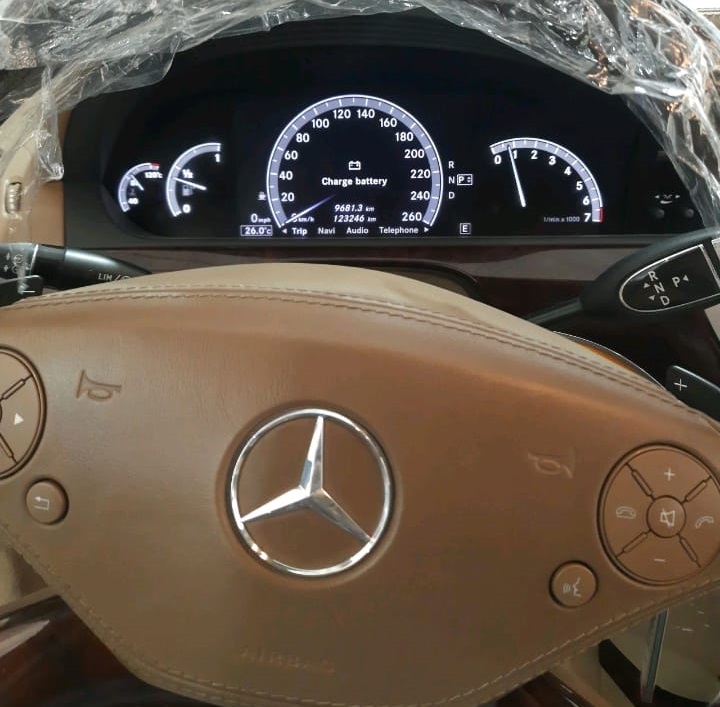
- – “Battery Not Charged” message (ignition ON)
- – “Charge Battery” warning after engine start
- – Occasional low-voltage behaviors (slow cranking, dim interior lights)
These warnings typically appear when:
- – The alternator output is unstable
- – The battery cannot hold a charge
- – There is high resistance or corrosion in the power distribution lines
- – Terminal 30 or 87 voltage drops intermittently
The goal was to determine whether the customer was facing a charging system failure, a battery problem, or a wiring/supply fault.
2. Step 1 : Charging System Verification (Alternator Check)
The technician measured alternator output:
- – Alternator charging voltage: 13.6V (within acceptable range)
✔ Alternator is functional
✘ Warning is triggered elsewhere in the system
This eliminates expensive alternator replacement a common mistake made when the root cause is actually upstream in the voltage supply network.
3. Step 2 : Full Diagnostic Scan: Fault Codes Retrieved
Using LAUNCH, the following codes were stored:
| Fault Code | Description |
|---|---|
| 900516 | Terminal 30 undervoltage (intermittent) |
| 9102 | Washer fluid level switch open circuit |
| 6100 | Control unit undervoltage detected |
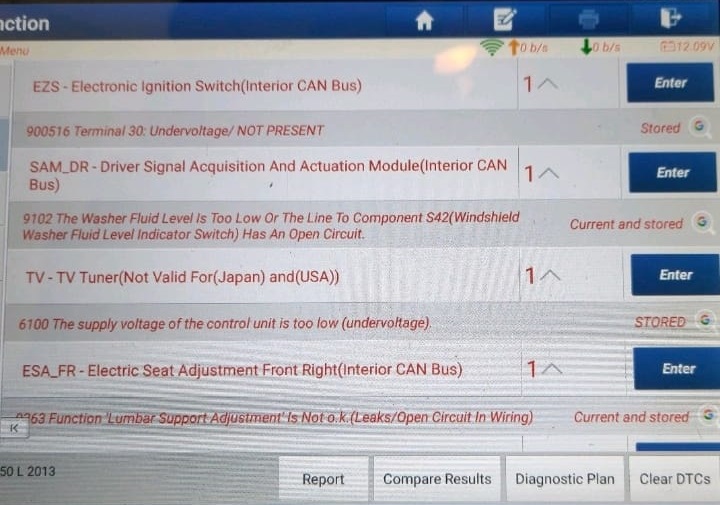
Key Insight:
Only EIS and TV tuner modules reported undervoltage.
The Front SAM showed normal voltage, which means this is a localized undervoltage, not a global power failure.
This shifts suspicion toward:
- – Pre-fuse box
- – Power distribution lines
- – High resistance or corroded connectors
- – Poor grounding
- – Broken supply line to EIS
4. Step 3 : Systematic Voltage & Wiring Inspection
To isolate the undervoltage, the technician performed:
✔ Fuse and relay inspection
No blown fuses
No overheated relays
✔ Alternator signal wire check
Signal integrity confirmed
✔ SAM module wiring check
No pin damage, no heat marks, no burnt wires
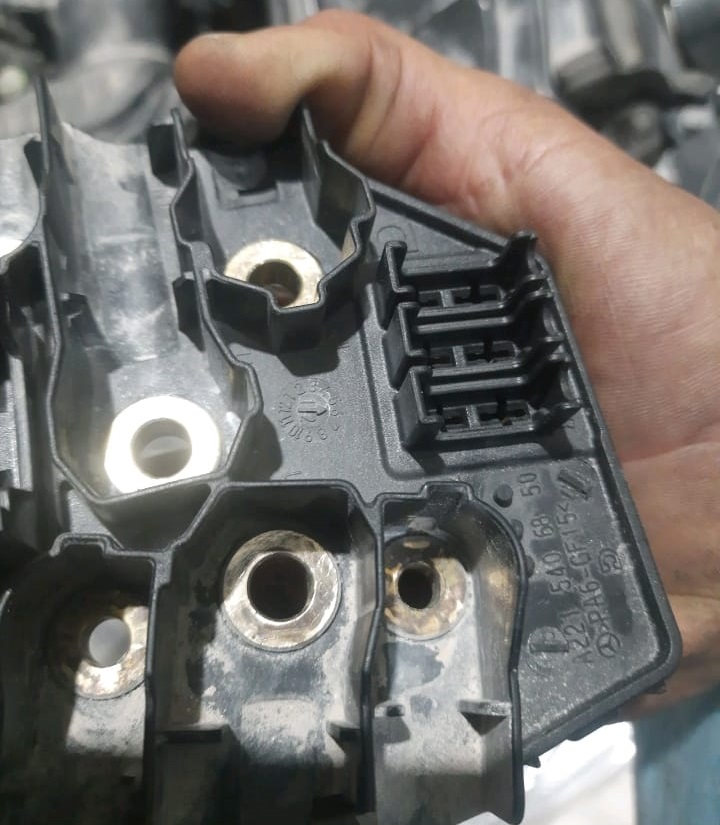
✔ Pre-fuse box inspection
This is where the breakthrough occurred.

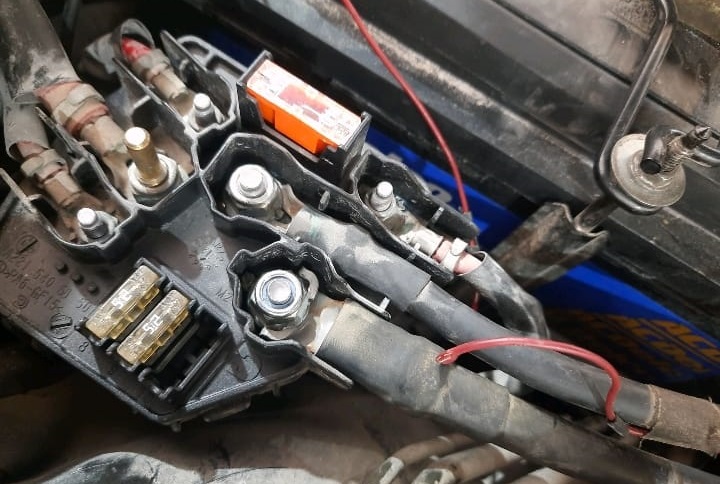
5. Step 4 : Root Cause Identified: Corrosion in the Pre-Fuse Box
Under the pre-fuse box cover, several connectors had:
- – Green corrosion buildup
- – High resistance on the main power supply line
- – Oxidized contacts affecting Terminal 30 feed
This corrosion caused:
- – Intermittent undervoltage
- – Voltage drop between alternator → pre-fuse → EIS
- – Incorrect “Battery Not Charging” warnings
- – Low-voltage fault codes across unrelated modules
This is a classic hidden failure in aging Mercedes vehicles exposed to moisture.
6. Step 5 : Repair Procedure: Restoring Battery Charging Function
✔ Cleaning the Corroded Connector Housing
- – All affected connectors removed
- – Contacts cleaned using contact cleaner + brush
- – Terminals restored to proper conductivity
- – Any severely oxidized pins reconditioned
✔ Reassembly & Power Distribution Check
Voltage flow confirmed:
- – Stable 12.6V at Terminal 30 (engine off)
- – Stable 13.6–14.2V (engine running)
- – No voltage fluctuations
✔ Fault Code Clearing & Road Test
- – All fault codes cleared
- – Vehicle driven 20+ km
- – No “Battery Not Charging” warning returned
- – No undervoltage codes stored
✔ System fully restored
✔ No alternator replacement needed
✔ No battery replacement required
7. Why the Charging Warning Appeared Even Though the Alternator Was Fine
This case proves a crucial diagnostic principle:
Mercedes charging warnings can be triggered by voltage supply interruptions NOT necessarily by alternator failure.
Common causes include:
- – Corroded pre-fuse box terminals
- – Weak EIS power supply
- – High-resistance grounding points
- – SAM moisture damage
- – Broken alternator signal wire
Replacing the alternator without confirming these factors is a costly mistake.
8. Preventative Maintenance Tips for Mercedes Charging System
To prevent future occurrences:
✔ Inspect pre-fuse & SAM connectors every 12–18 months
Especially if vehicle is exposed to moisture or humidity.
✔ Ensure alternator ground strap is clean and tight
Bad grounding mimics alternator failure.
✔ Keep battery terminals corrosion-free
A battery that seems bad often suffers from poor connections.
✔ Replace aging batteries proactively
Mercedes vehicles are voltage-sensitive; old batteries cause CAN and SAM problems.
9. Case Study Conclusion
This case study demonstrates the importance of structured diagnostics in solving “Mercedes Battery Not Charging” problems. Rather than replacing expensive parts, the technician traced the real issue to:
=> Corroded connectors in the pre-fuse box causing intermittent undervoltage
Once cleaned and restored, the entire system returned to normal, proving that:
✔ Correct diagnosis saves time
✔ Correct diagnosis saves money
✔ Correct diagnosis prevents unnecessary part replacements
For more electrical troubleshooting guides, see:
Mercedes Electrical Problems: Fix SAM, ECU & CAN Bus Faults Hub
Author Bio
Written by Mercedes Expert
With years of hands-on experience diagnosing and repairing Mercedes-Benz systems, he brings technical depth and practical case studies to help car owners, technicians, and enthusiasts troubleshoot complex automotive issues. His work focuses on clear repair guides, OEM-level procedures, and knowledge-sharing to empower both professionals and drivers.
Last update: November 2025
