Table of Contents
Automatic Transmission Oil Change: Interval, DIY Steps & Cost (Mercedes-Friendly Guide)
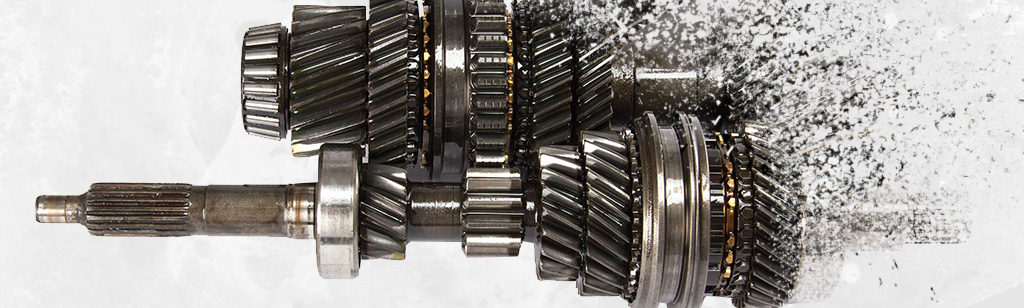
Why This Matters
Overheating and fluid contamination cause most AT failures industry data suggests up to ~90% of failures stem from poor fluid condition. Fresh ATF maintains hydraulic pressure, cooling, lubrication, and component cleanliness. Regular changes = smoother shifts, longer gearbox life, safer motoring, and fewer surprise bills.
For full maintenance context (Service A/B, tires, coolant, 7DCT/9G tips), see our Mercedes Maintenance and Service Guide.
What Is ATF (Automatic Transmission Fluid)?
ATF is a multi-role fluid that:
- – Lubricates gears, clutches, bushings.
- – Cools by carrying heat to the cooler.
- – Generates hydraulic pressure for shift actuation.
- – Cleans & protects with detergents, anti-oxidants, anti-foaming, anti-corrosion additives.
Common specifications
- – OEM-specific fluids (e.g., Mercedes 236.xx specs for 7G-TRONIC/9G-TRONIC)
- – DEXRON/MERCON families (legacy or non-MB applications)
- – CVT/DSG fluids (not interchangeable with standard ATF—use only what your vehicle specifies)
Rule #1: Always match the exact spec in the owner’s manual / WIS. Wrong ATF can cause shudder, slip, harsh shifts, and premature wear.
When Should You Change ATF?
Manufacturer Guidance (Typical)
- – Conventional automatics: every 30,000–60,000 mi (50,000–100,000 km)
- – Some newer units with synthetic ATF: up to 60,000–100,000 mi (model-specific)
Adjust for Severe Use
Change sooner if you:
- – Tow, haul, or drive in mountains
- – Sit in stop-and-go traffic frequently
- – Drive in extreme heat/cold
- – Track/spirited driving, heavy loads
Watch for Early Warning Signs
- – Delayed/harsh shifts, flare or slip
- – Dark/burnt-smelling fluid
- – Whine/grind noises, overheating messages
Symptom, Cause and Fix (Quick Table)
| Symptom | Likely Cause | Recommended Fix |
|---|---|---|
| Delay engaging D/R | Low/oxidized ATF | Check level; drain & refill with correct spec; inspect for leaks |
| Harsh or erratic shifts | Wrong/aged fluid, dirty filter | Correct ATF spec; replace filter & pan gasket; adaptation if required |
| Shudder at light throttle | Degraded friction modifiers | ATF exchange with OEM spec; add updated fluid per TSB if applicable |
| Overheating message | Restricted cooler/old fluid | Service ATF; inspect cooler/lines; verify cooling fan operation |
| Metallic debris in pan | Internal wear | Service ATF & filter; evaluate with professional before further driving |
To understand the potential damage caused by irregular maintenance of automatic transmissions, explore the following links:
Delayed shifting when accelerating : Case Study & Solution
Why is my automatic car not shifting gears ? Case study
Cost & Time Snapshot
| Service | What’s Included | Typical Cost |
|---|---|---|
| Drain & Fill | Pan drain, refill, level check | $150–$300 |
| Pan-off Service | Drain, new filter & gasket, magnet cleaning, refill | $250–$500 |
| Full Exchange (Machine) | Fluid exchange to target % refresh + filter where possible | $300–$600 |
Dealerships may be higher; a trusted Mercedes specialist often offers OEM fluids at better rates.
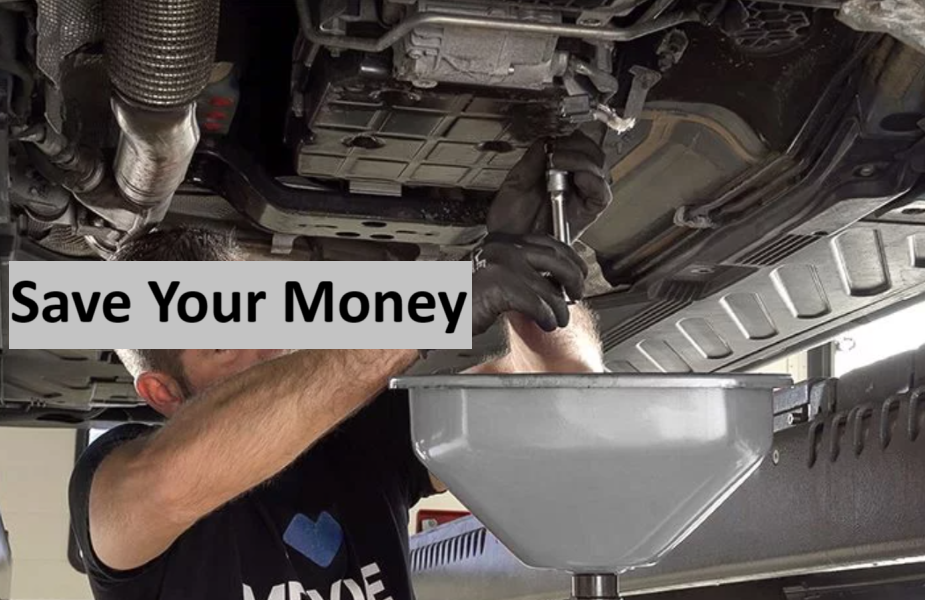
DIY Transmission Oil Change in Mercedes equiped with 7G-TRONIC
Performing a transmission oil change yourself can save money and help you understand your vehicle better. Here’s a comprehensive guide to ensure a successful and safe DIY transmission oil change.

Tools & Supplies
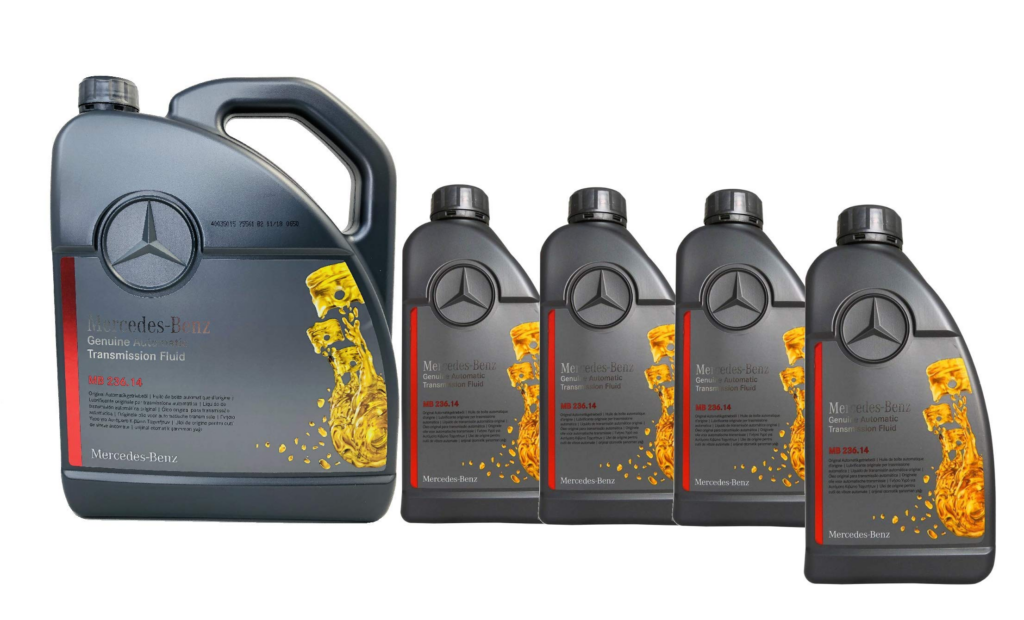
- – Correct MB 236.xx-spec ATF (per model)
- – New pan gasket, filter, crush washers, drain/fill plugs if required
- – Socket set/torque wrench, fluid pump/funnel
- – Large drain pan, rags, brake cleaner
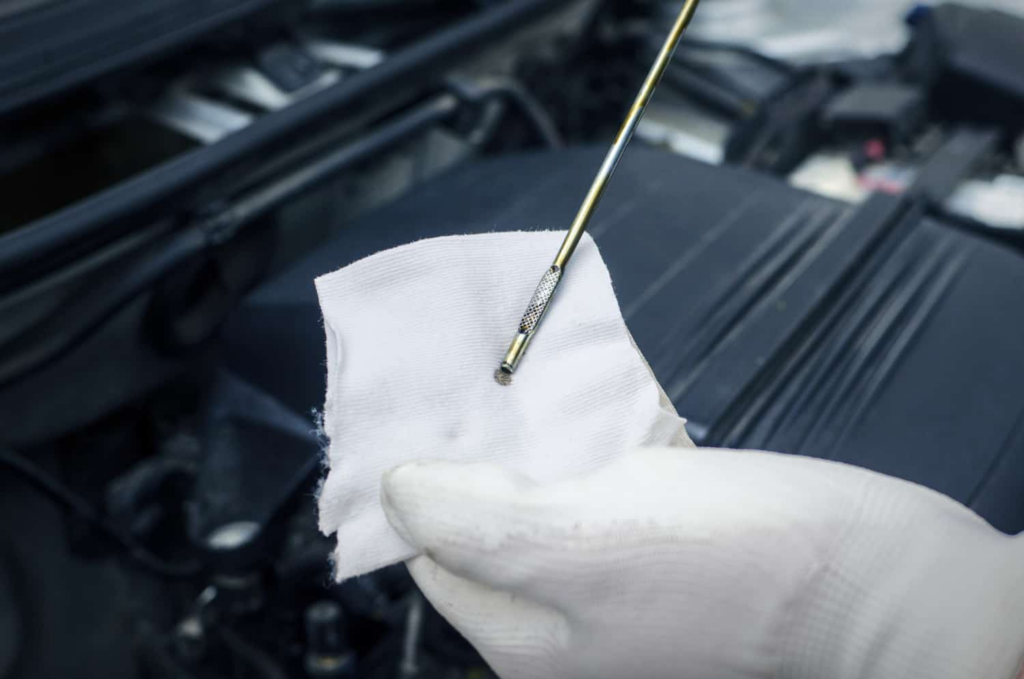
- – Scan tool or thermometer to verify ATF temp for level setting
Safety Precautions:
- – Ensure the vehicle is on a flat, stable surface.
- – Use jack stands or ramps to securely lift and support the vehicle.
- – Wear safety glasses and gloves to protect against hot fluids and sharp edges.
- – Allow the engine to cool before starting the process to avoid burns from hot fluid.
Locate the Transmission
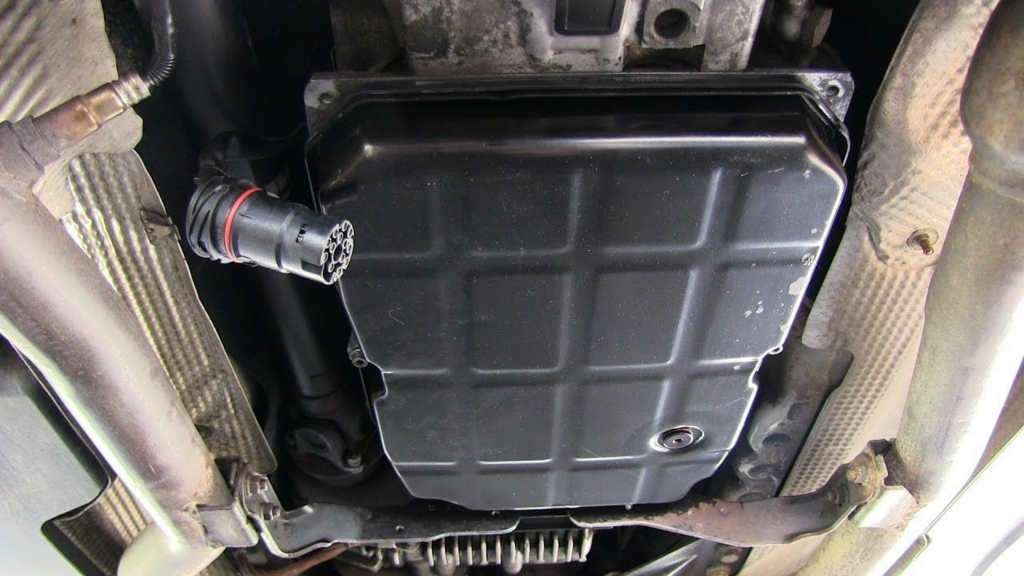
Instructions to Find the Transmission Pan and Drain Plug:
1. Consult the Owner’s Manual: Refer to the manual for specific details about your vehicle’s transmission location.
2. Raise the Vehicle: Use a jack to lift the front of the vehicle and secure it with jack stands or ramps.
3. Locate the Transmission Pan: The transmission pan is typically located near the center of the vehicle, underneath the transmission. It’s a flat, metal pan bolted to the bottom of the transmission.
4. Find the Drain Plug: The drain plug is usually a bolt located at the lowest point of the transmission pan, allowing fluid to be drained out.
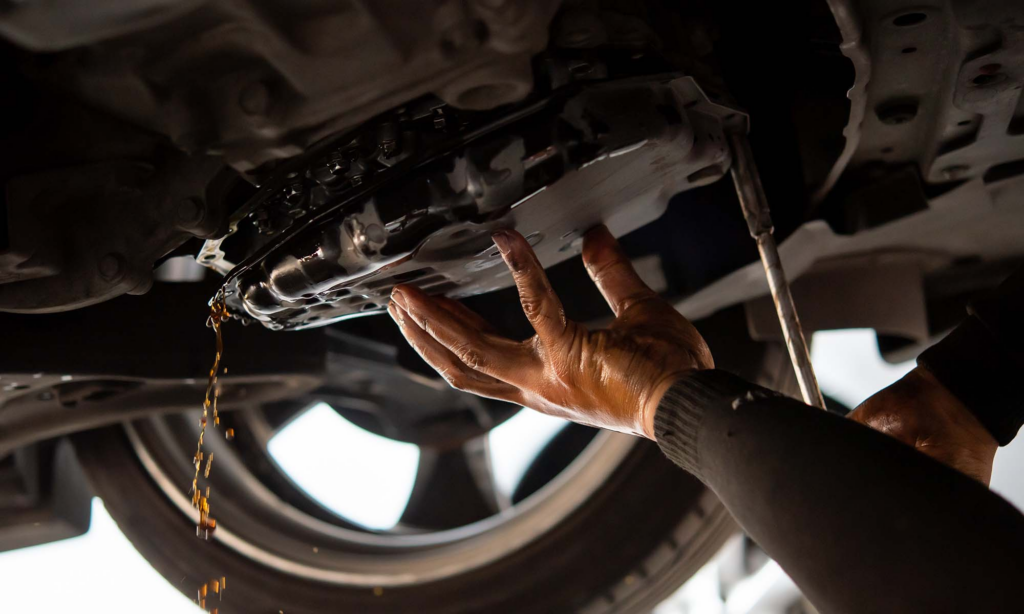
Drain the Old ATF
Step-by-Step Guide to Draining the Old Oil:
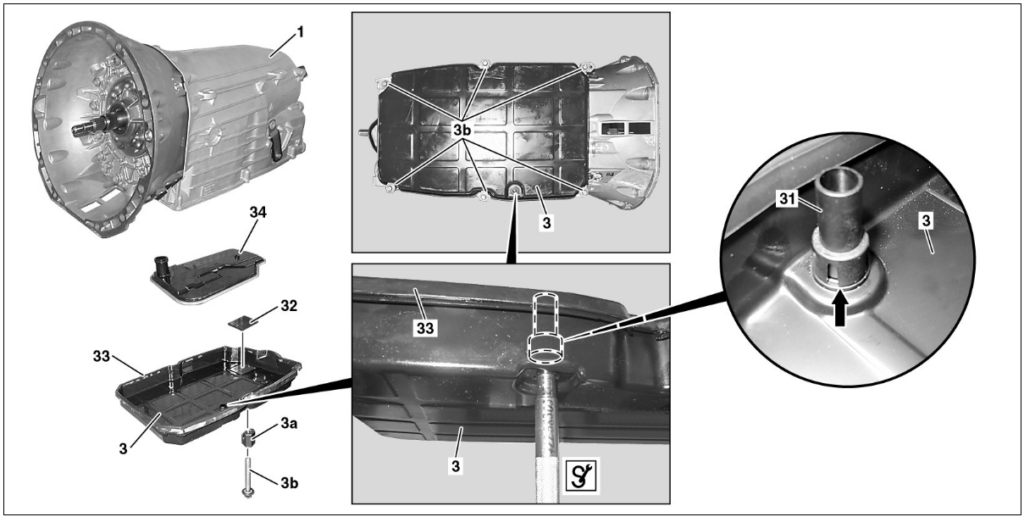
Step 1: Removal
- 1. Put the automatic transmission in neutral.
- 2. Switch the anti-theft control unit to position “0”.
- 3. Raise the vehicle using the lift.
- 4. Remove the auxiliary oil pump from the automatic transmission.
- 5. Drain the transmission oil from the torque converter.
- 6. Remove the oil pan (3).
- 7. Remove the current oil filter (34).
Step 2: Install
- 1. Install the new oil filter (34).
- 2. Replace the magnets (32).
- 3. Install the oil pan (3) with the new gasket (33).
- 4. Install the new drain plug with a new gasket in the torque converter.
- 5. Install the auxiliary oil pump of the automatic transmission.
- 6. Fill the automatic transmission with oil.
For more information about the step 2, continue reading
How to Remove and Replace the Transmission Filter ?
1. Locate the Filter: The filter is usually attached to the transmission body, held in place by screws or clips.
2. Remove the Old Filter: Carefully remove the screws or clips and take out the old filter. Be prepared for some additional fluid to drain out.
3. Install the New Filter: Position the new filter in place and secure it with the screws or clips.
Install the New Gasket and Pan
Proper Installation Techniques to Avoid Leaks:
1. Clean the Mating Surfaces: Ensure both the transmission pan and the transmission body surfaces are clean and free of old gasket material.
2. Install the New Gasket: Place the new gasket on the transmission pan, aligning the bolt holes.
3. Reattach the Pan: Carefully position the pan back onto the transmission and hand-tighten the bolts in a crisscross pattern to ensure even pressure. Use a torque wrench to tighten the bolts to the manufacturer’s specified torque.
Add New ATF
How to Add the Correct Amount of ATF and the Importance of Using the Right Type:
1. Locate the ATF Fill Port: This is usually found in the engine bay, marked with a dipstick labeled “Transmission.”
2. Insert the Funnel: Place a funnel in the fill port to prevent spills.
3. Add New ATF: Slowly pour the correct type of ATF into the fill port. Refer to your owner’s manual for the exact amount required.
4. Check the Level: Use the dipstick to check the fluid level. Add more fluid if necessary, but avoid overfilling.
Check for Leaks and Test Drive
Ensuring No Leaks and Performing a Short Test Drive:
1. Check for Leaks: Inspect the area around the transmission pan and drain plug for any signs of leaks. Tighten bolts if necessary.
2. Lower the Vehicle: Carefully remove the jack stands and lower the vehicle.
3. Start the Engine: Start the engine and let it idle for a few minutes. Shift through all the gears to circulate the new fluid.
4. Test Drive: Take the vehicle for a short drive, paying attention to how the transmission shifts.
5. Final Check: After the test drive, recheck the ATF level and look for any leaks. Top off the fluid if needed.
By following these steps, you can successfully change your vehicle’s automatic transmission oil, ensuring it runs smoothly and efficiently. Regular maintenance like this helps prolong the life of your transmission and improves overall vehicle performance.
DIY vs Professional ; Which Should You Choose?
| Scenario | DIY | Pro Shop / Dealer |
|---|---|---|
| Basic drain & fill with pan/filter | If equipped and you have correct tools | Faster; clean & precise |
| Temp-based level setting | Possible with scan tool/thermometer | Recommended |
| Flushing/exchange on high-mileage unknown fluid | Risk of dislodging debris | Evaluation first, staged refresh |
| Leaks/overheating/harsh faults present | Diagnose first | Diagnostic workflow & TSBs |
Environmental & Warranty Notes
- – During service, inspect cooler lines, electrical connector sleeves, and mechatronics sleeve (common seep points).
- – Dispose of ATF responsibly at a recycling center.
- – Keep receipts and document the ATF spec used helps with resale and warranty.
Quick Checklist (Print-Friendly)
- – Confirm OEM ATF spec (MB 236.xx)
- – New filter, gasket, washers, correct torque specs
- – Clean pan & magnets
- – Fill, run through gears, set level at temp
- – Road test; re-check for leaks
- – Log mileage/date; attach receipt
FAQs: Automatic Transmission Oil Change
Q: Is ATF really “lifetime”?
No. Heat, oxidation, and clutch material degrade fluid. Follow OEM intervals, sooner for severe use.
Q: Can the wrong ATF cause damage?
Yes, expect shudder, harsh shifts, premature wear. Use the exact spec listed for your transmission.
Q: Do I need to change the filter every time?
If your transmission uses a serviceable pan filter, replace it at each pan-off service.
Q: Is a full machine flush safe?
On well-maintained gearboxes, a controlled exchange with filter can be fine. For neglected units, many techs prefer staged drain/fills to avoid dislodging debris too aggressively.
Q: How often for Mercedes 7G-TRONIC/9G-TRONIC?
Common guidance: ~40k–60k mi for many models. Always verify by VIN/owner’s manual.
Related Guides
How to Check Automatic Transmission Oil: Step-by-Step Guide
Mercedes 9G-TRONIC Oil Change Guide: Cost & Interval
7DCT300 Oil Change: DIY Steps & Service Tips
— Salim, Mercedes Expert
Independent specialist in Mercedes-Benz diagnostics, CAN Bus analysis, troubleshooting case studies, and EV systems.