Table of Contents
Car won’t start Due to Low Fuel Pressure: A Real Case Study
When a Mercedes-Benz won’t start, it can often be traced to fuel system issues especially low fuel pressure. This case study explores a real-world diagnostic and repair process for a Mercedes C-Class C300 (W205), showing how a failed fuel pump caused a complete no-start condition despite correct voltage readings.
By following a structured diagnostic approach using Mercedes XENTRY, the technician was able to identify the root cause without unnecessary part replacements.
Customer Complaint
A customer brought their Mercedes C-Class C300 (W205) to the dealership, reporting:
“My car won’t start the engine turns over, but it won’t ignite.”
Despite multiple attempts, the engine failed to start, confirming a cranking-but-no-start condition.
Initial Inspection
The vehicle was brought into the service bay for diagnostic testing.
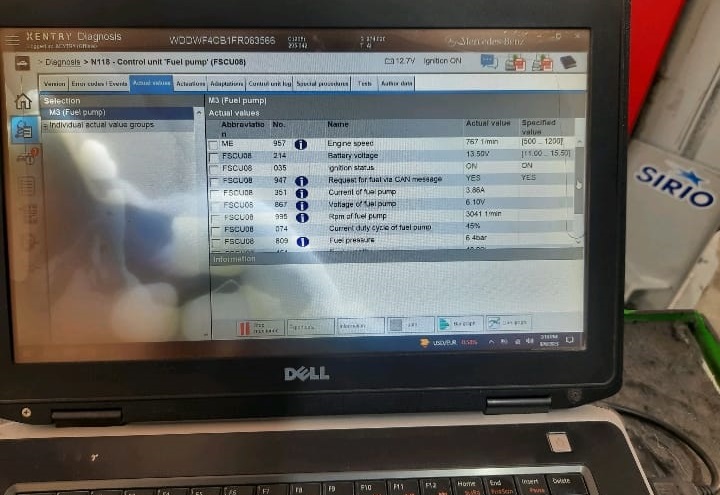
A Mercedes-certified technician verified the complaint and performed a full XENTRY scan to check for system faults.
Findings:
- – Fault Code: Low fuel pressure detected by the Engine Control Unit (ECU).
- – No other major drivetrain faults recorded.
This pointed to a potential fuel delivery issue either the pump, pressure regulator, or fuel control system.
Diagnostic Procedure
The technician followed a systematic diagnostic sequence to pinpoint the failure.
Step 1: Fuel Pump Output Check
While attempting to start the engine, no fuel delivery was observed at the output line of the fuel pump.
This confirmed that fuel wasn’t reaching the injectors a critical step in combustion.
Step 2: Supply Voltage Verification
Using a multimeter, the technician measured voltage at the fuel pump electrical connector during cranking.
| Test Parameter | Measured Value | Expected Result | Conclusion |
|---|---|---|---|
| Supply Voltage | 12V | 12V | Voltage supply OK |
| Ground Integrity | Good | Good | Ground OK |
| Fuel Delivery | None | Fuel flow expected | Pump not operating |
Even though 12 volts were present, the fuel pump wasn’t activating confirming that the pump motor had internally failed.
Root Cause: Faulty Fuel Pump
The diagnosis was conclusive:
The fuel pump was receiving voltage but not delivering pressure indicating internal failure of the pump assembly.
This situation is common in Mercedes W205 models, where the fuel pump motor can degrade over time or seize due to contamination or wear.
Repair Process: Replacing the Fuel Pump
The technician proceeded with replacing the faulty pump following Mercedes-Benz workshop procedures.
Step 1 : Preparation
- – Verified fuel level (below 25% before removal).
- – Disconnected the battery for safety.
- – Moved passenger seat forward and removed the rear seat cushion.
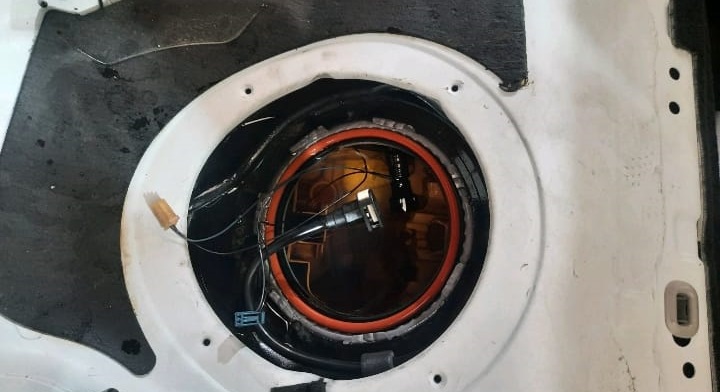
- – Opened the fuel pump access cover located under the rear seat.
Step 2 : Fuel Pump Removal
- 1. Disconnected electrical connectors and fuel lines, sealing them to prevent leakage.
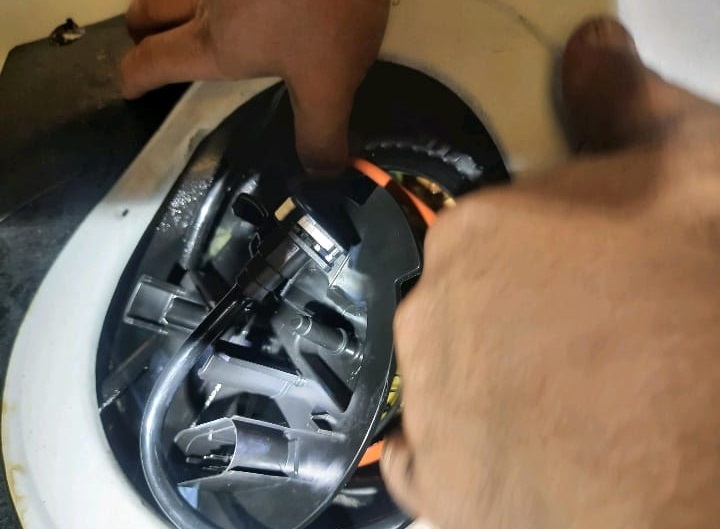
- 2. Released the locking ring using a claw wrench.
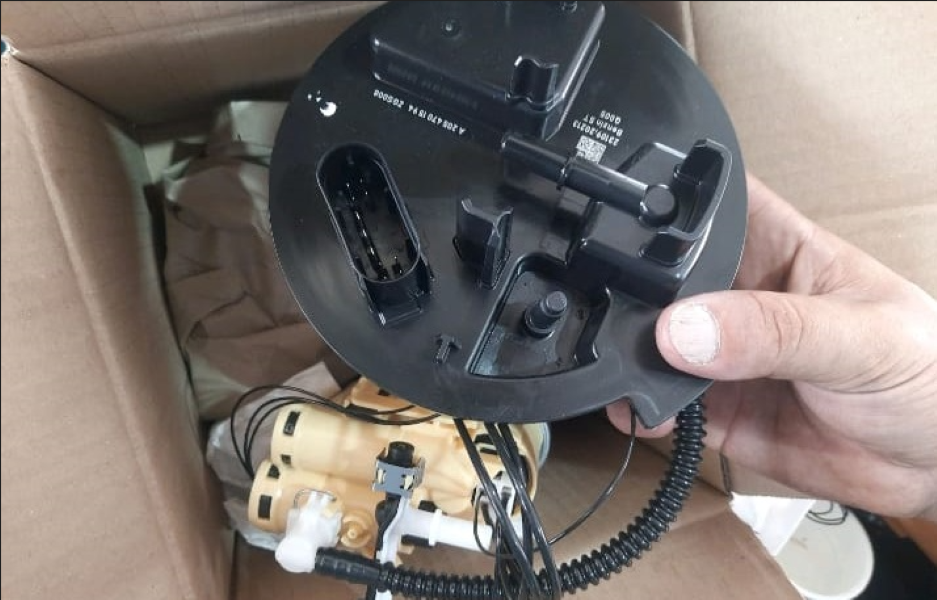
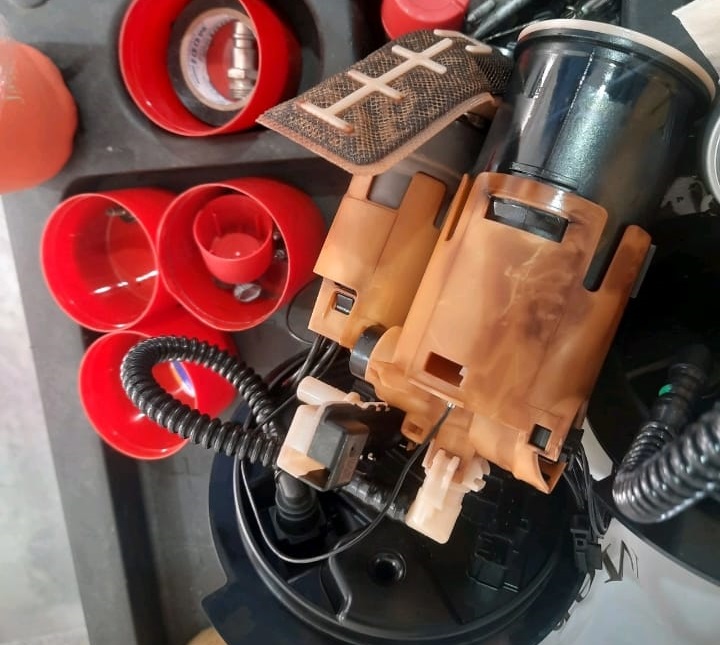
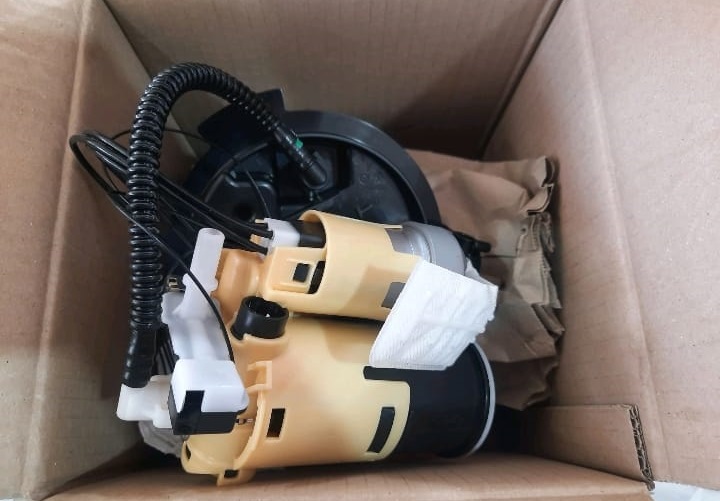
- 3. Lifted out the fuel pump transfer unit (M3) carefully to avoid fuel spillage.
Step 3 : Installation
- 1. Cleaned all sealing surfaces.
- 2. Installed a new OEM fuel pump and replaced the sealing ring.
- 3. Reconnected the drive line, fuel lines, and electrical connectors.
- 4. Reassembled the interior trim and reconnected the battery.
How to Replace a Fuel Pump ?
Changing a fuel pump in Mercedes can be overwhelming, especially since you’re working in the presence of a flammable liquid. But you can do it safely if you take your time and follow the instructions for your particular vehicle.
Step 1 : To deposit
- 1. Check the fuel level
- 2. If the fuel tank shows a filling level above 25%, empty the fuel tank.
- 3. Open the fuel flap and unscrew the tank cap.
- 4. Move the passenger seat forward as far as possible.
- 5. Remove the rear seat cushion.
- 6. Vacuum the fuel vapors from the cabin.
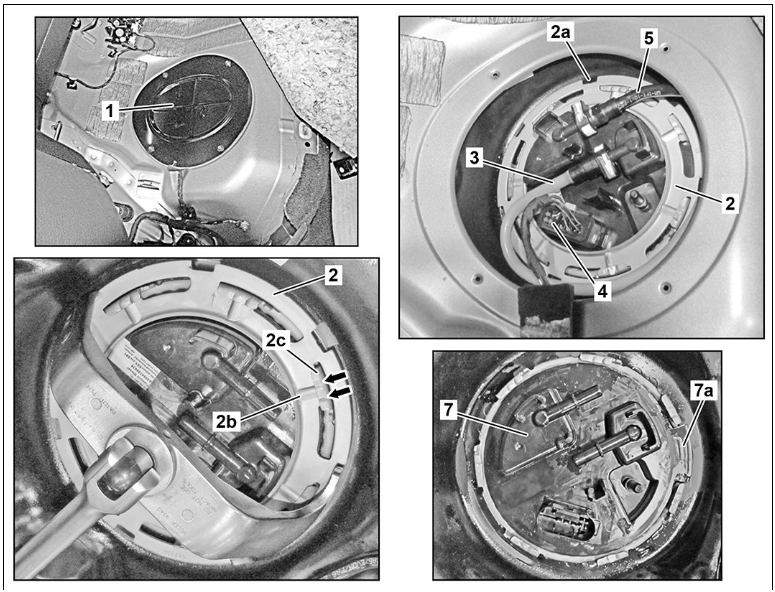
- 7. Remove the maintenance cover (1).
- 8. Unlock the electrical connector (4) and disconnect it.
- 9. Plug the fuel line (5) with an appropriate cap.
- 10. Plug the purge line (9) with an appropriate cap.
- 11. Cap off the connectors with appropriate plugs.
- 12. Insert the claw wrench into the notches (2a) on the sealing ring (2), turn the sealing ring (2) counterclockwise.
- 13. Identify the sealing ring (2) in relation to the fuel tank.
- 14. Remove the sealing ring (2).
- 15. Lift the transfer unit (7) slightly.
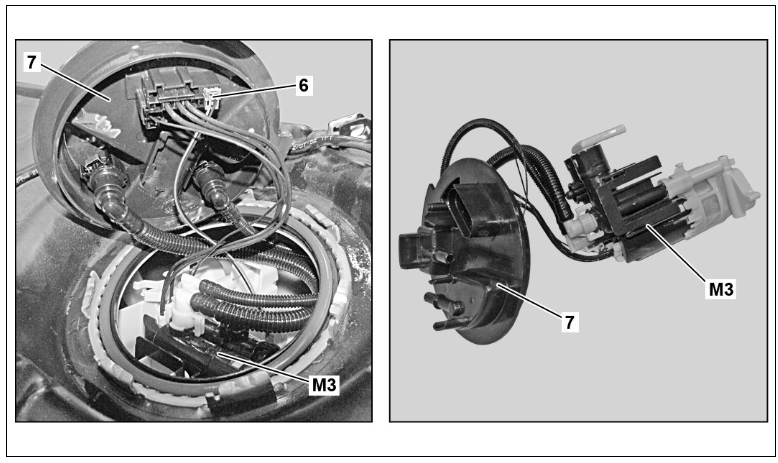
- 16. Unlock the electrical connector (6) and disconnect it.
- 17. Unlock and disconnect the electrical connector (11).
- 18. Remove the transfer unit (7) with the fuel pump (M3).
Step 2 : To Place
- 1. Clean the sealing surfaces on the fuel tank and on the transfer unit (7).
- 2. Replace the sealing ring.
- 3. Push the transfer unit (7) with the fuel pump (M3) into the stabilization pot.
- 4. Lift the transfer unit (7) slightly.
- 5. Connect the drive line (14).
Post-Repair Verification
After reassembly:
- – The engine was started it ran smoothly with no hesitation.
- – Fuel pressure readings returned to factory specifications.
- – A final XENTRY scan confirmed no residual fault codes.
Result: The no-start issue was fully resolved.
Case Study Summary
| Symptom | Root Cause | Repair Action | Result |
|---|---|---|---|
| Engine cranks but won’t start | Low fuel pressure / failed pump | Replaced fuel pump module | Engine started successfully |
This highlights how even with proper voltage present, a mechanically failed fuel pump can completely disable engine start-up.
Preventive Maintenance Tips
| System | Preventive Action | Benefit |
|---|---|---|
| Fuel System | Keep tank above ¼ full | Prevents overheating of pump motor |
| Electrical Connectors | Inspect and seal during service | Prevents corrosion and voltage drop |
| Filter Maintenance | Replace fuel filter every 60,000 km | Ensures proper flow and pump longevity |
| Fuel Quality | Use only high-grade fuel | Reduces risk of contamination and injector blockage |
Workshop Insight
This case reinforces two key workshop principles:
- 1. Never replace components without confirming system function (voltage, pressure, communication).
- 2. Always validate mechanical and electrical operation using proper Mercedes diagnostic tools like XENTRY or PicoScope.
Related Diagnostic Resource
If you’re facing similar starting problems, explore our full troubleshooting hub:
Mercedes No Start Issues: Causes, Fixes & Case Studies : a complete guide covering electrical, fuel, and ECU-related no-start scenarios across multiple Mercedes models.
FAQs
1. Why did the Mercedes fuel pump fail even with proper voltage?
The internal motor failed mechanically voltage alone doesn’t guarantee operation if the pump’s internal components are seized or worn.
2. How can I check fuel pressure in my Mercedes?
Use diagnostic tools like XENTRY to view live fuel rail pressure or attach a mechanical gauge to the rail (for models with test ports).
3. How often should the Mercedes fuel pump be replaced?
There’s no fixed interval, but after 100,000–150,000 km, it’s wise to inspect pump output and pressure during maintenance.
— Salim, Mercedes Expert
Independent specialist in Mercedes-Benz diagnostics, CAN Bus analysis, troubleshooting case studies, and EV systems.